Discover how to collect all the collectibles in the fifth and largest chapter of The Last Of Us remake, which begins with Joel and Ellie crashing into a pole. In the Pittsburgh chapter, you need to find 17 Artifacts, 3 Firefly Pendants, 3 Comics, 3 Workbenches, 1 Workbench tool, 4 Training Manuals, 4 Shiv Doors, 1 Safe, 10 Option Conversations and 4 Ellie Jokes (counted as dialogues in the menu). Progress can be tracked through the chapter selection menu.
Alone and Forsaken
Artifact #1: Siphon Hose
Automatically appears in your inventory at the beginning of the chapter.
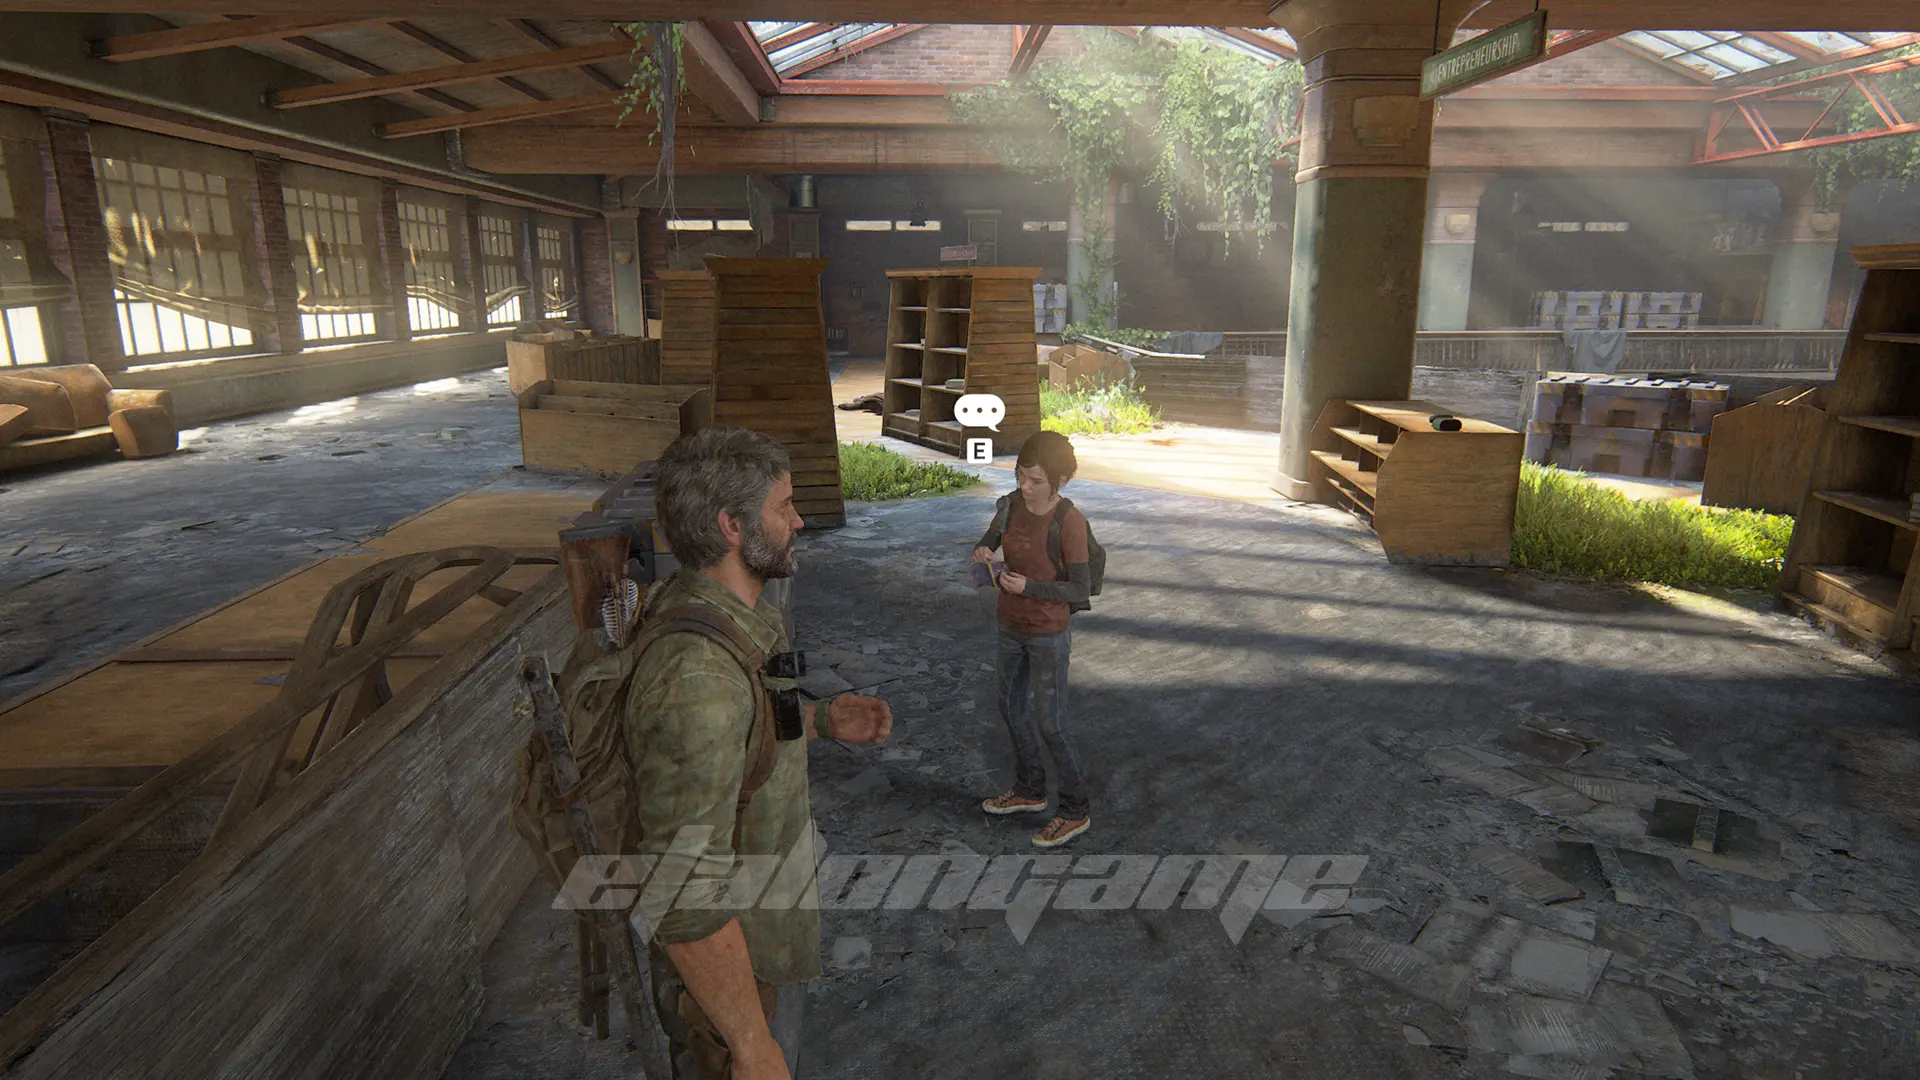
Option Conversation #1
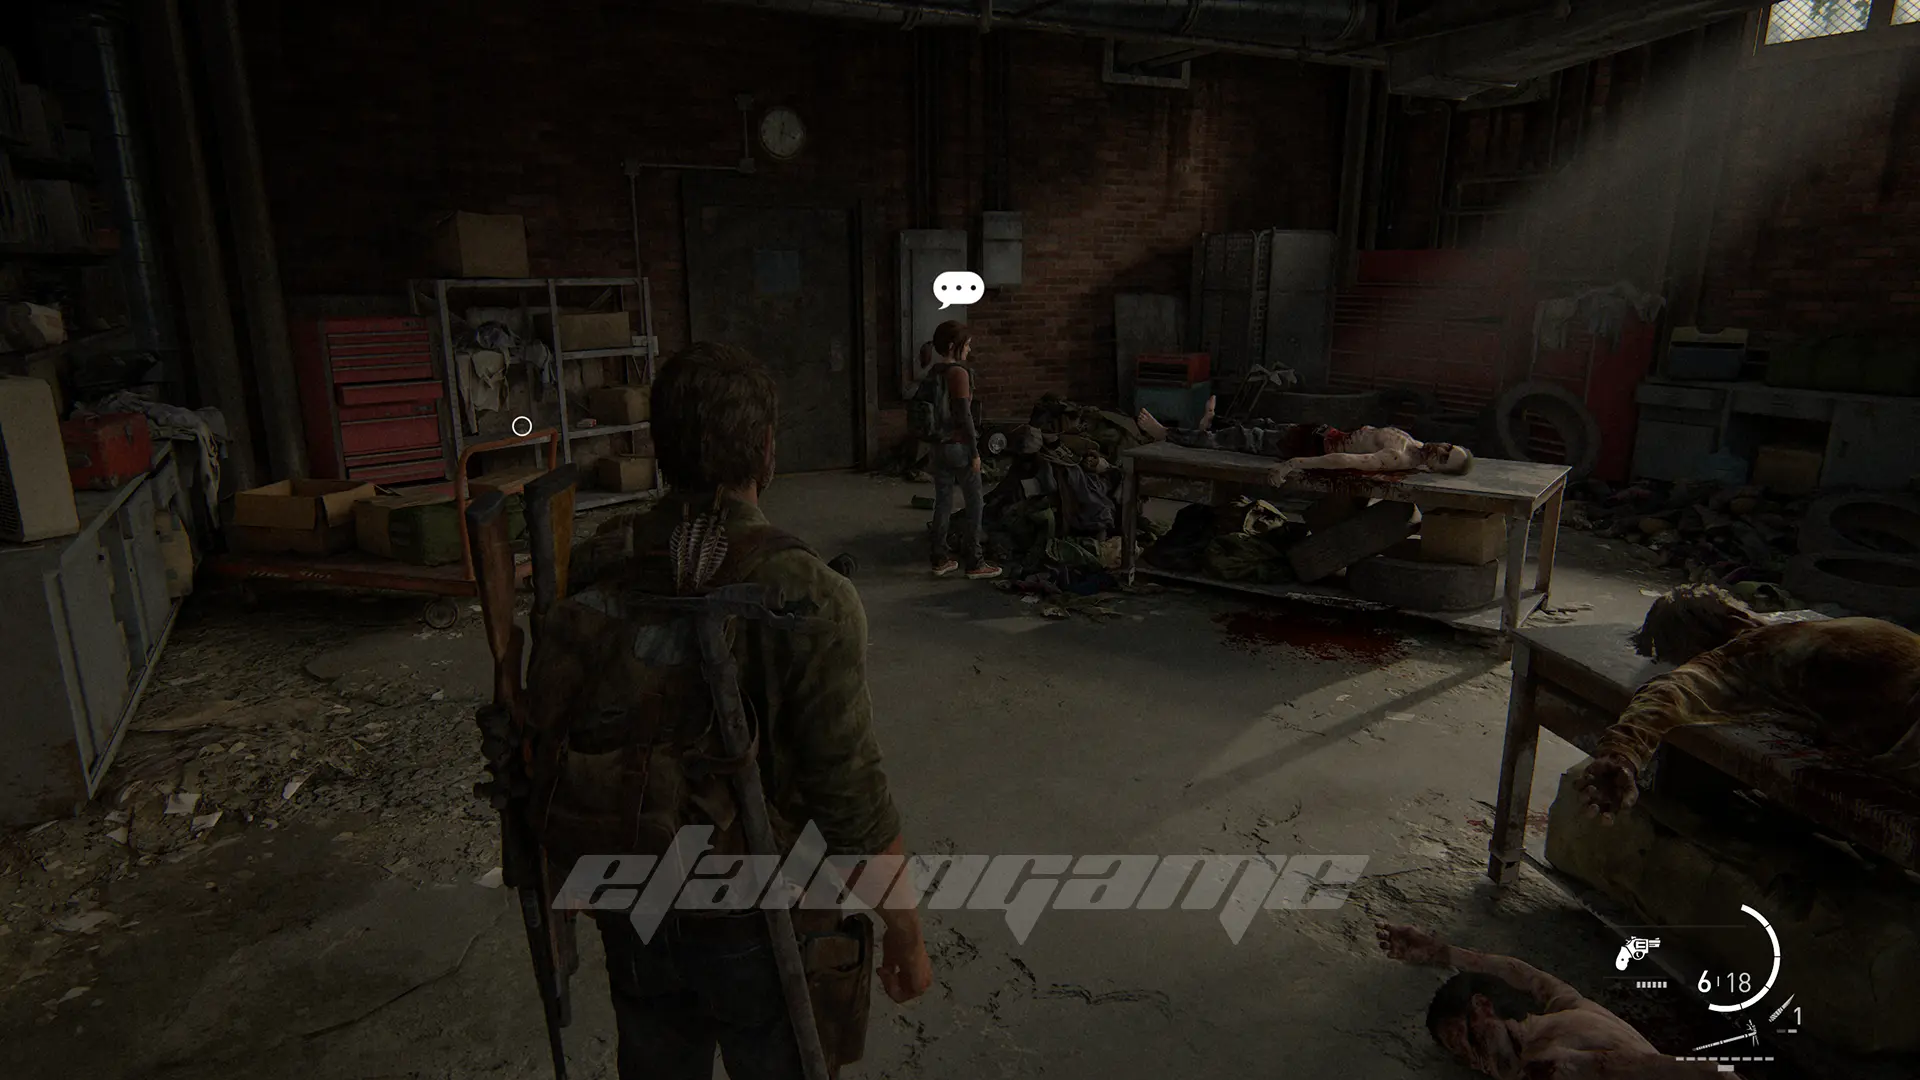
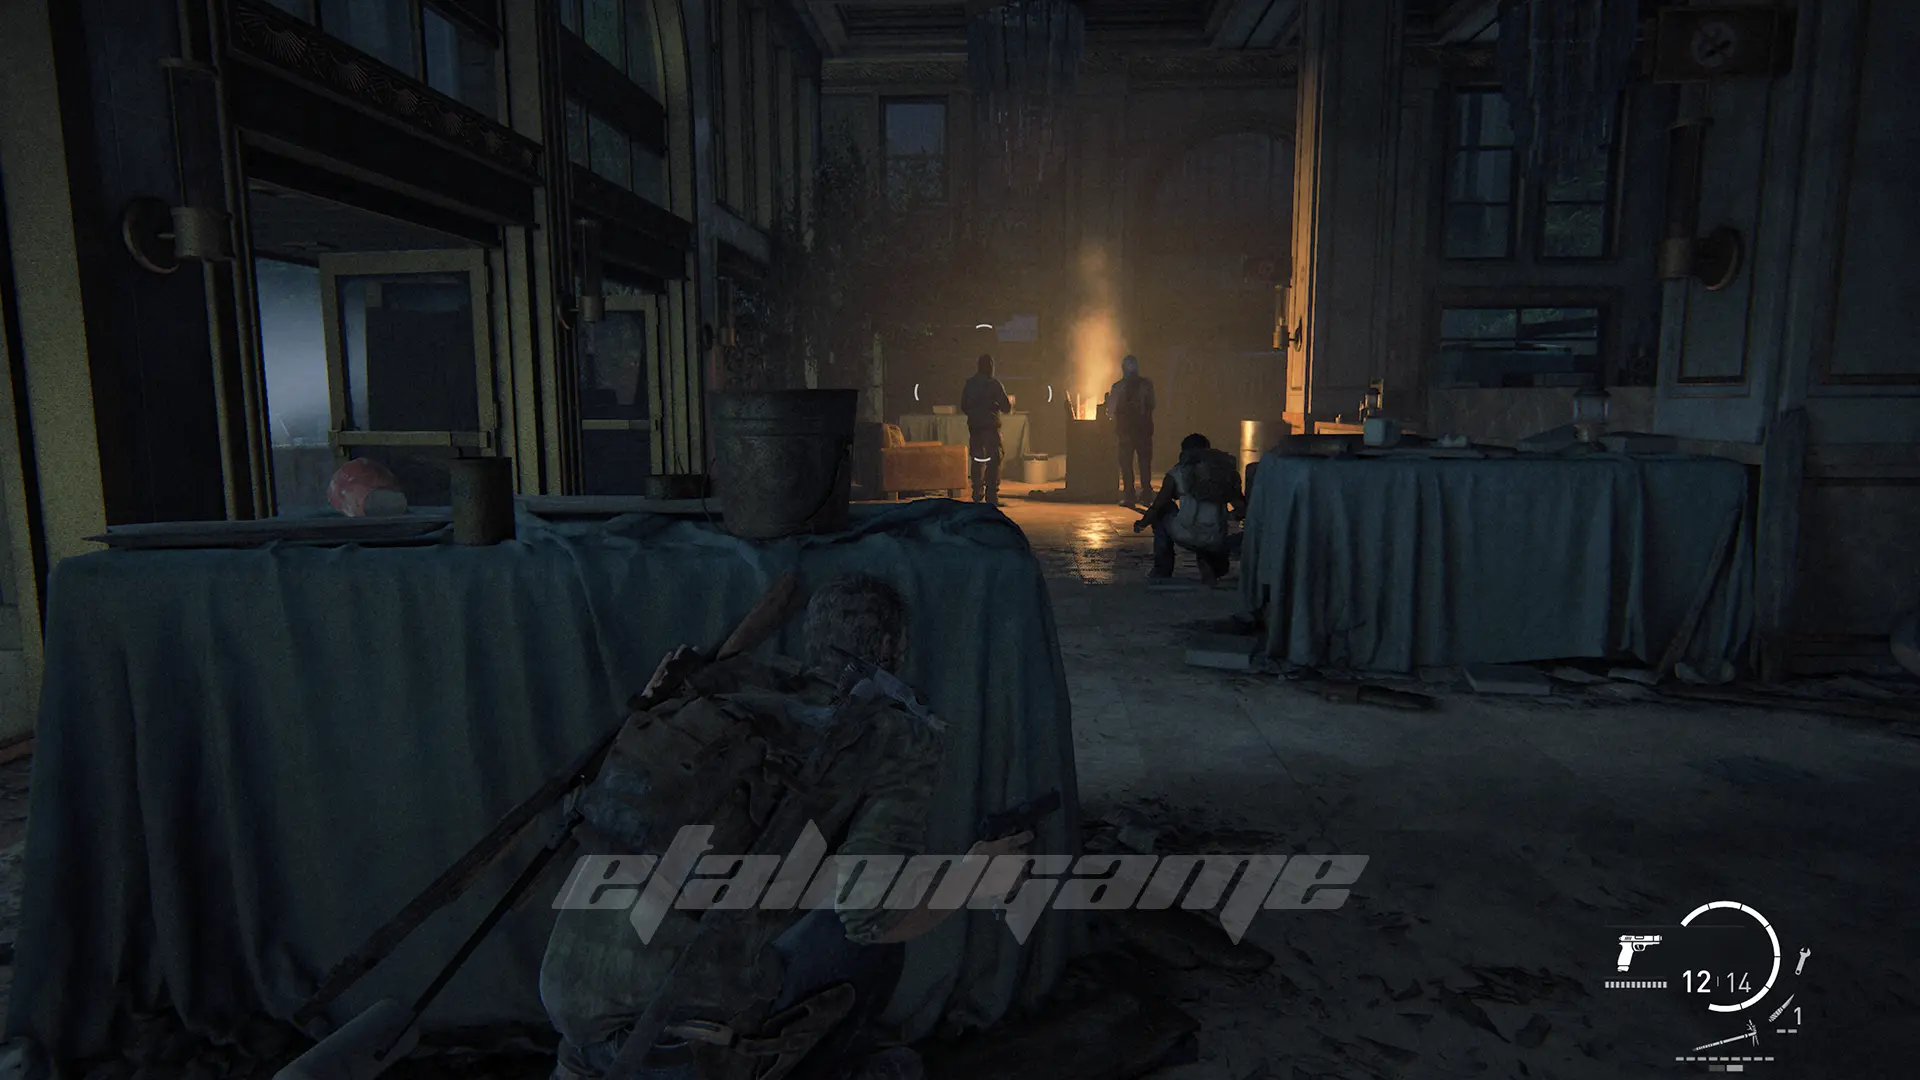
After dealing with the Hunters, Joel will lift the door to the garage to move on. Inside, talk to Ellie.
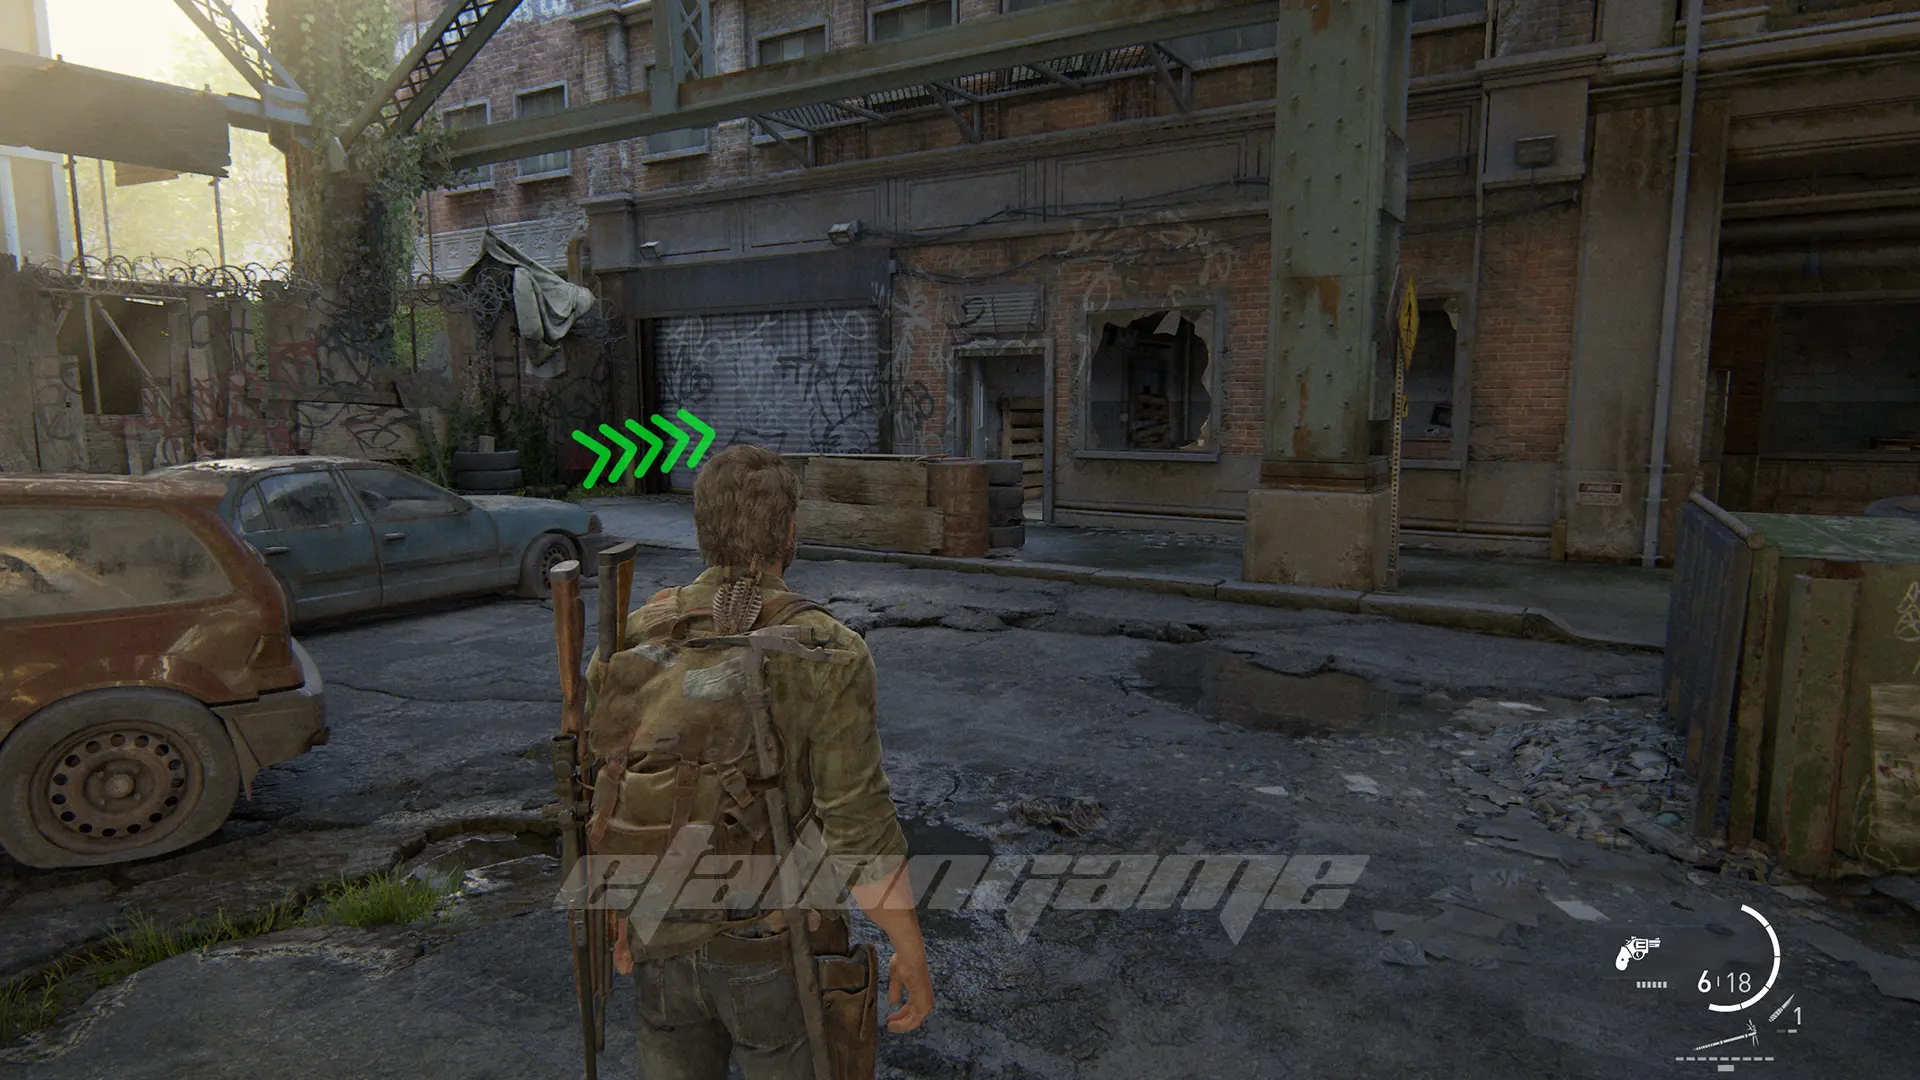
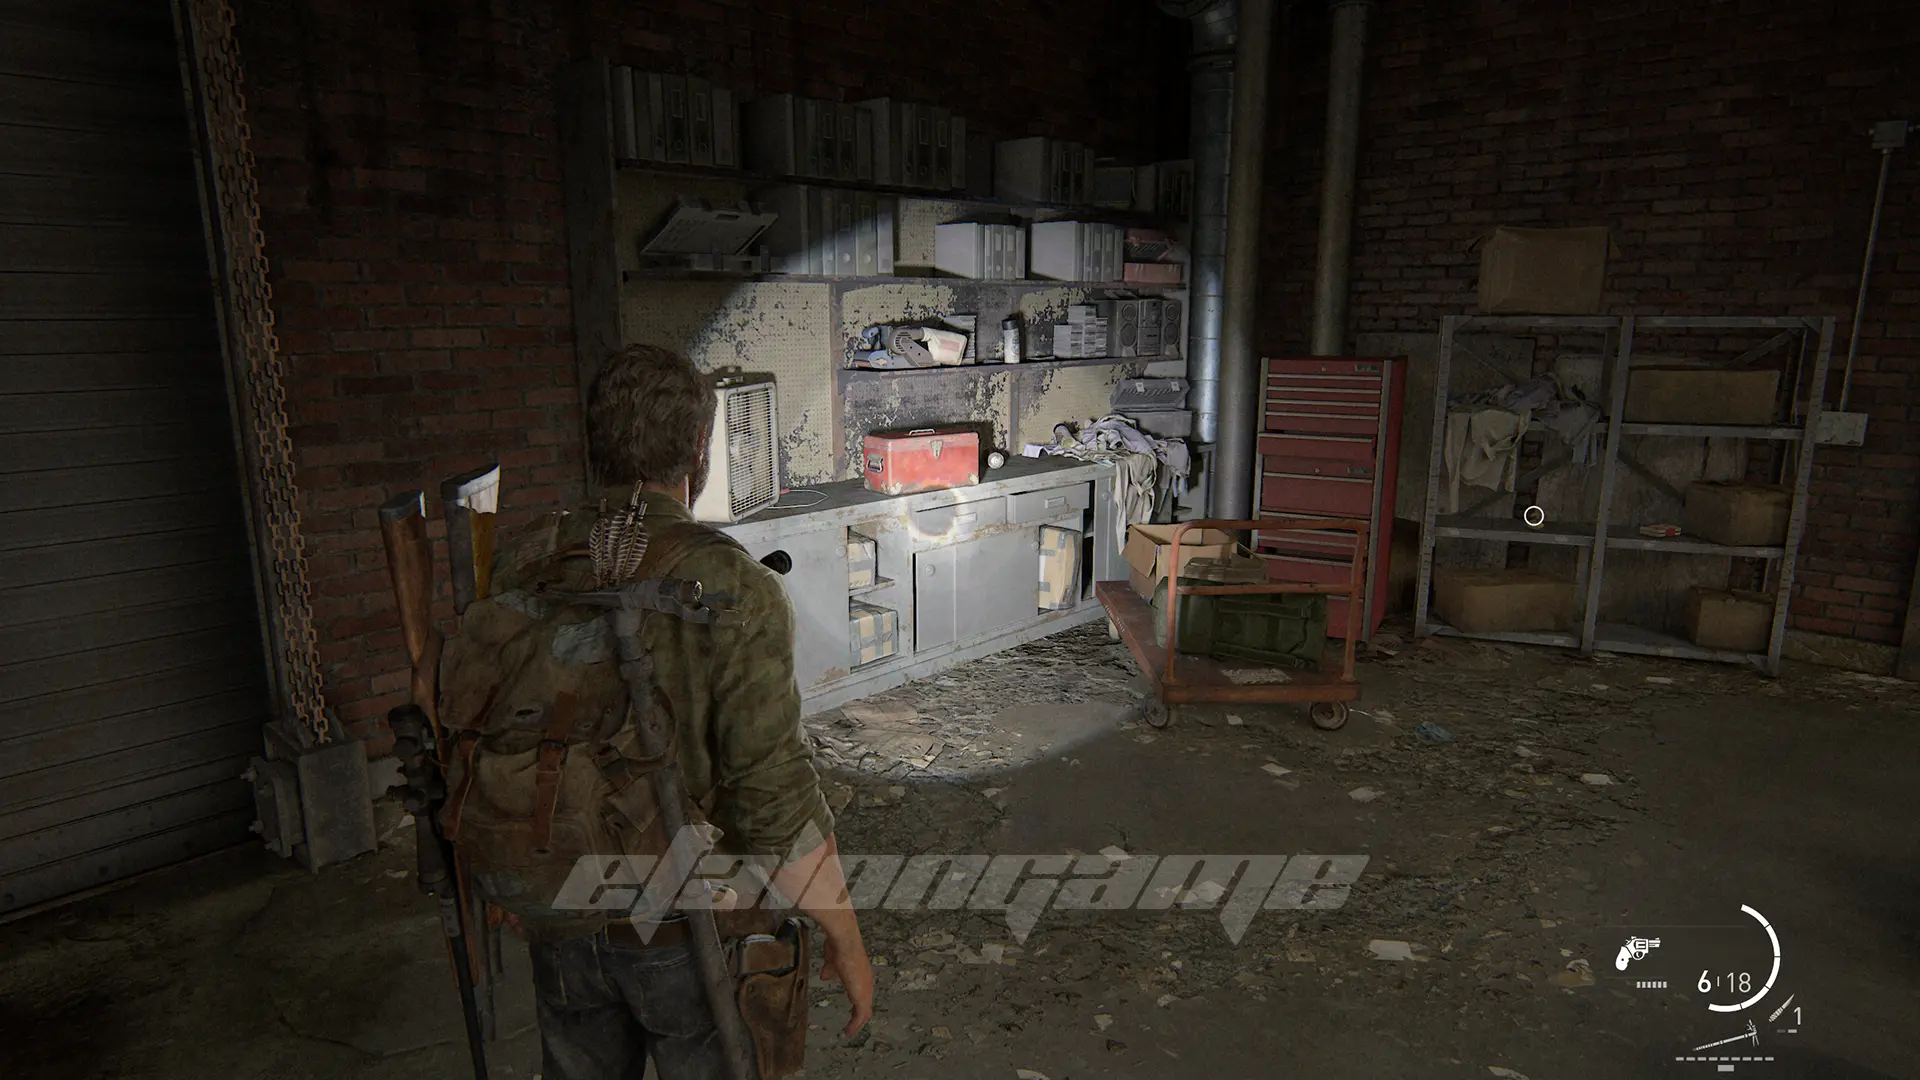
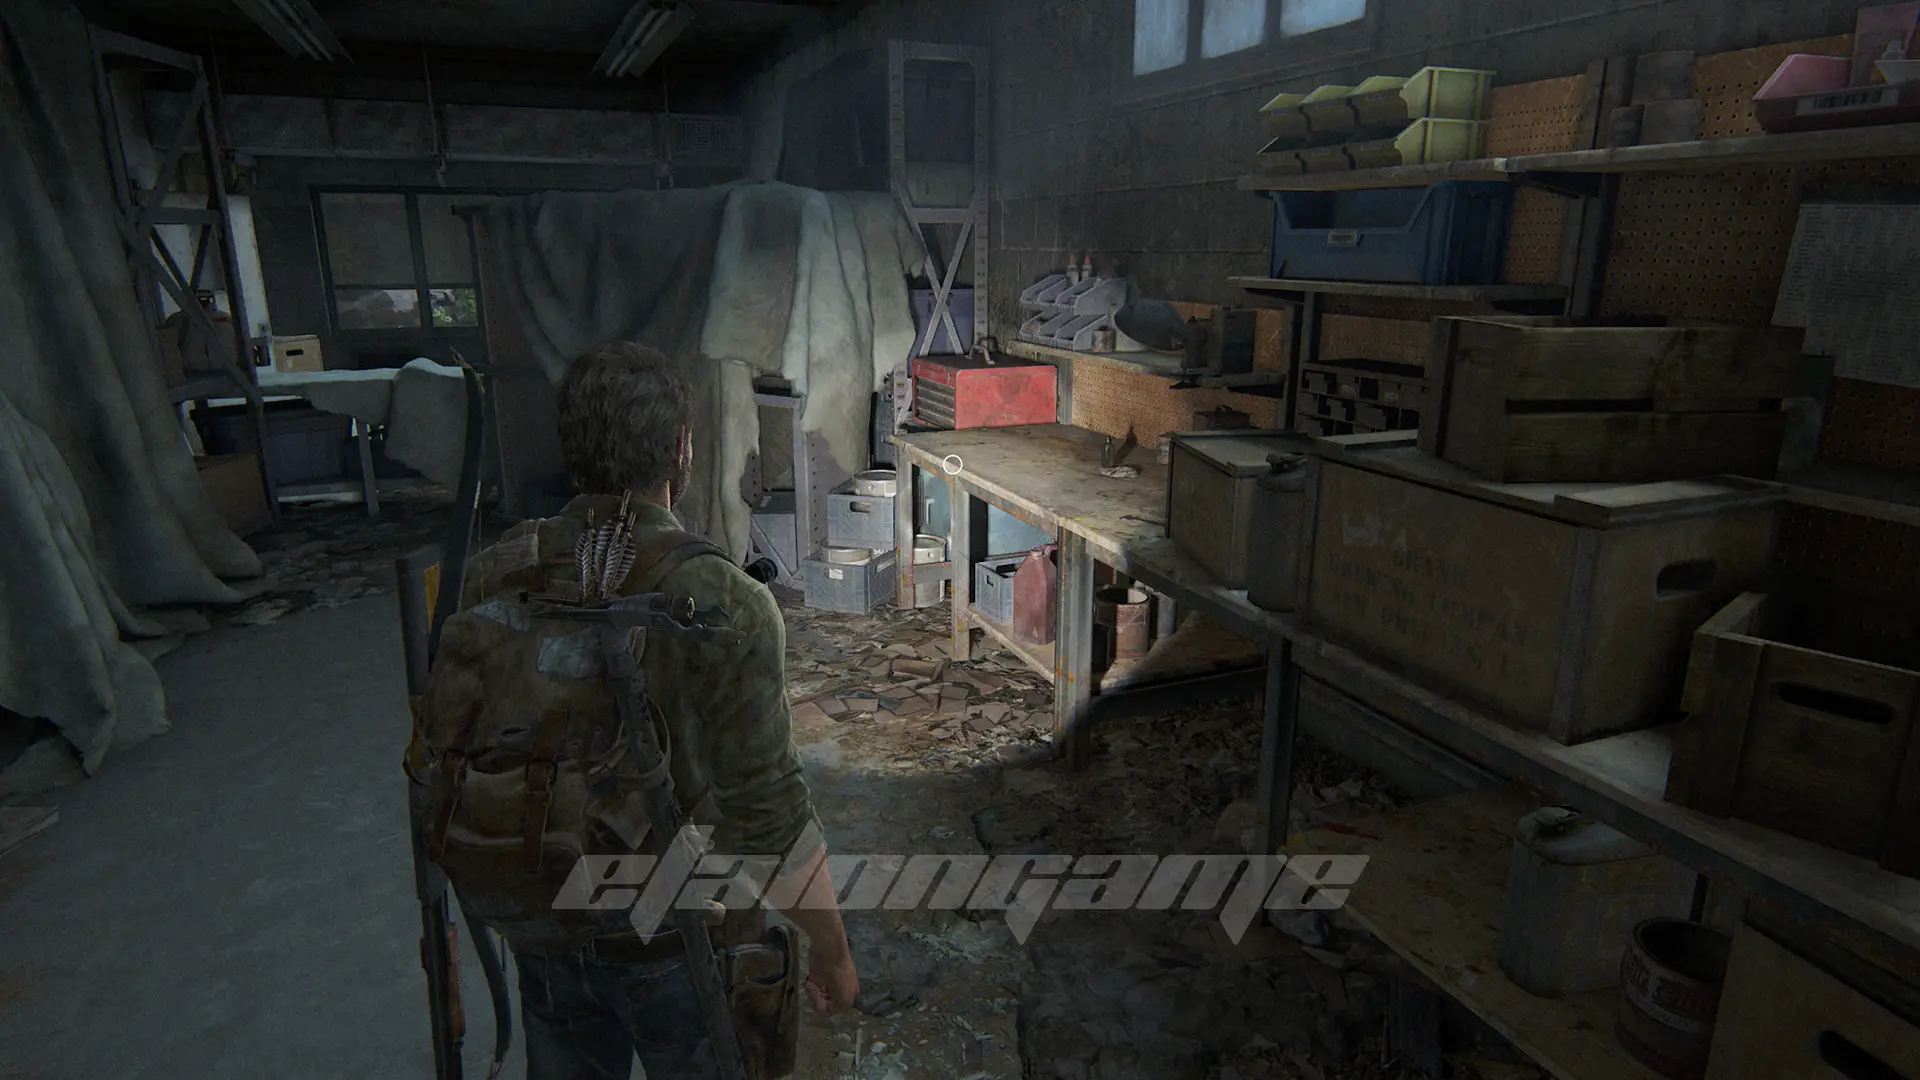
Workbench Tools, Level 2
On the rack next to you, in the same garage.
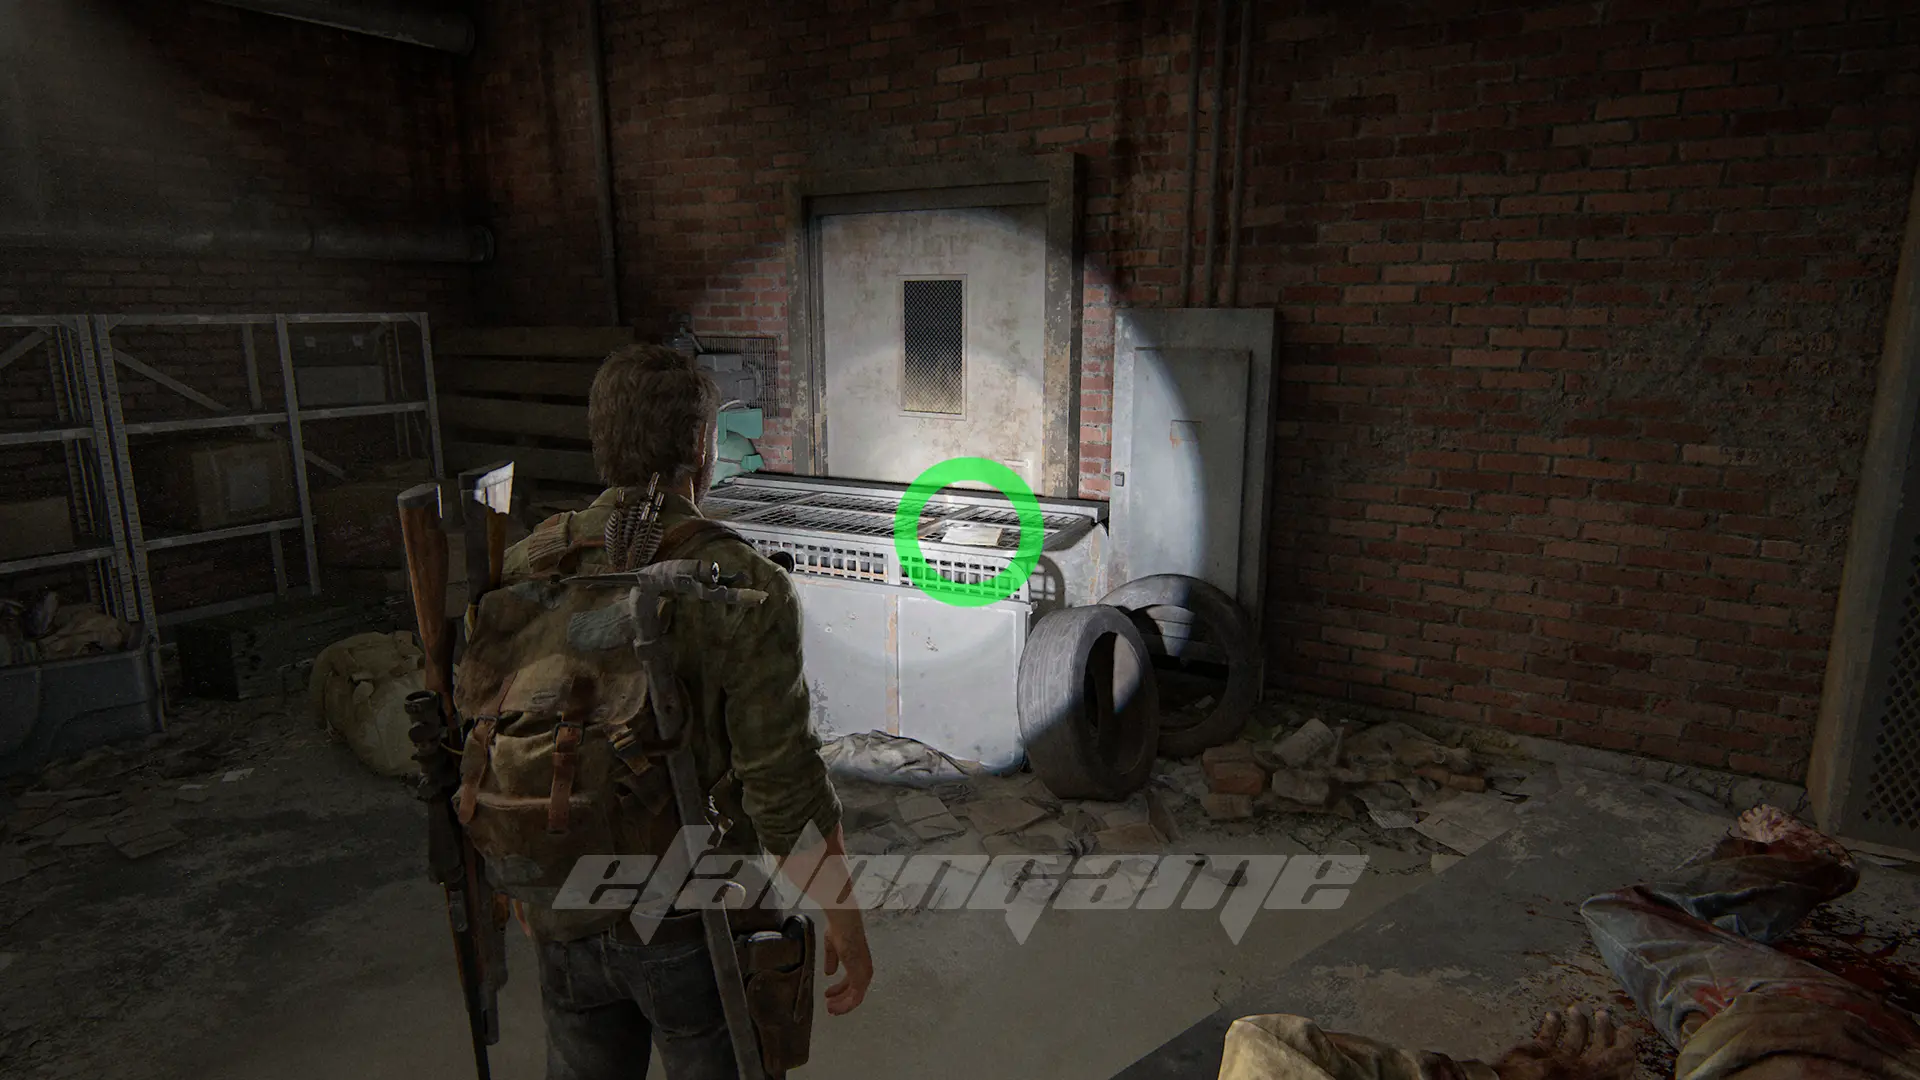
Artifact #2: Tourists Manifest
In the same garage, a note lies on a mesh metal box.
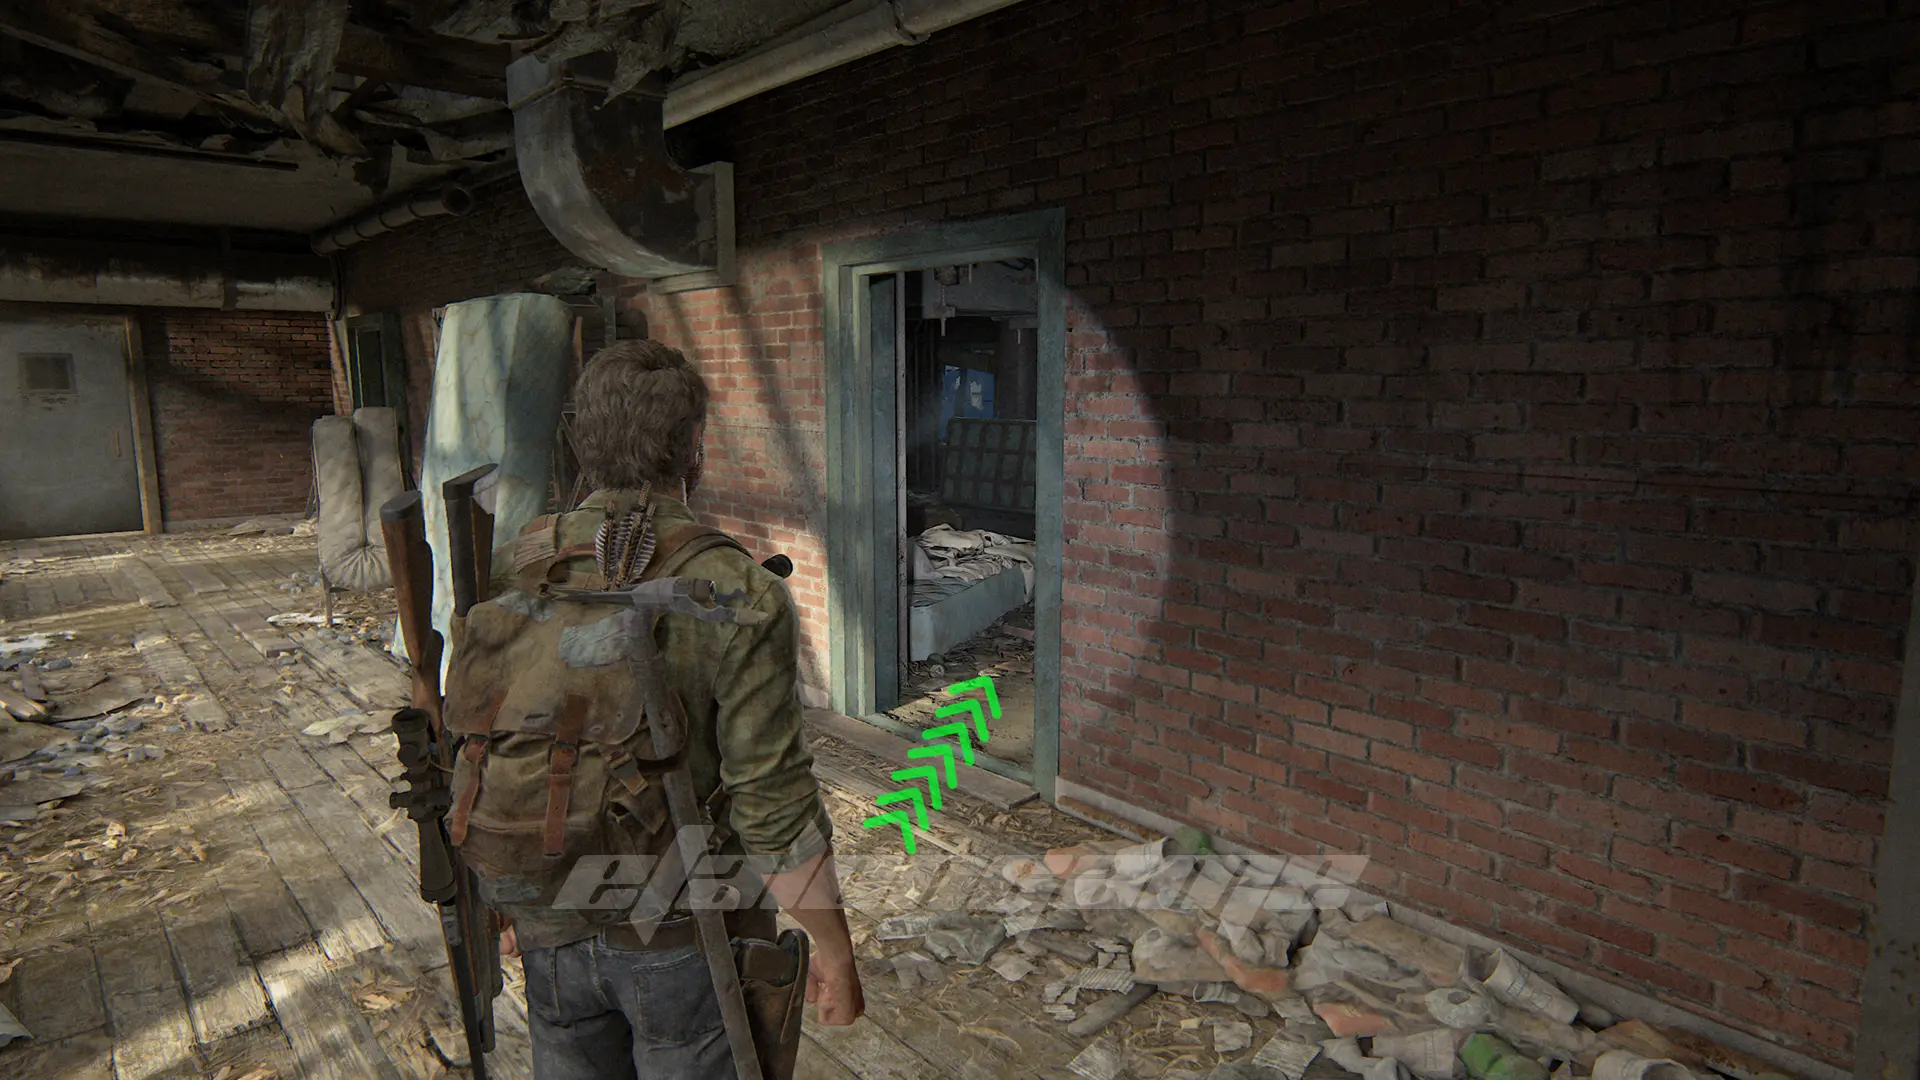
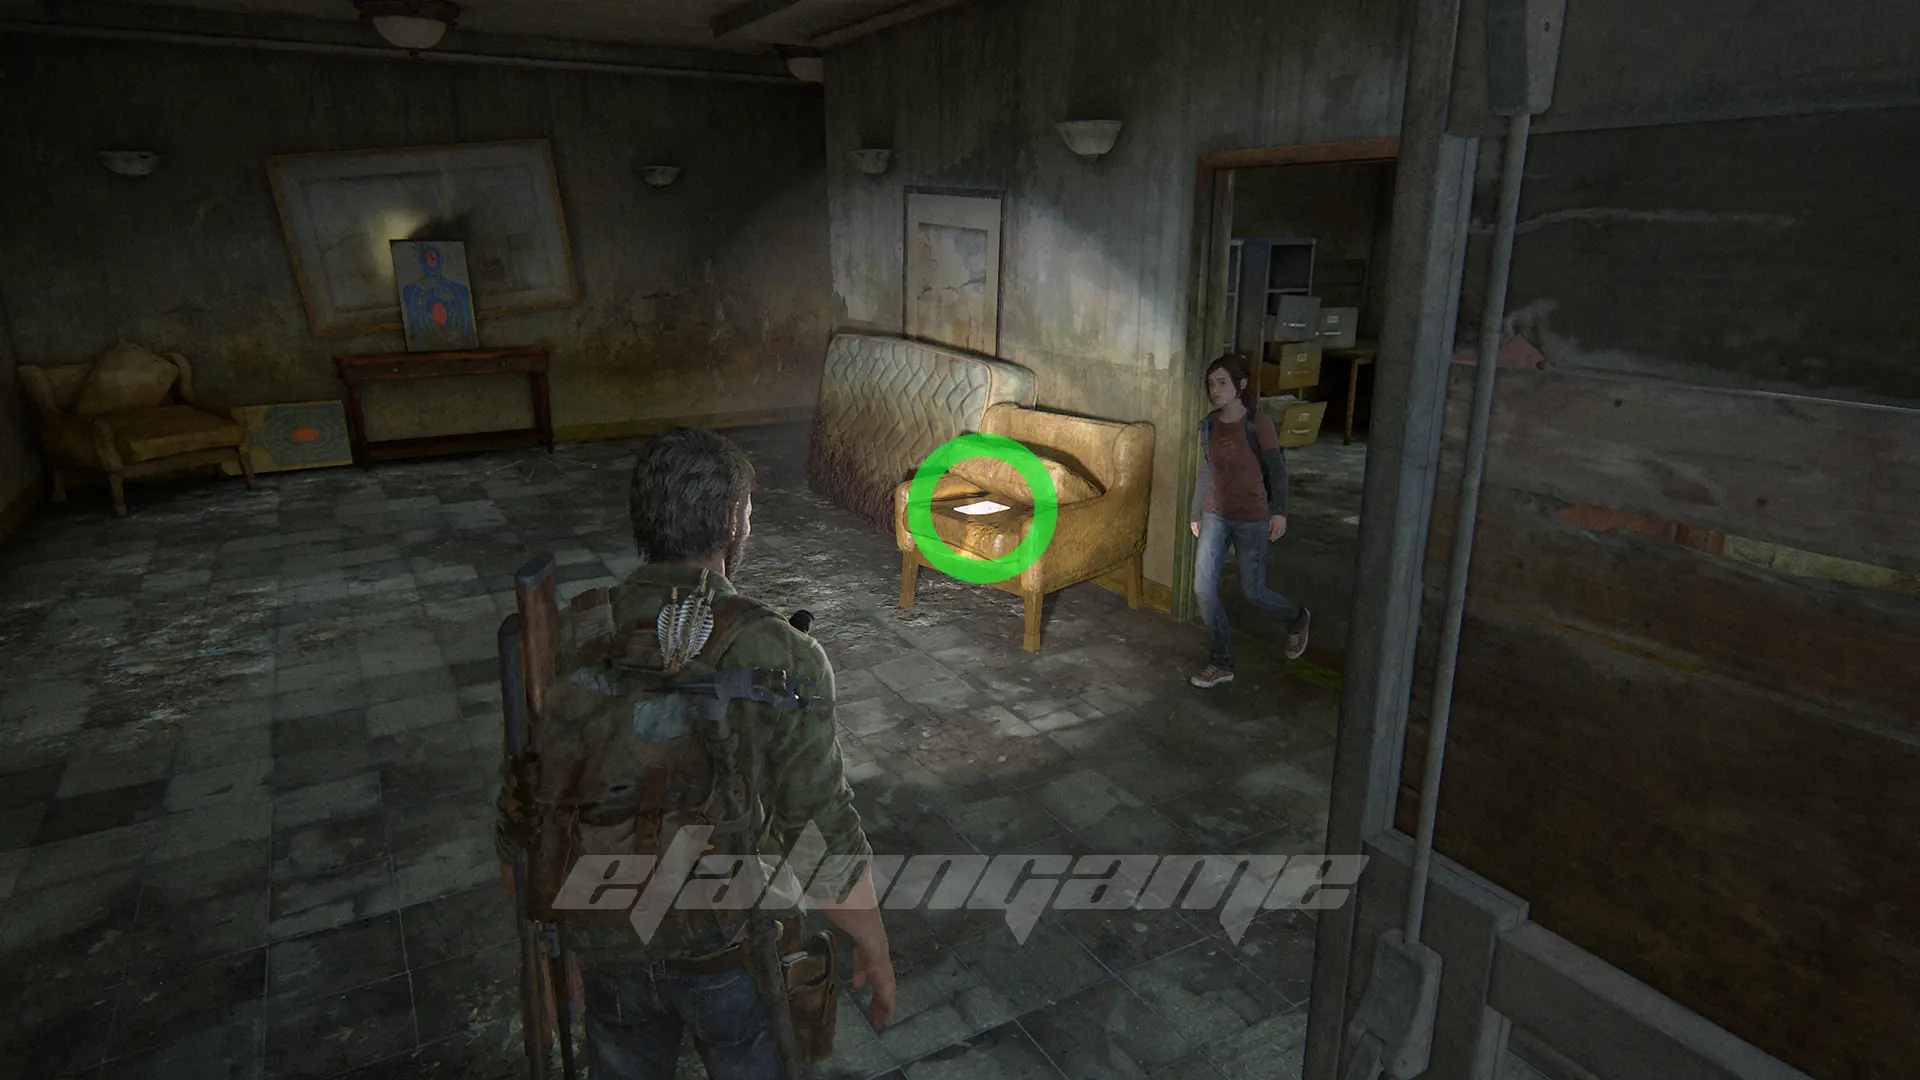
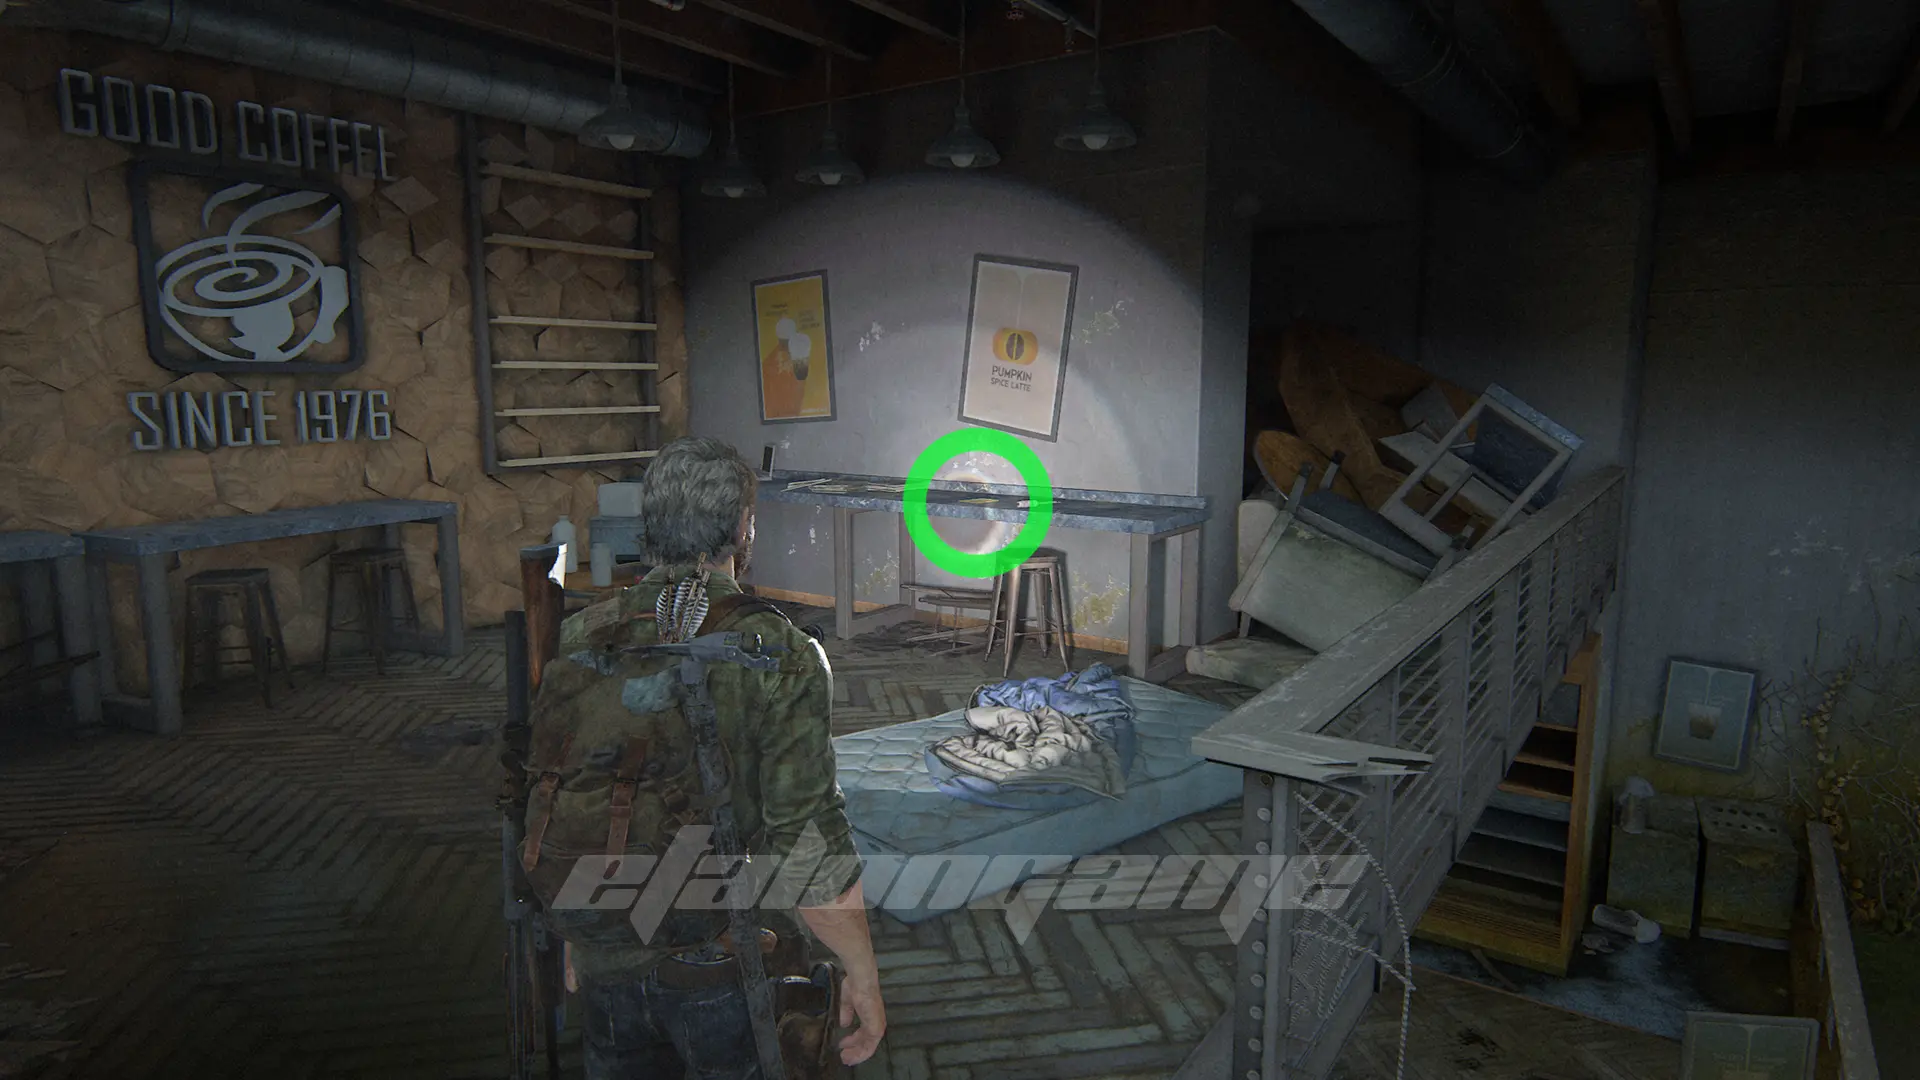
Training Manual #1: Health – Splinting
Go upstairs and go into the room on the right to pick up this study guide from the old mattress. It will increase the effectiveness of your first aid kits by 33%.
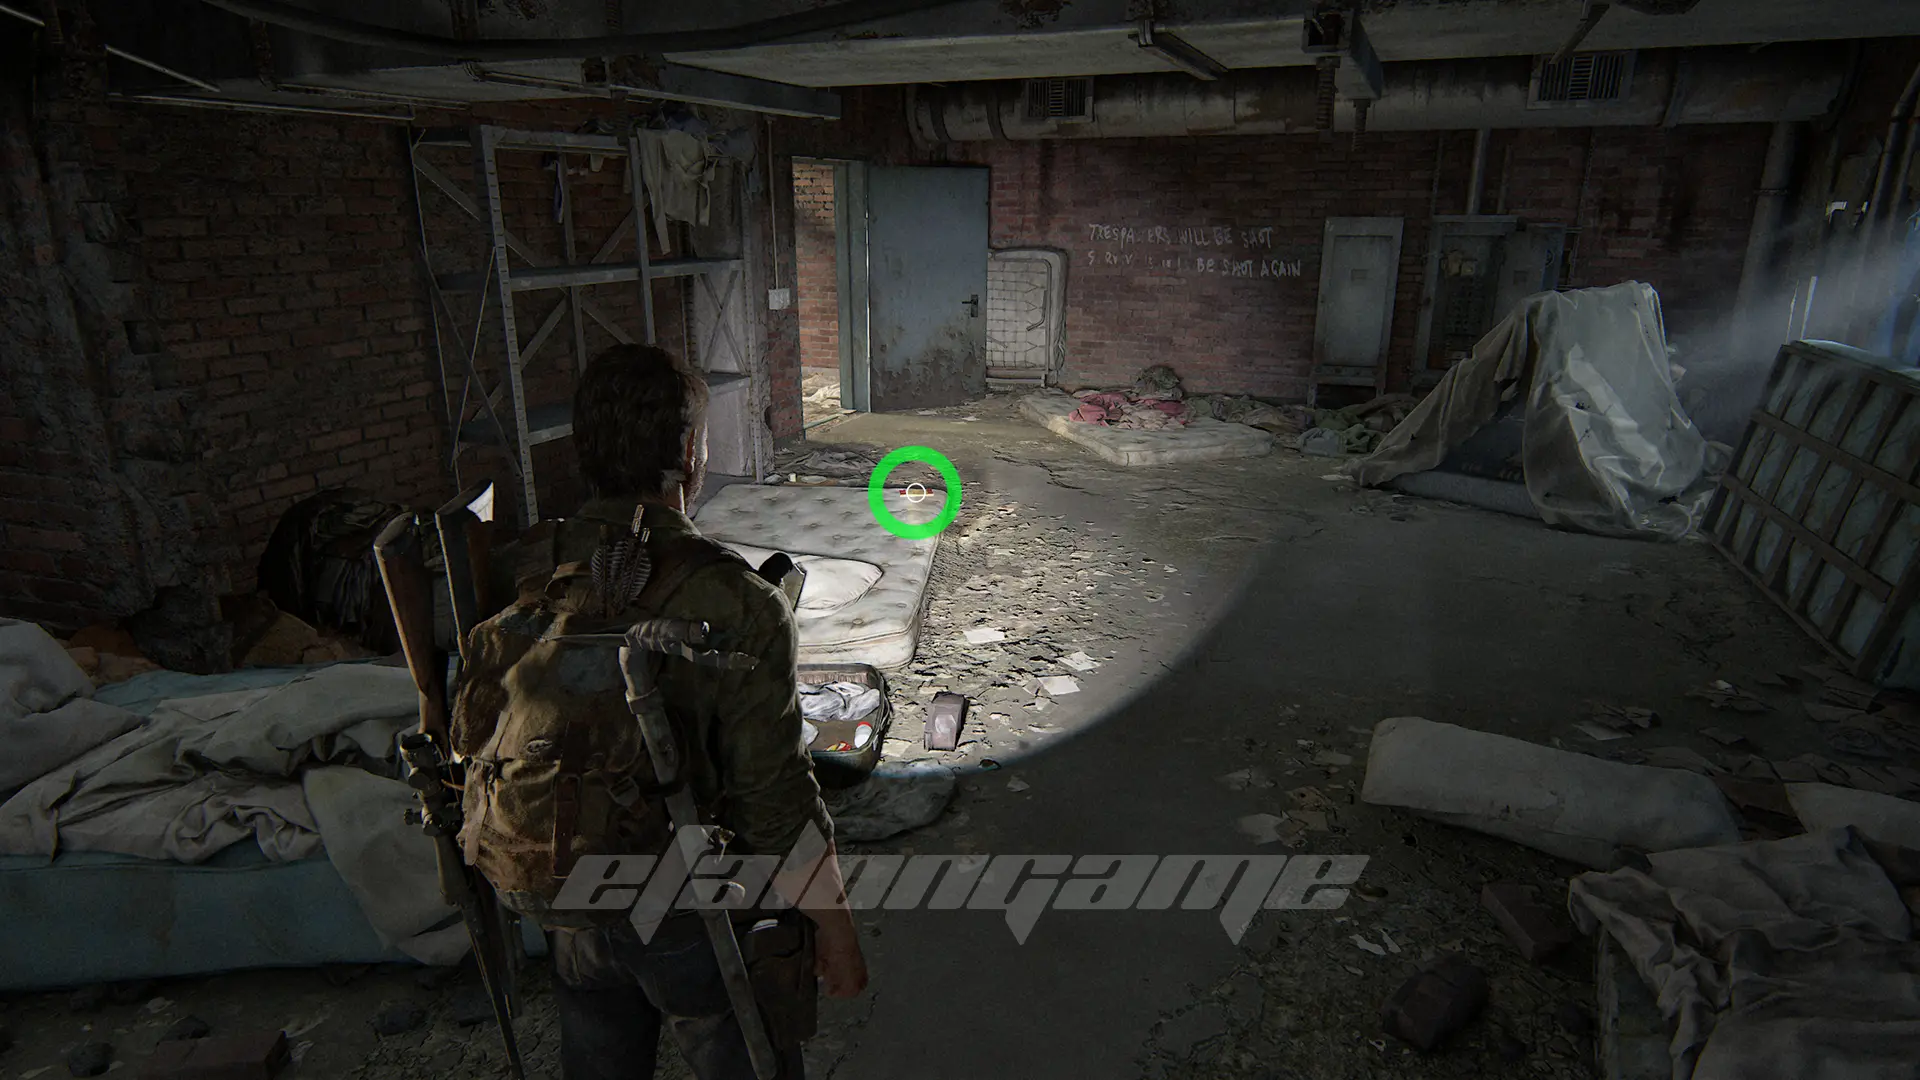
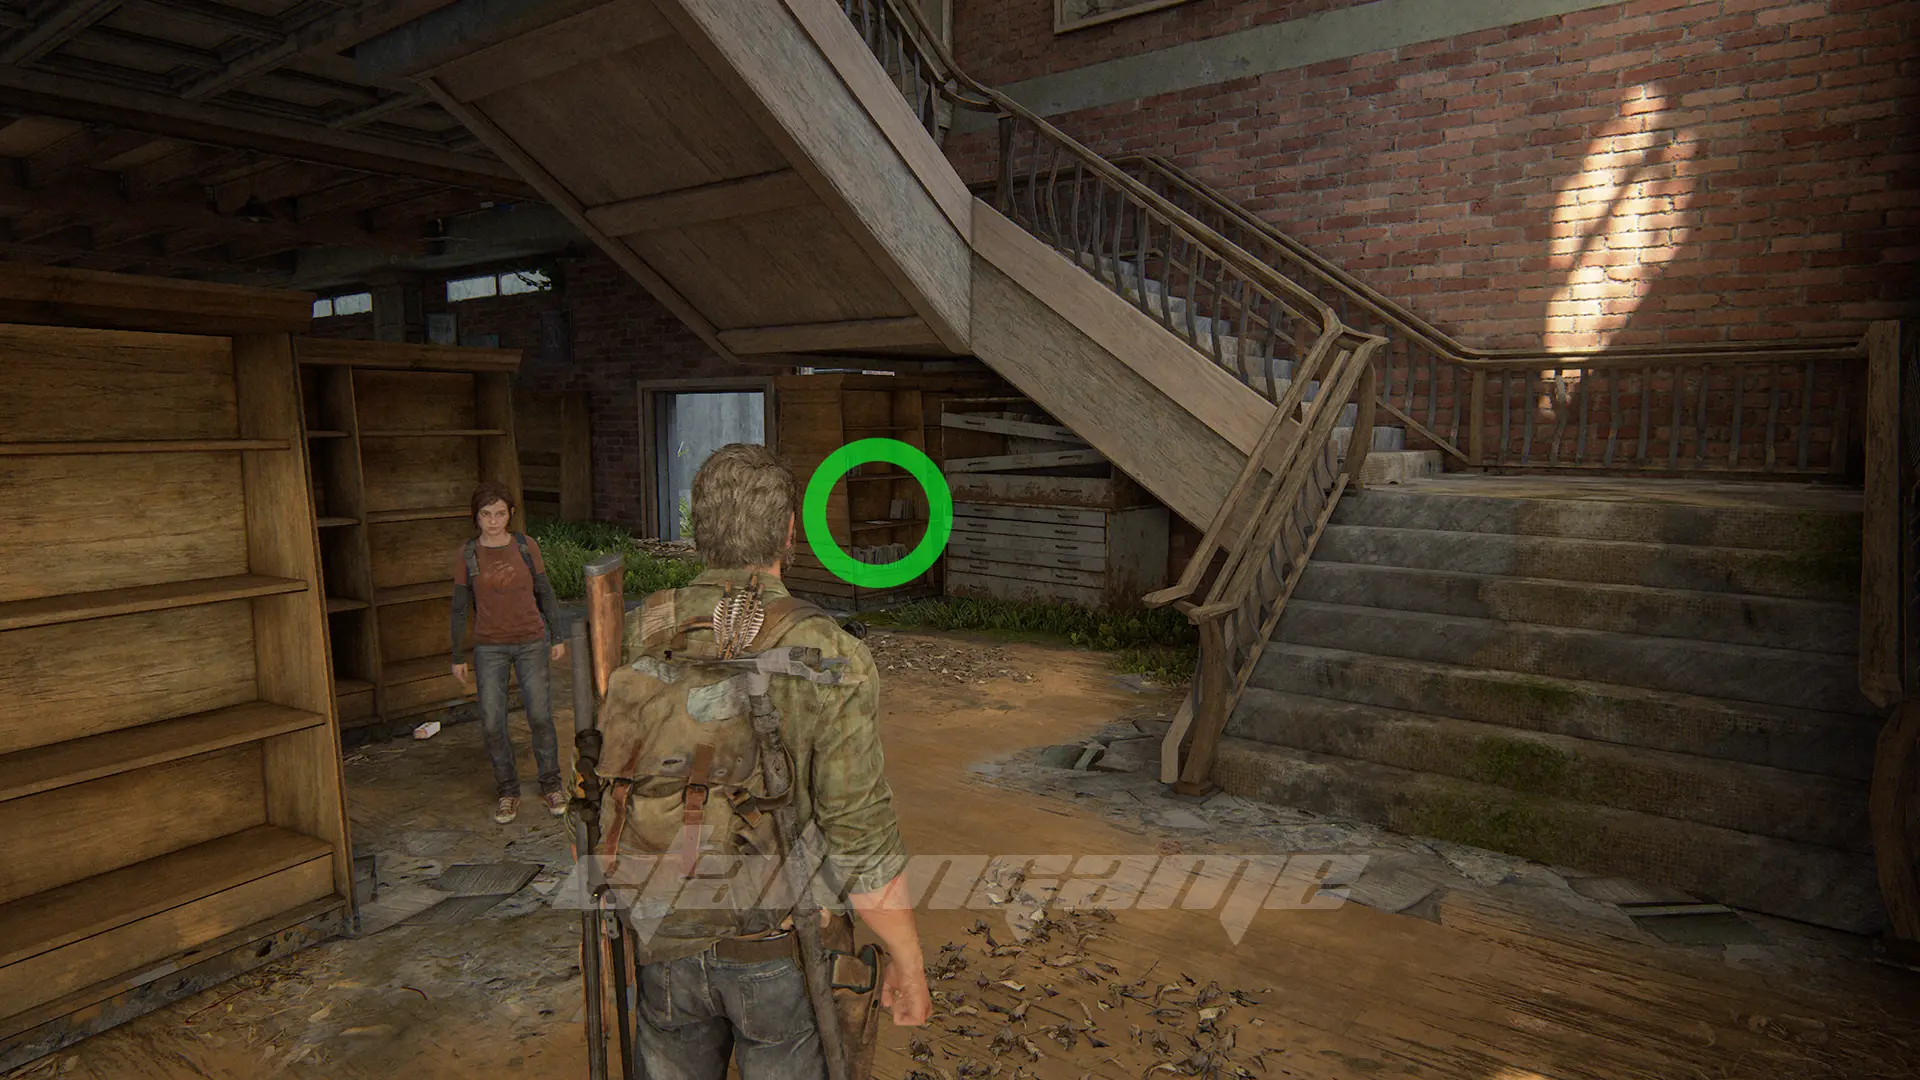
Artifact #3: Ambush Map
Go into the room at the end of the hallway to pick up this map from the wall.
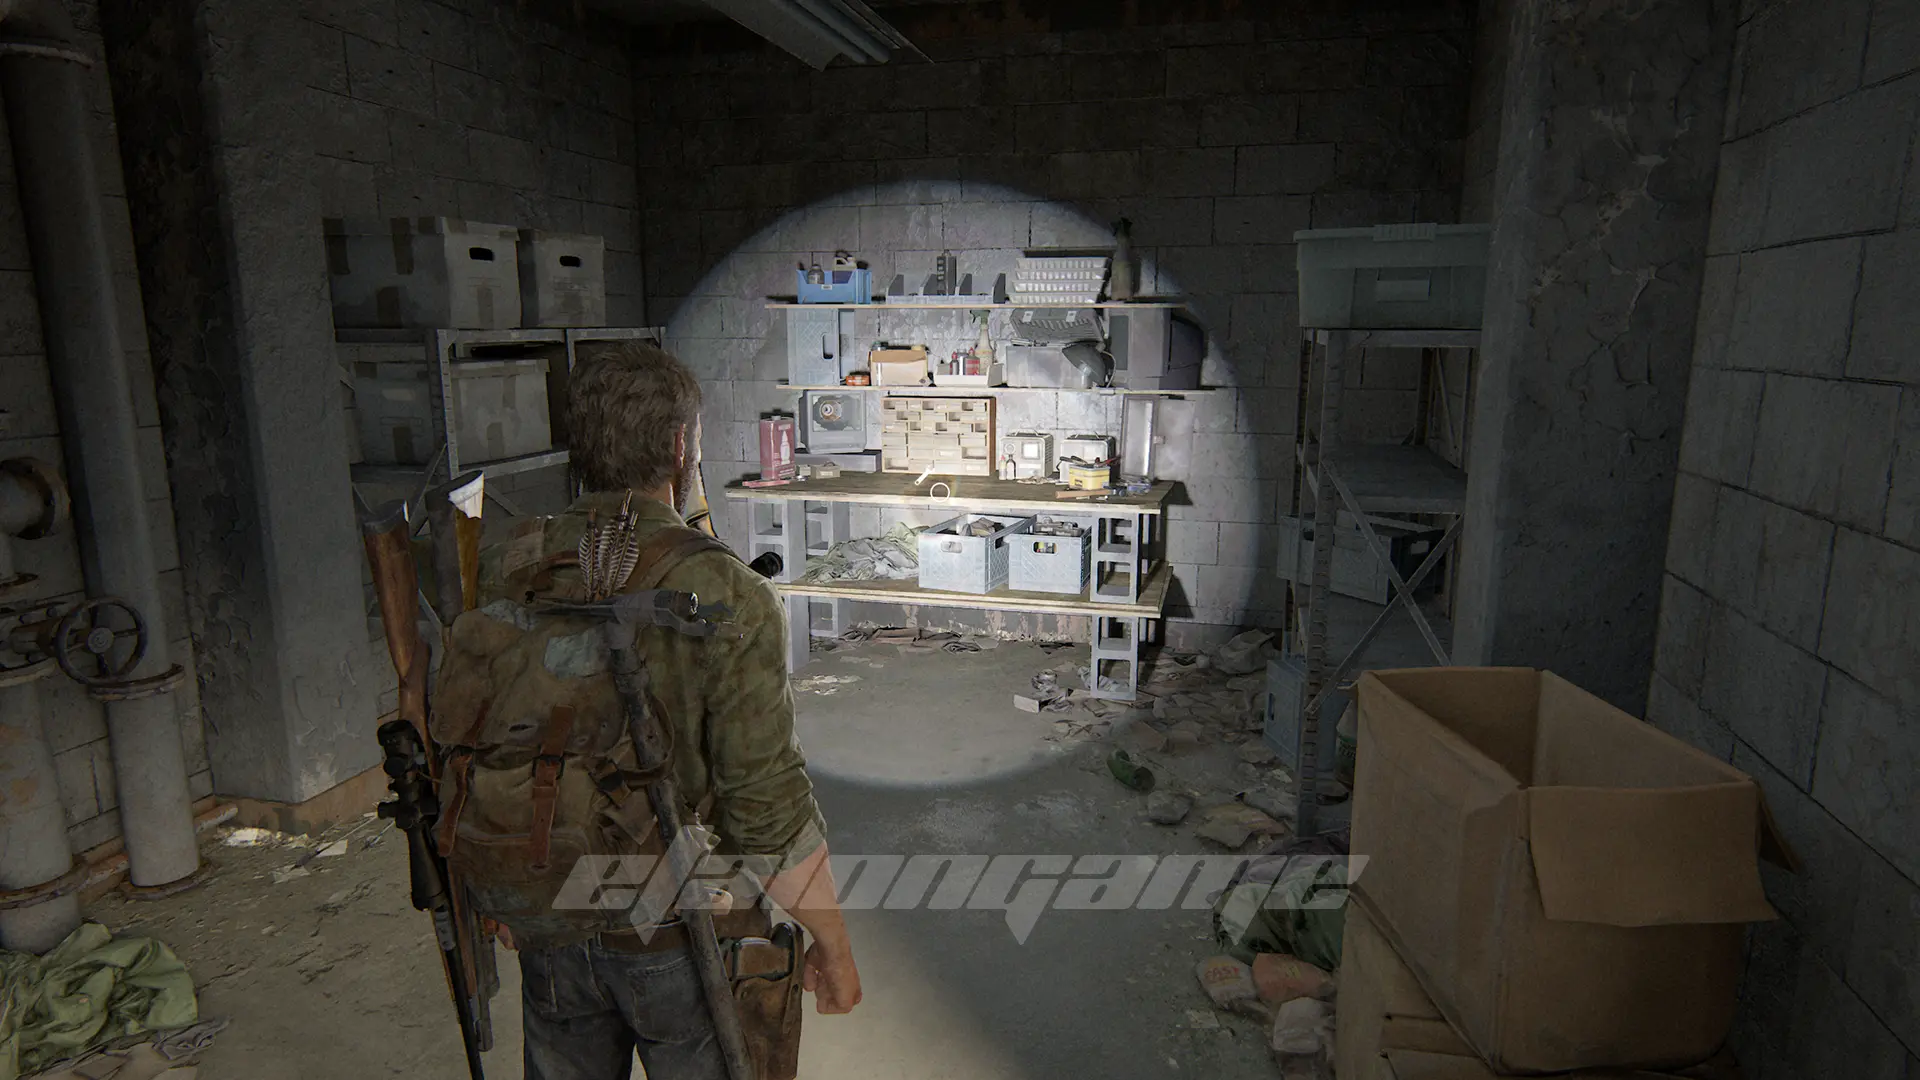
Workbench #1
In the same room as the map. Remember to interact with it to make it count.
Comics #1: Termination Shock
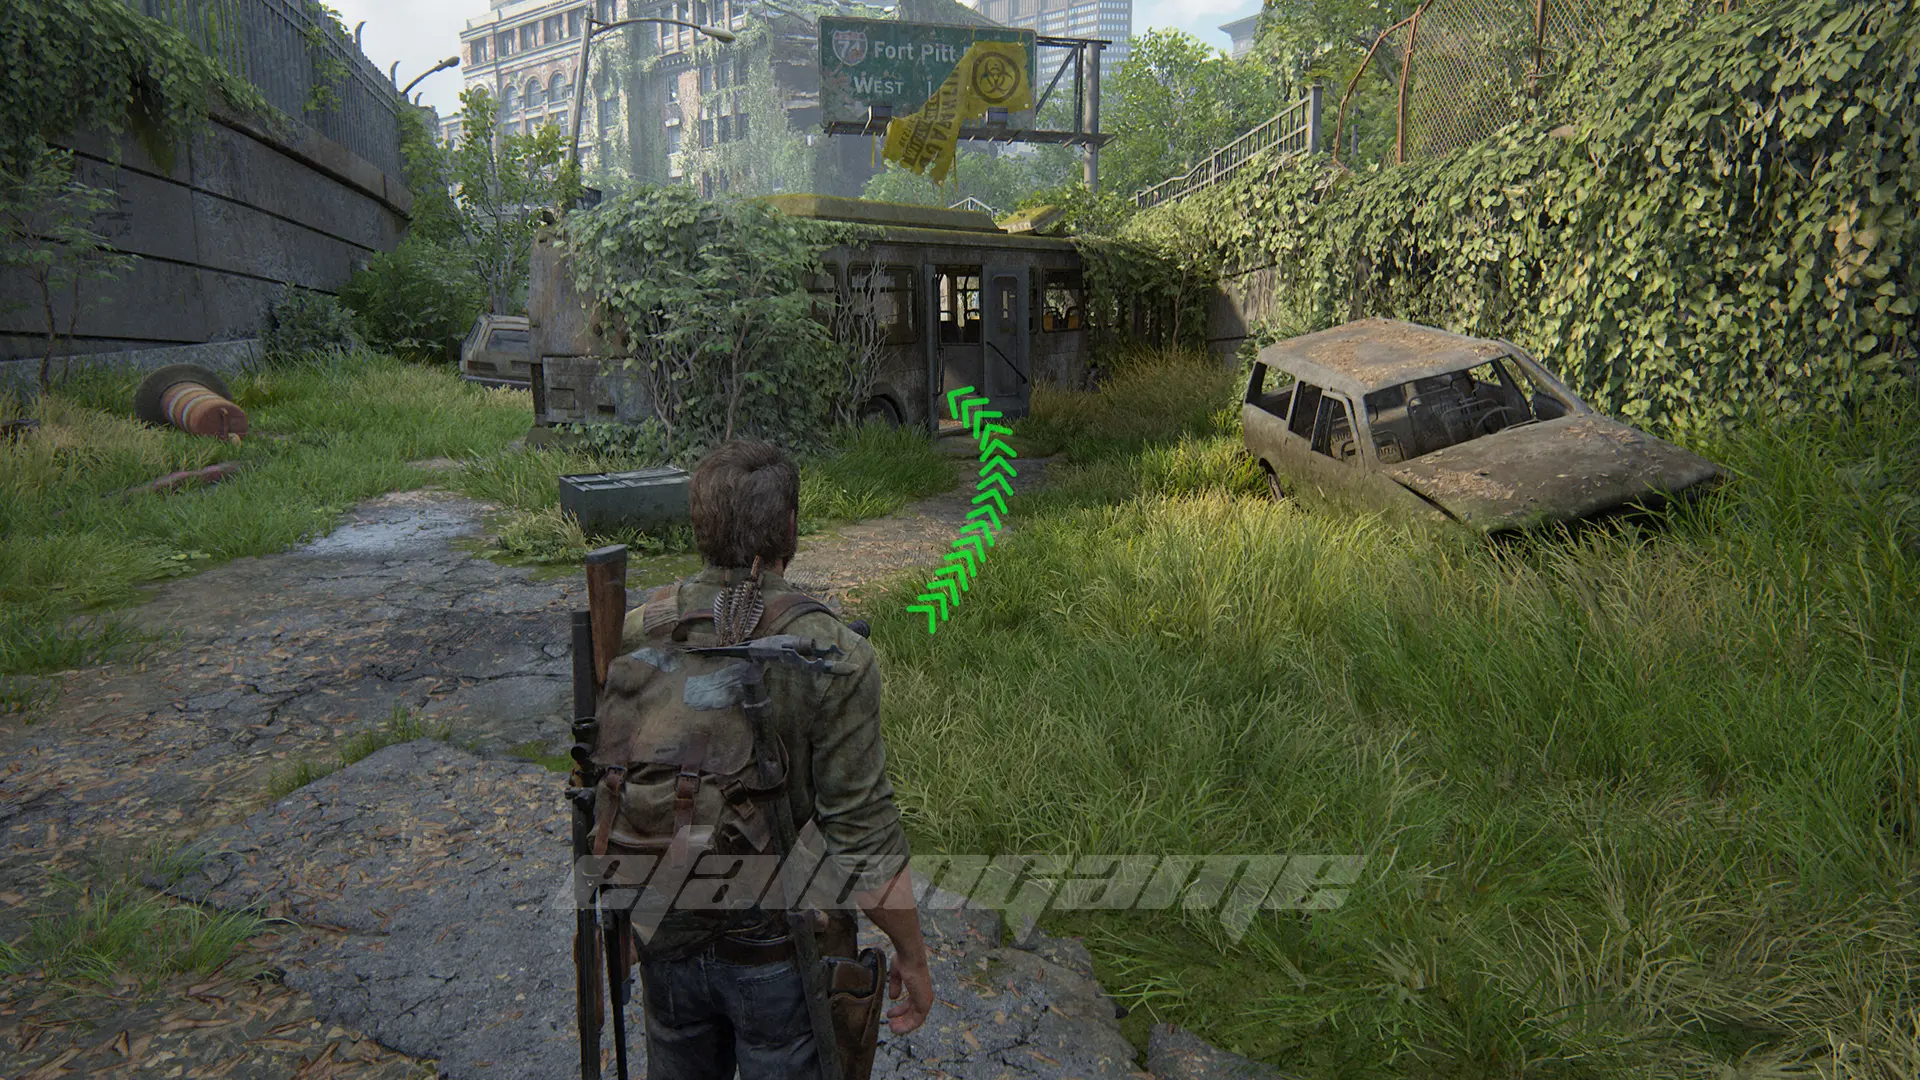
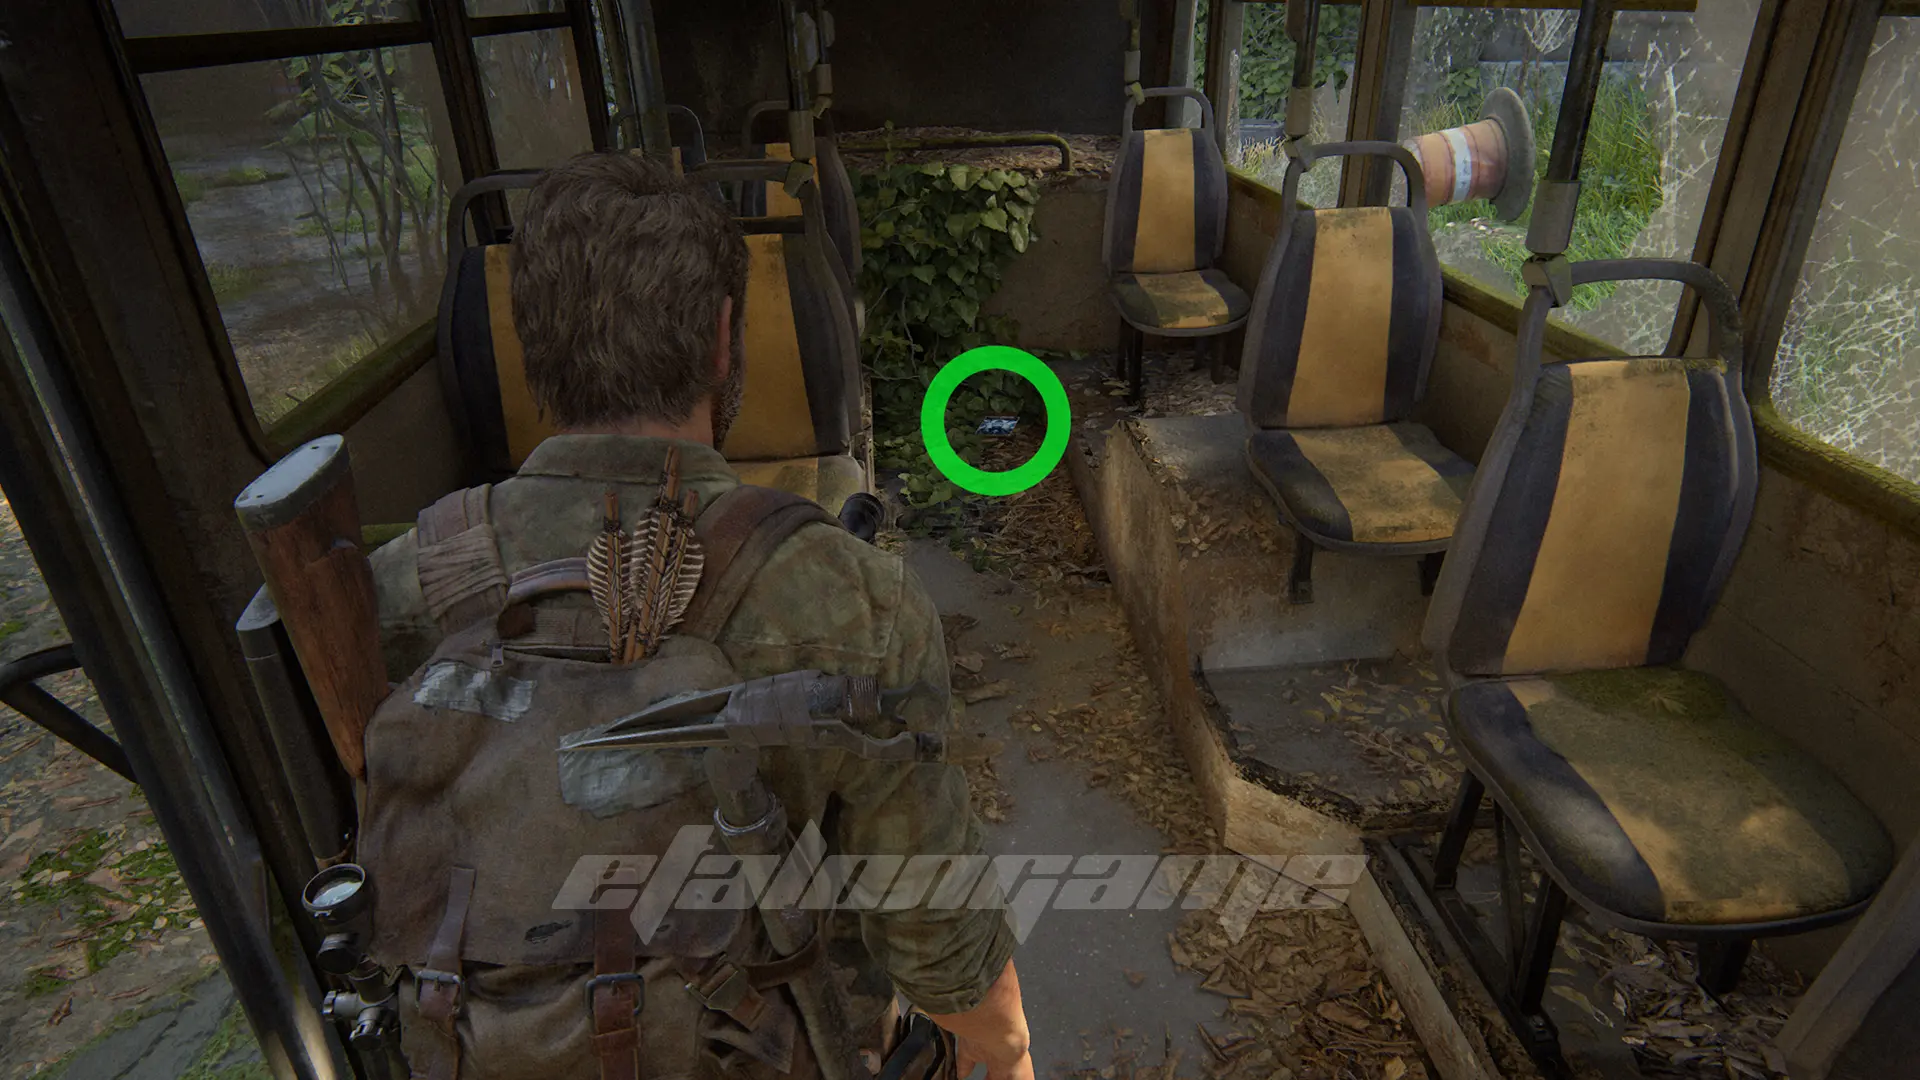
Once out on the road, look into the overgrown bus directly in front of you to find this comics between the seats.
Option Conversation #2
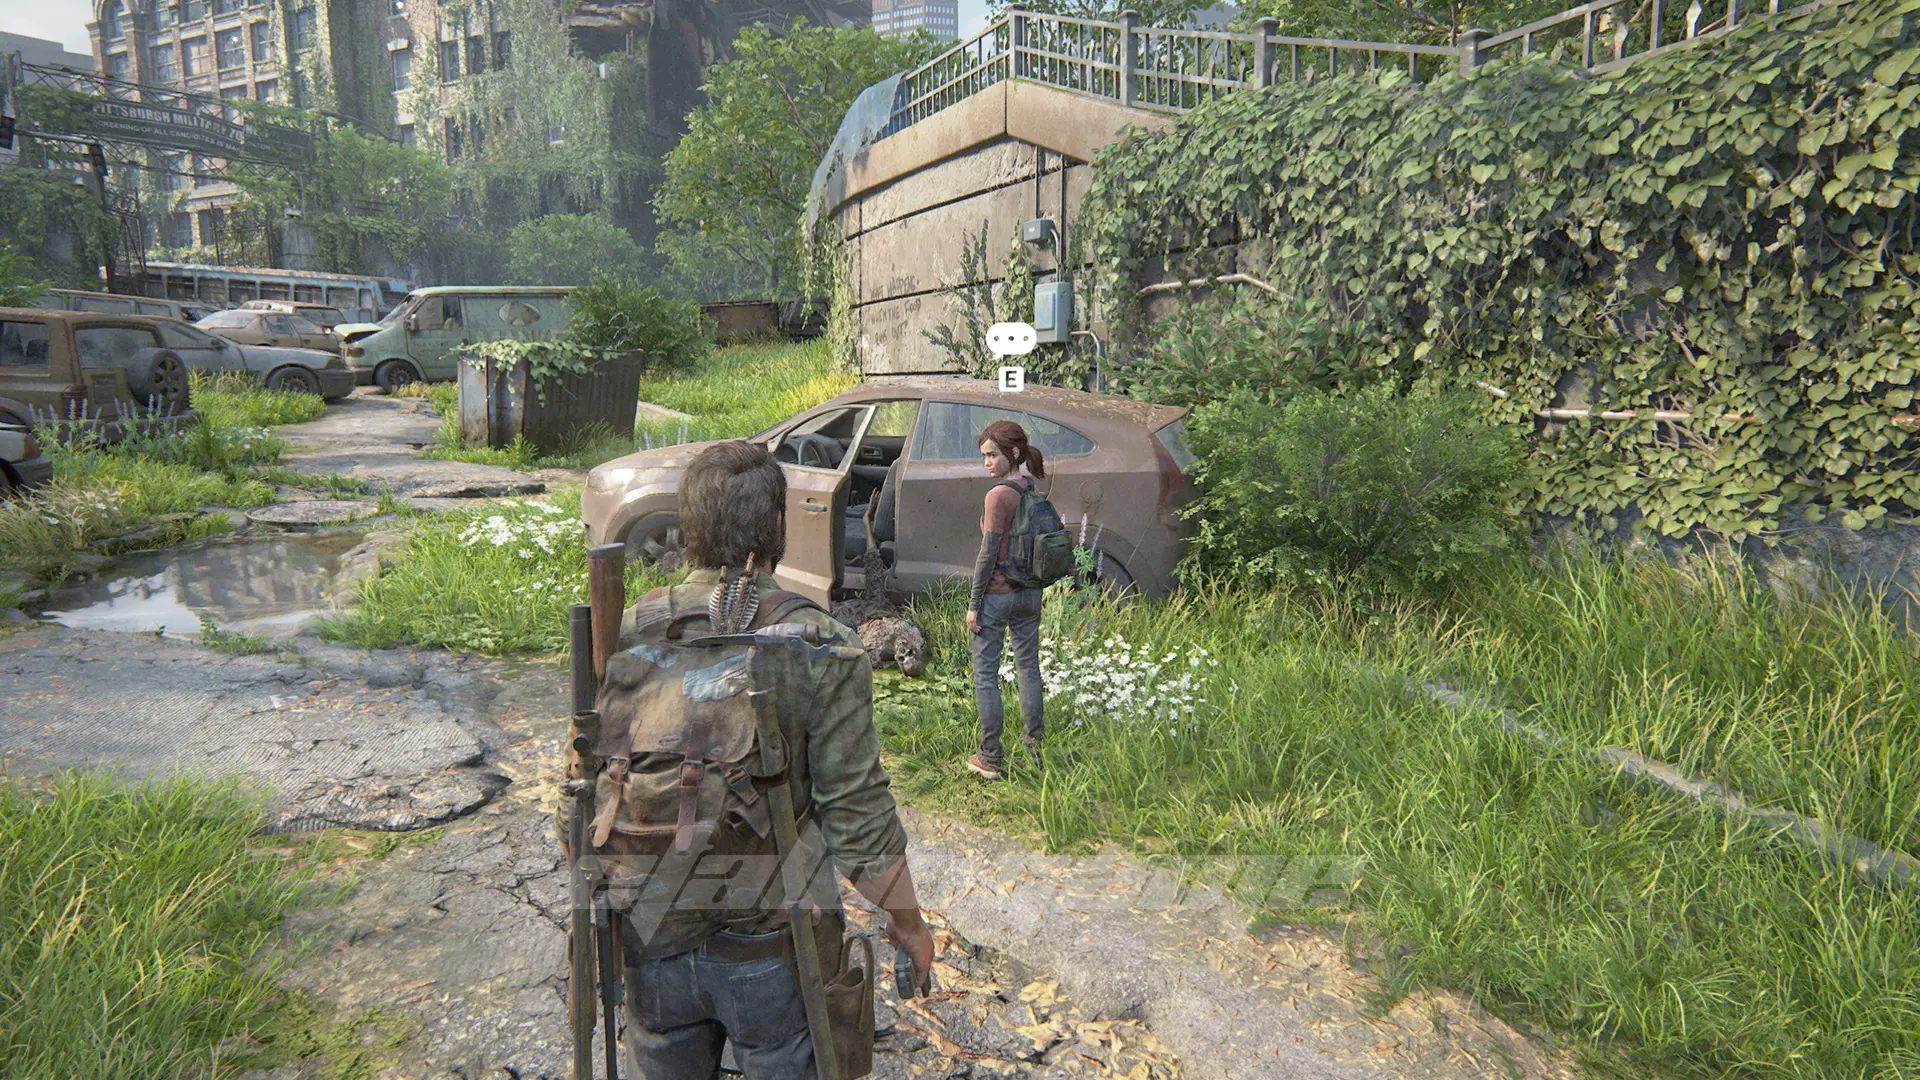
Walk forward a bit to see a body piled out of the car. Ellie walks up to him to talk.
Ellie’s Joke #1
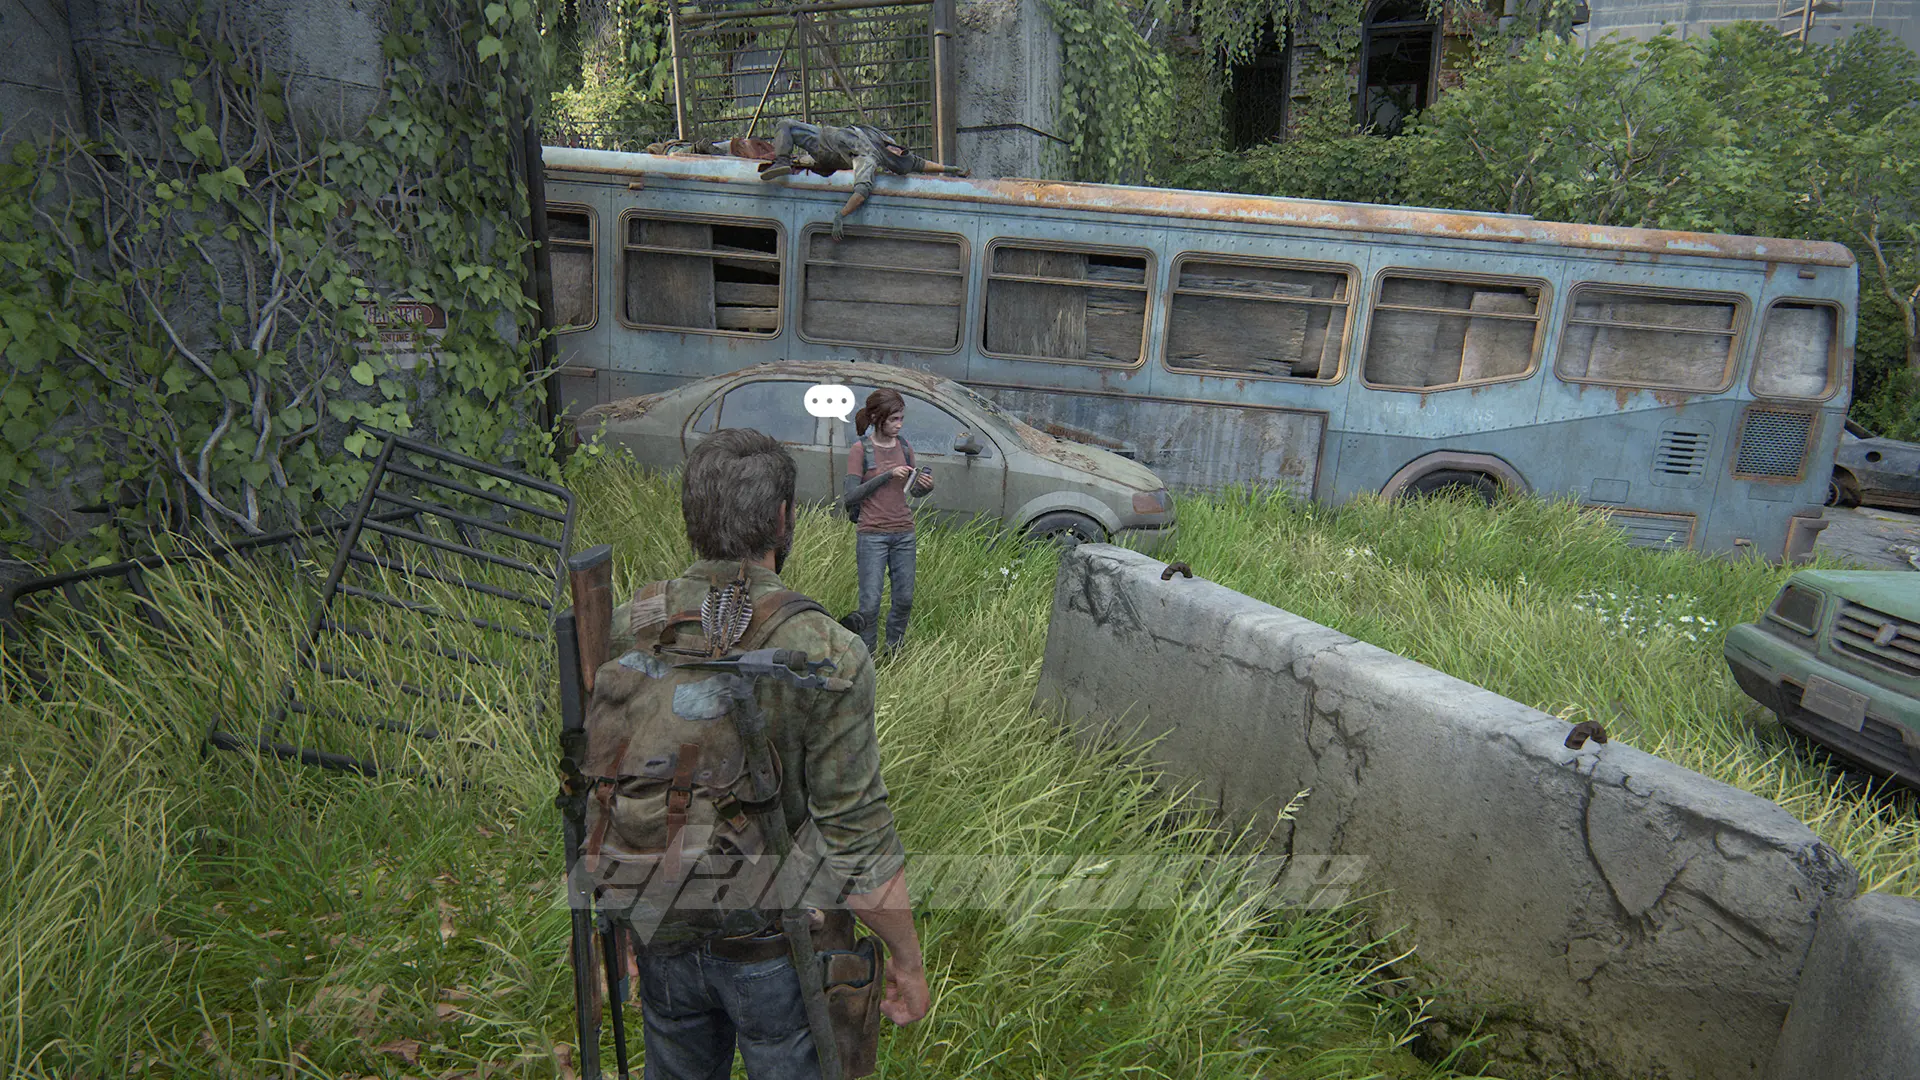
After dealing with the Hunters, you’ll need to climb onto the blue bus to move forward. Before you do that, stand by it for a few minutes until Ellie pulls out her joke book. Let her tell it all the way through.
Option Conversation #3
Once you get over the bus, you’ll see the graffiti on the wall on the right. Wait for Ellie to come over to talk to them.

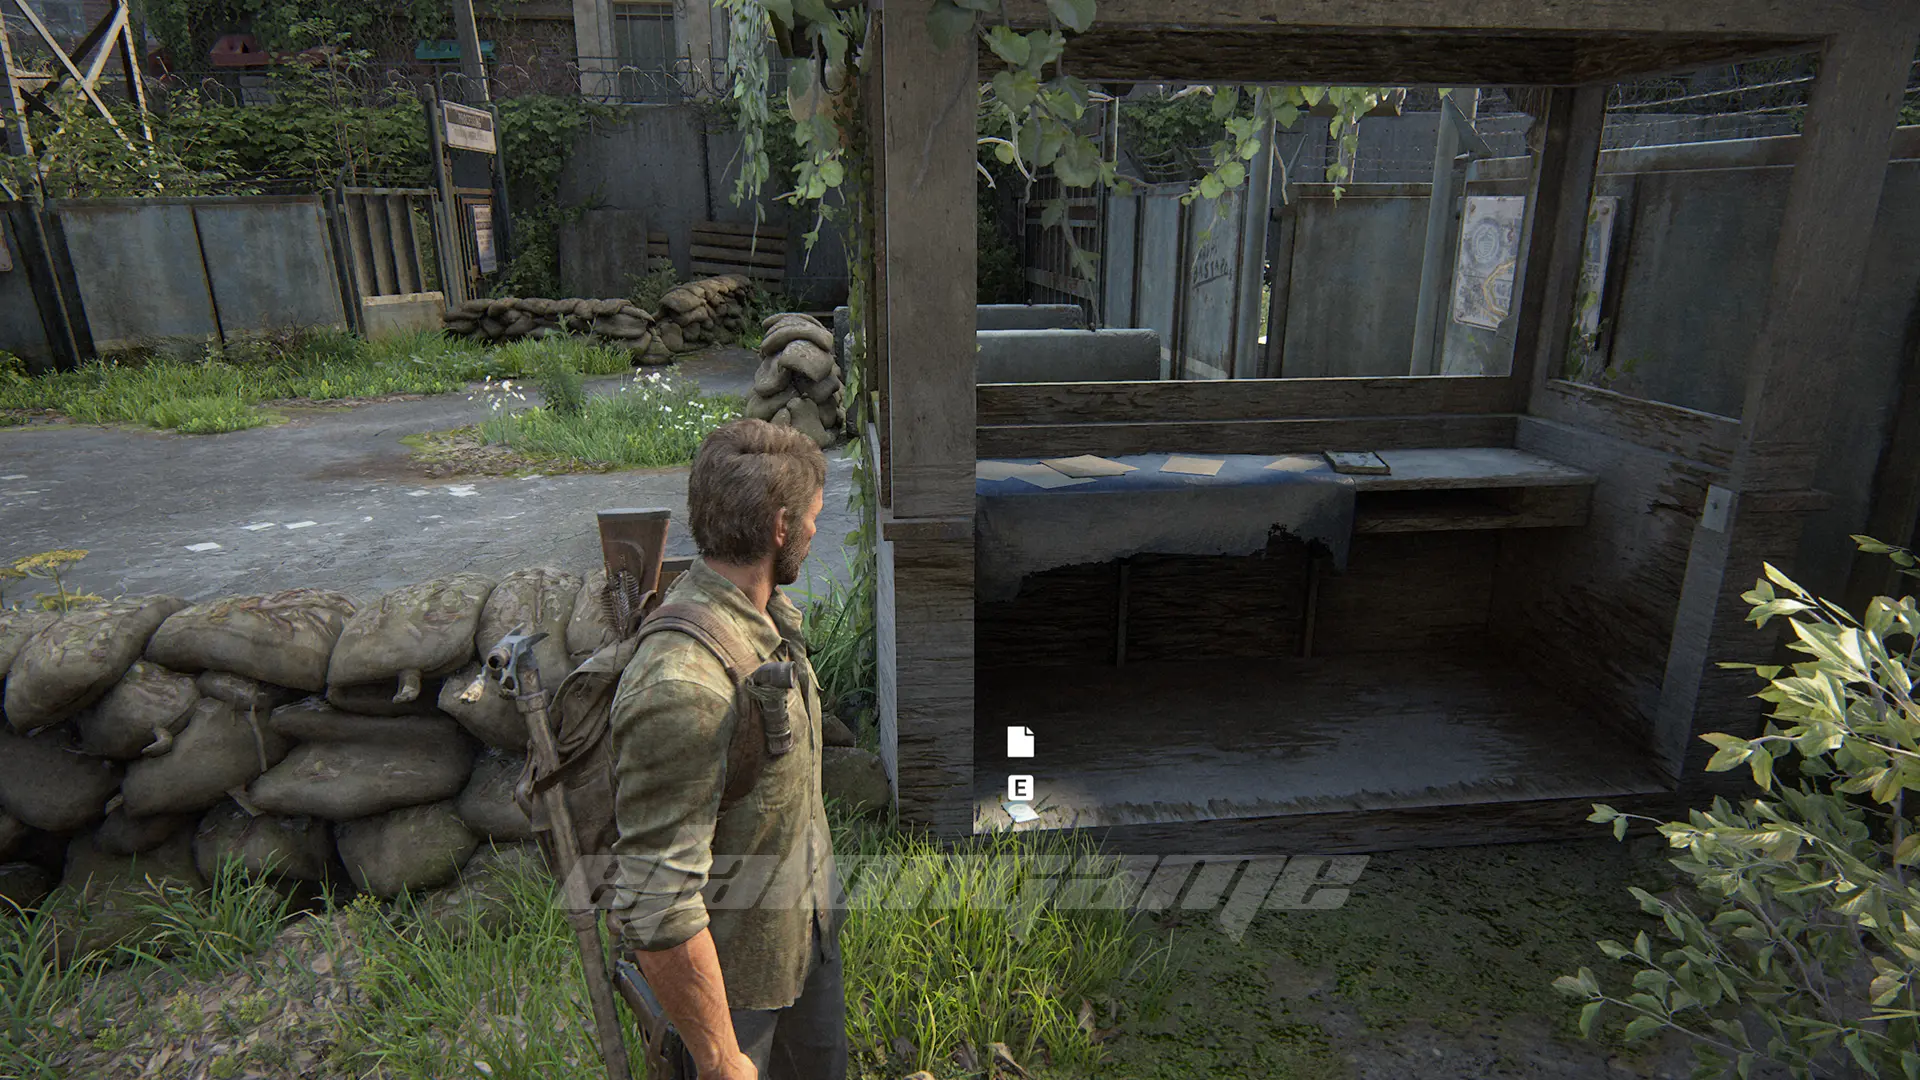
Artifact #4: Lost Hill Note
In the security booth near the previous graffiti.
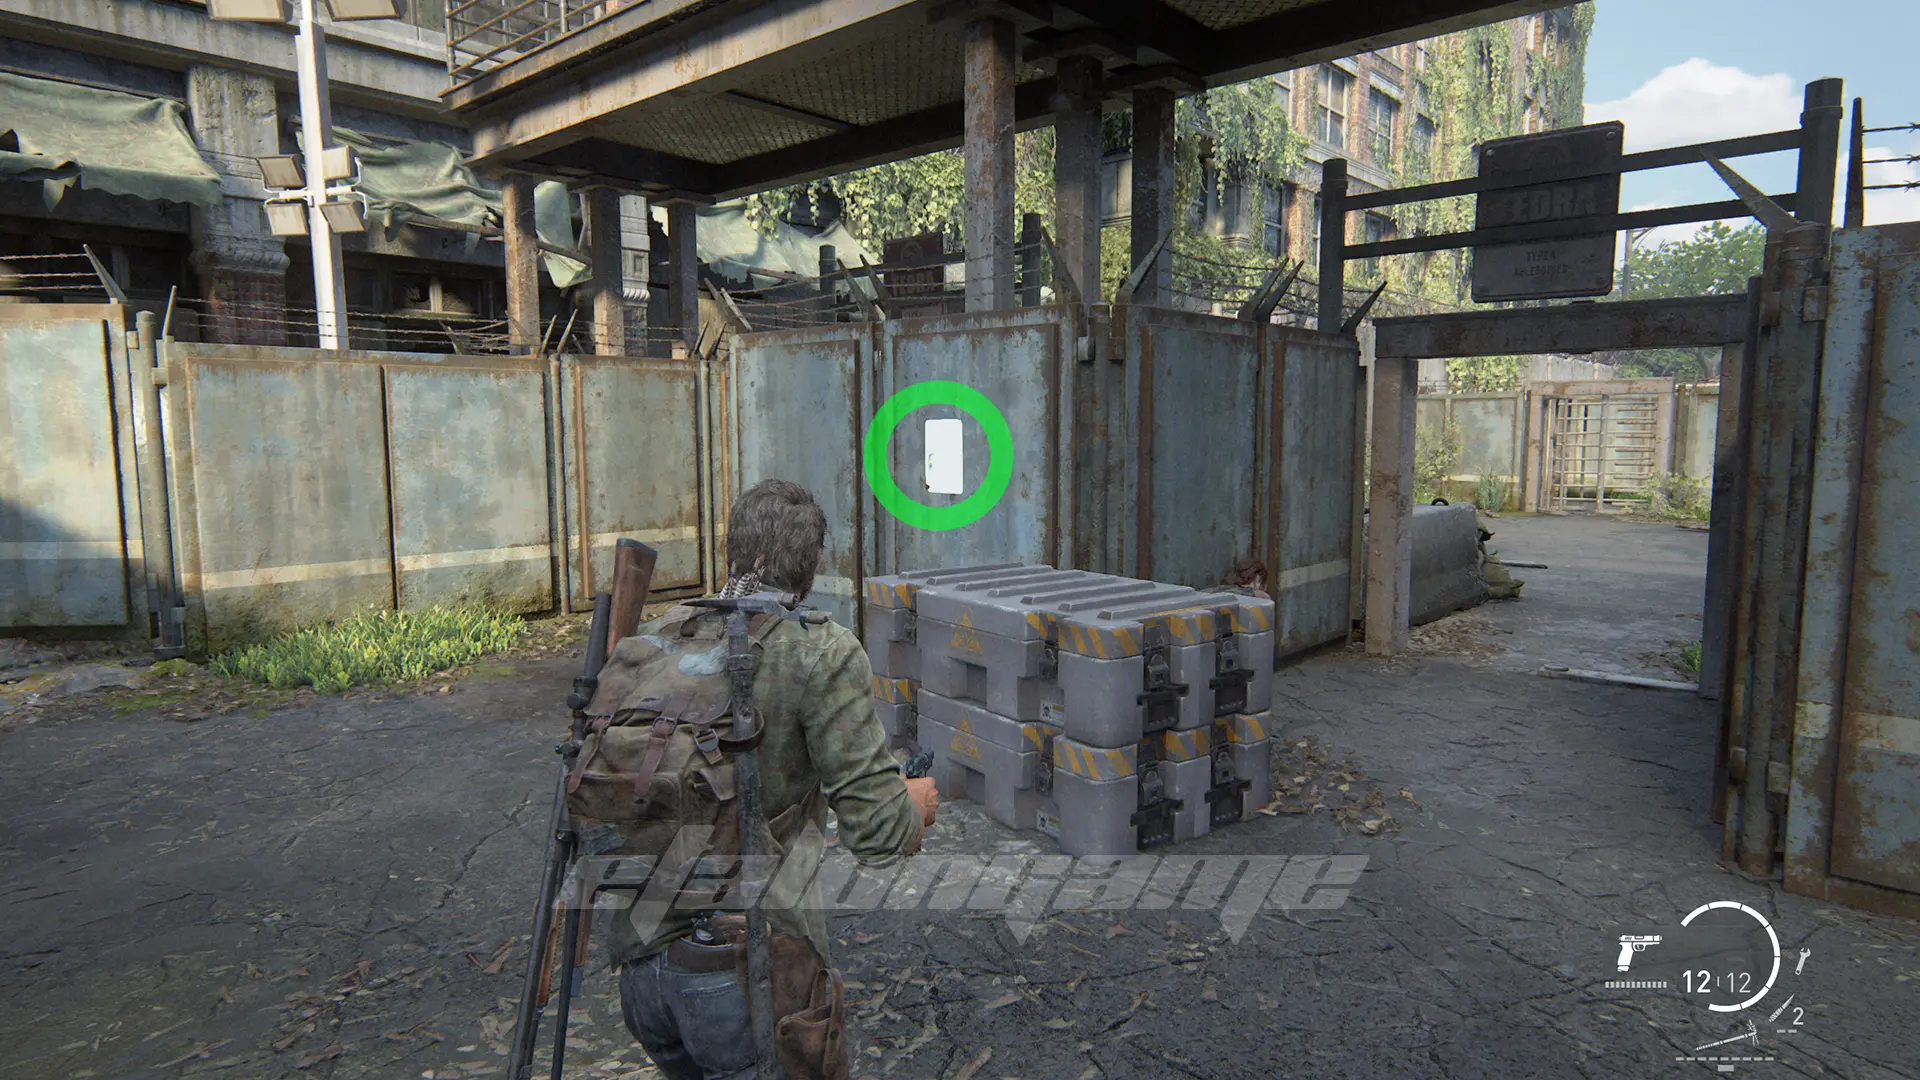
Artifact #5: Traitors Flyer
At the checkpoint, after passing through the turnstile and the gate following it, turn around to find this leaflet on the wall.
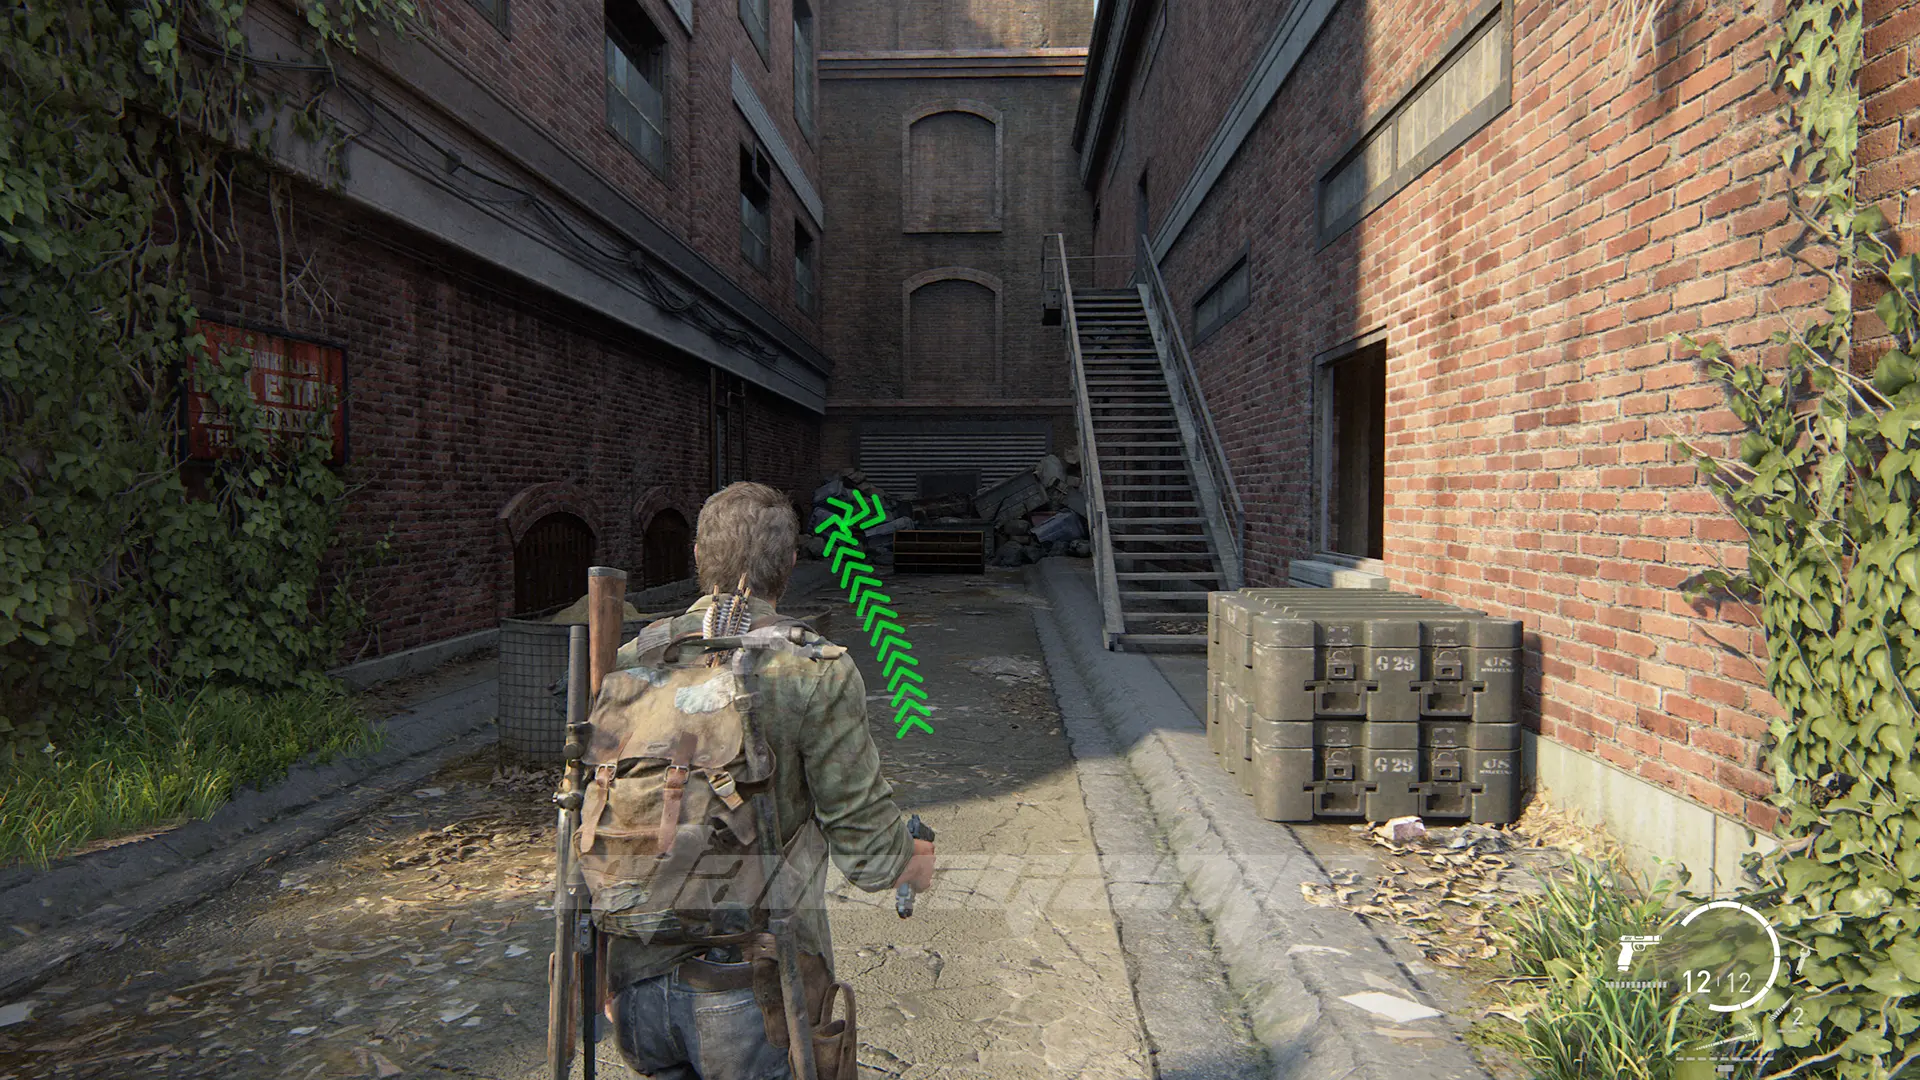
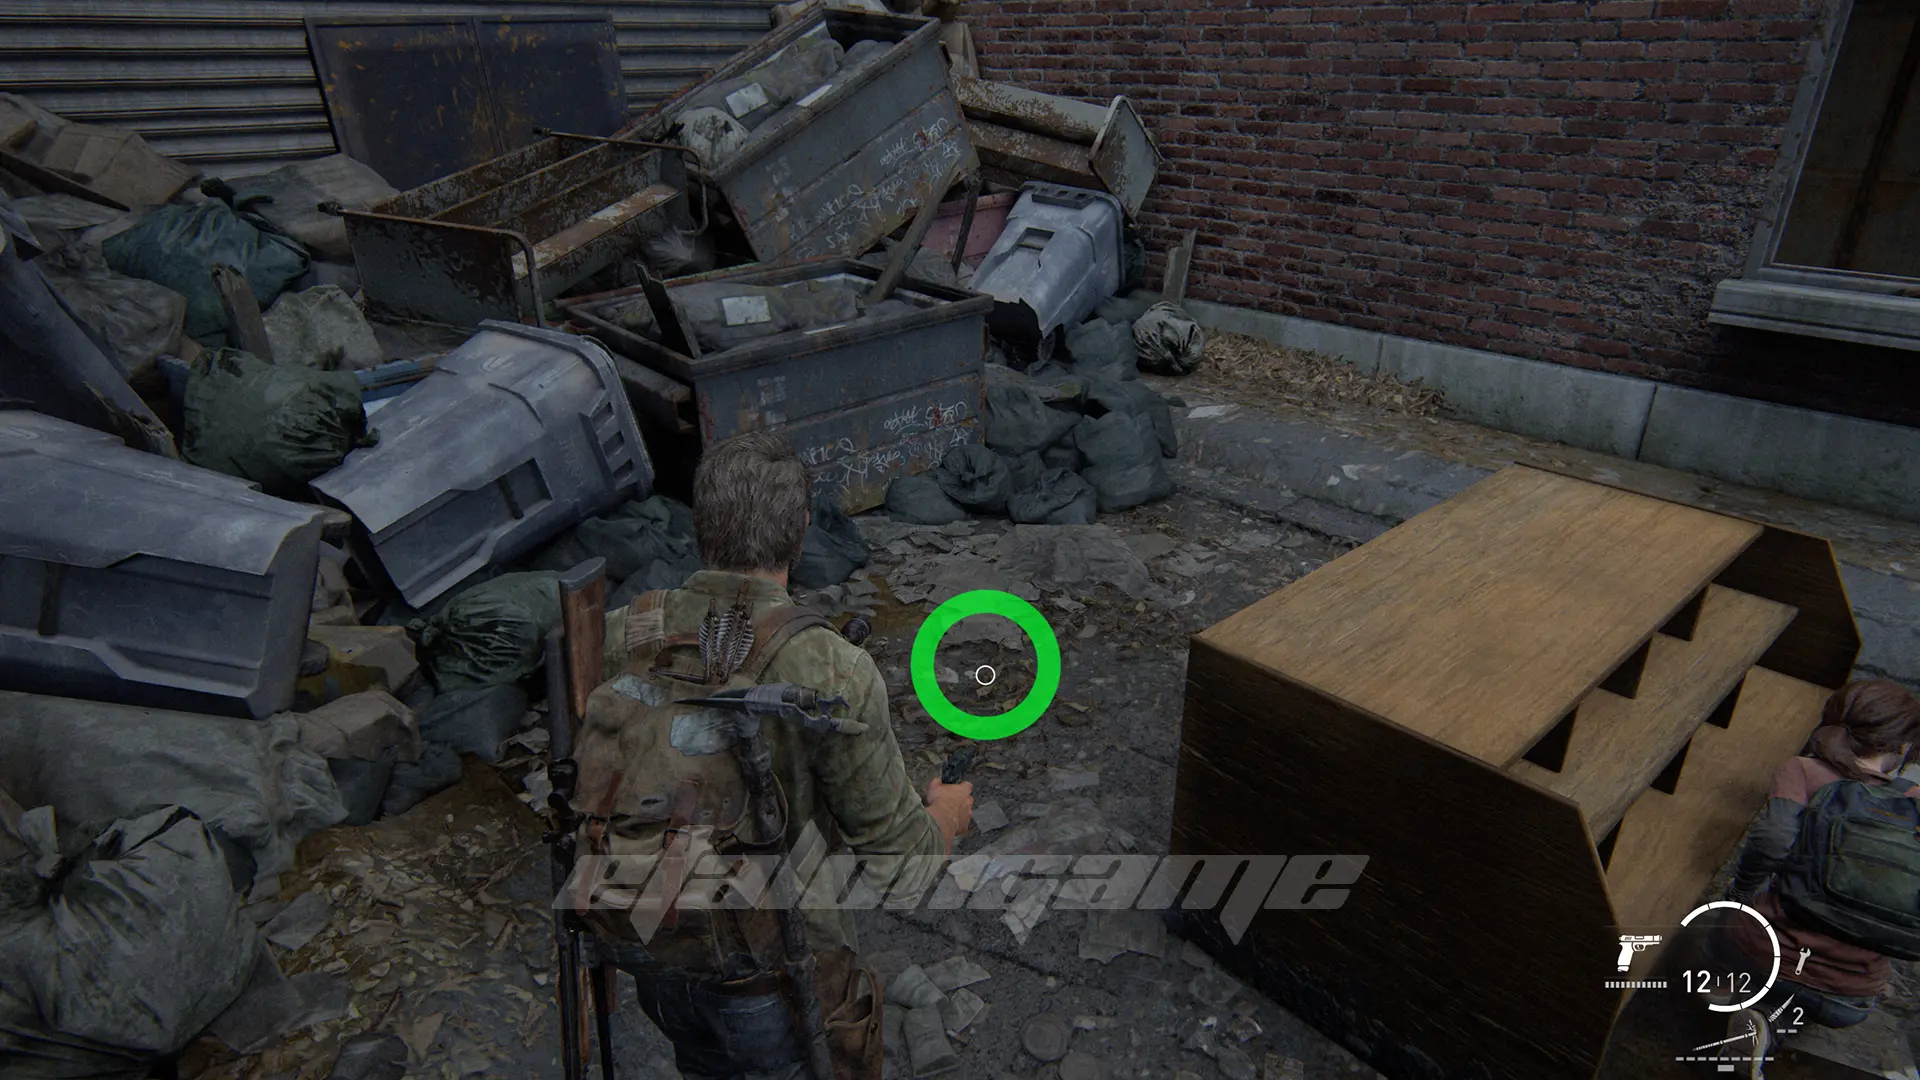
Firefly Pendant #1: Risk
From the previous location, go forward and then right after the bookstore. At the end of the alley, behind a wooden glass case, you will find this pendant.
Ellie’s Joke #2
Deal with the Hunters on both floors of the bookstore, and then wait a few minutes for Ellie to get her joke book. Let her tell it all.
Artifact #6: Applicant Checklist
If you enter this bookstore through the main entrance on the first floor, there will be a staircase on your right. The instructions are on the shelf below it.
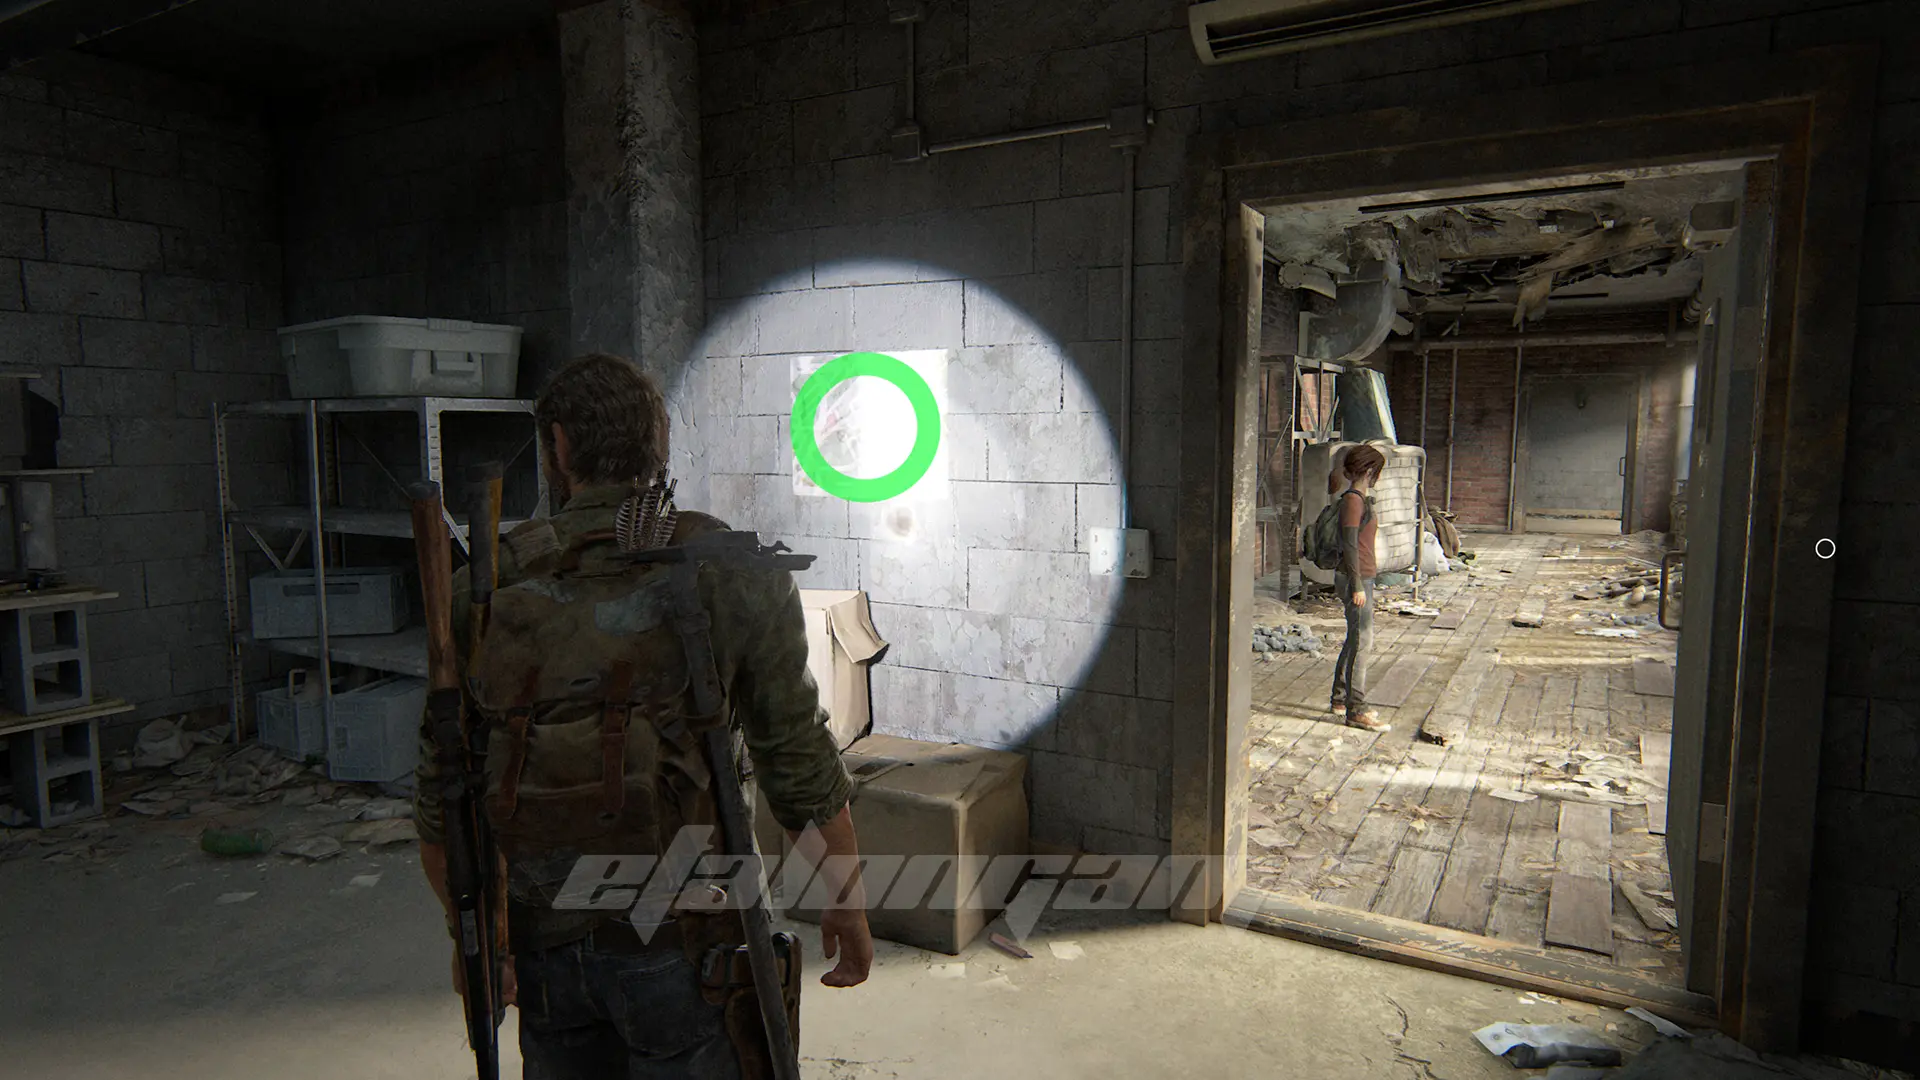
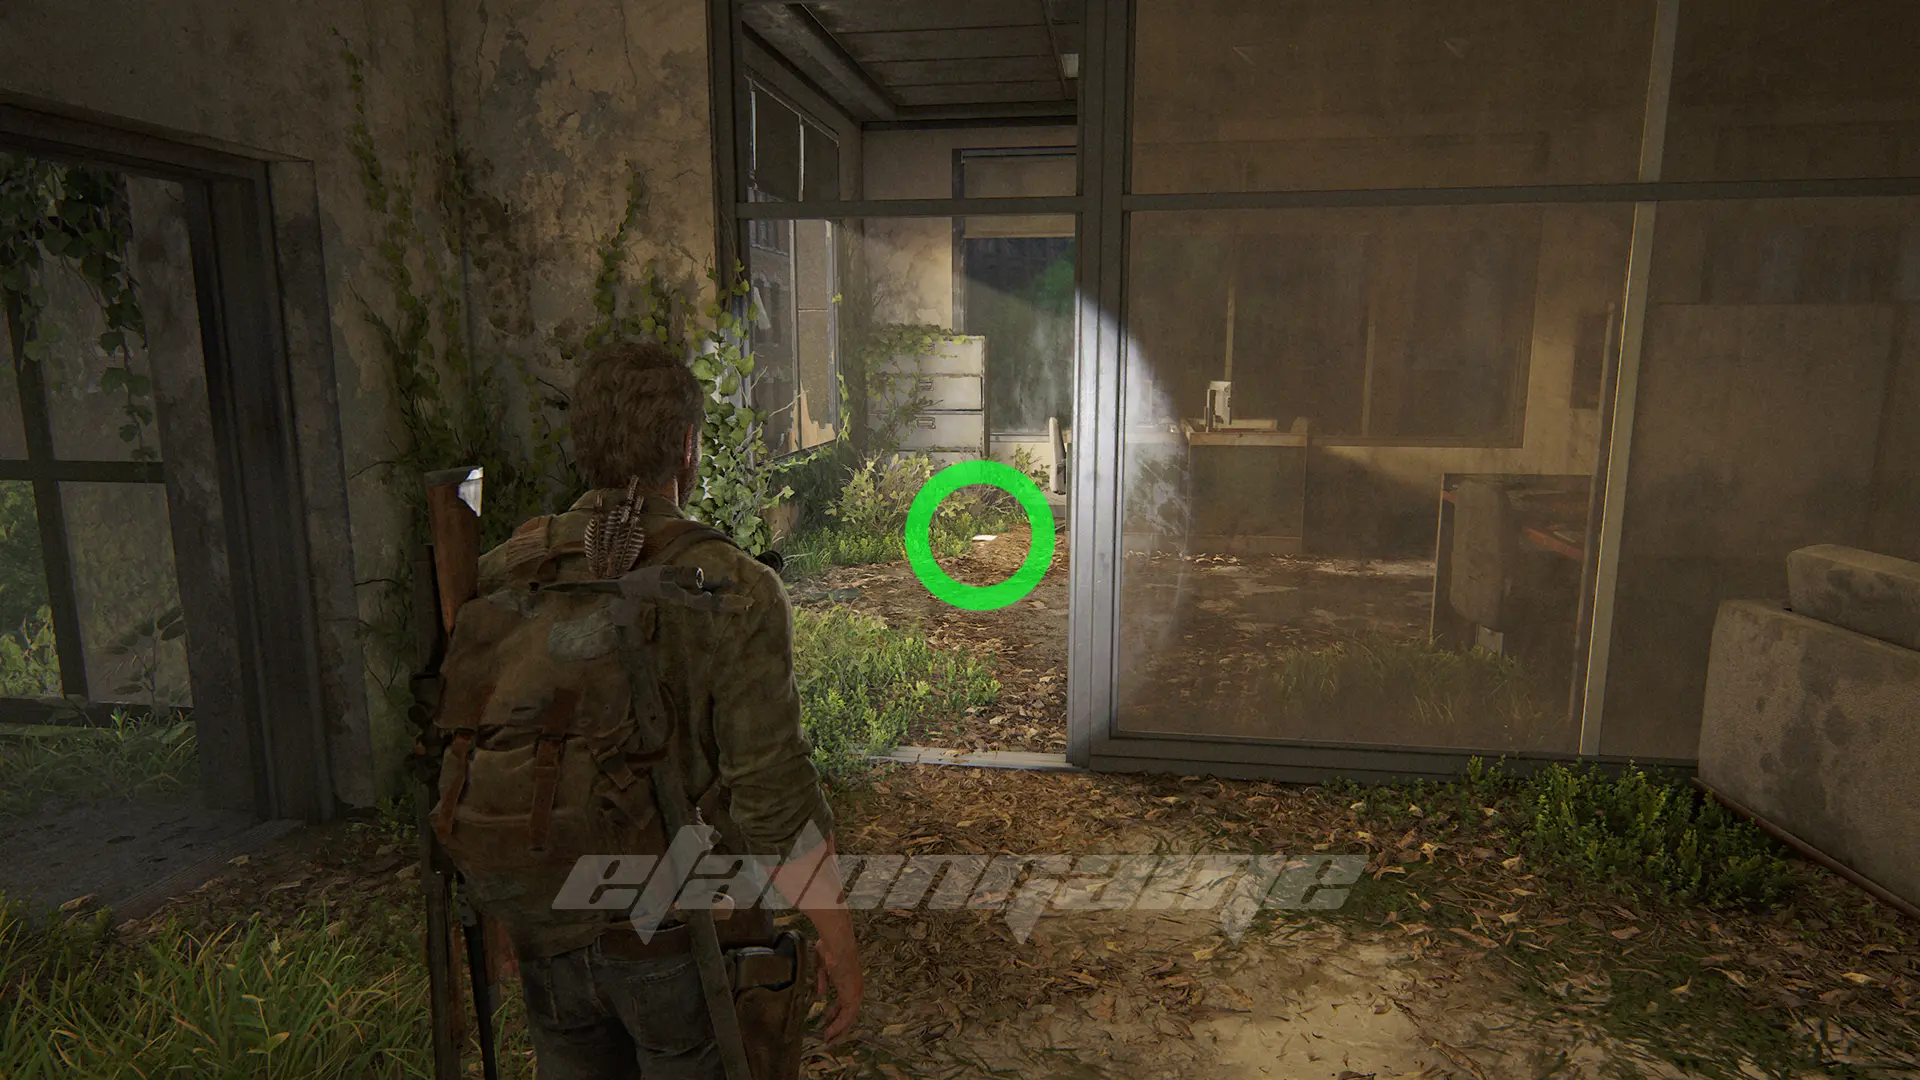
Artifact #7: Abandon Zone Note
From the previous note, go forward along the wall until you are in the kitchen. The sheet you need is on the cupboard.
Shiv Door #1
Continue along the wall and go up the stairs, which you will bump into. You will find yourself in the cafeteria area. In the corner, there is a locked door to the bathroom. You’ll need a shiv to open it and pick up supplements and parts for the workbench.
Artifact #8: Lost Areas Map
On the locker inside the previous restroom.

Option Conversation #4
After leaving the bookstore, move through the story to the Hunters’ cutscene. After it, turn around and walk up to the picture of the girl in the store window. Wait for Ellie to listen to this dialogue.
Ellie’s Joke #3
After the previous dialogue, stand still for a few minutes for Ellie to pull out her joke book. Let her tell it all.

Shiv Door #2
There is a locked door to the left of the cab you were hiding behind during the cutscene. You’ll need a shiv to open it and pick up supplements and parts for the workbench.
Artifact #9: Mother’s Letter
In the room, you entered by unlocking the previous door with the shiv.
Artifact #10: Stash Note
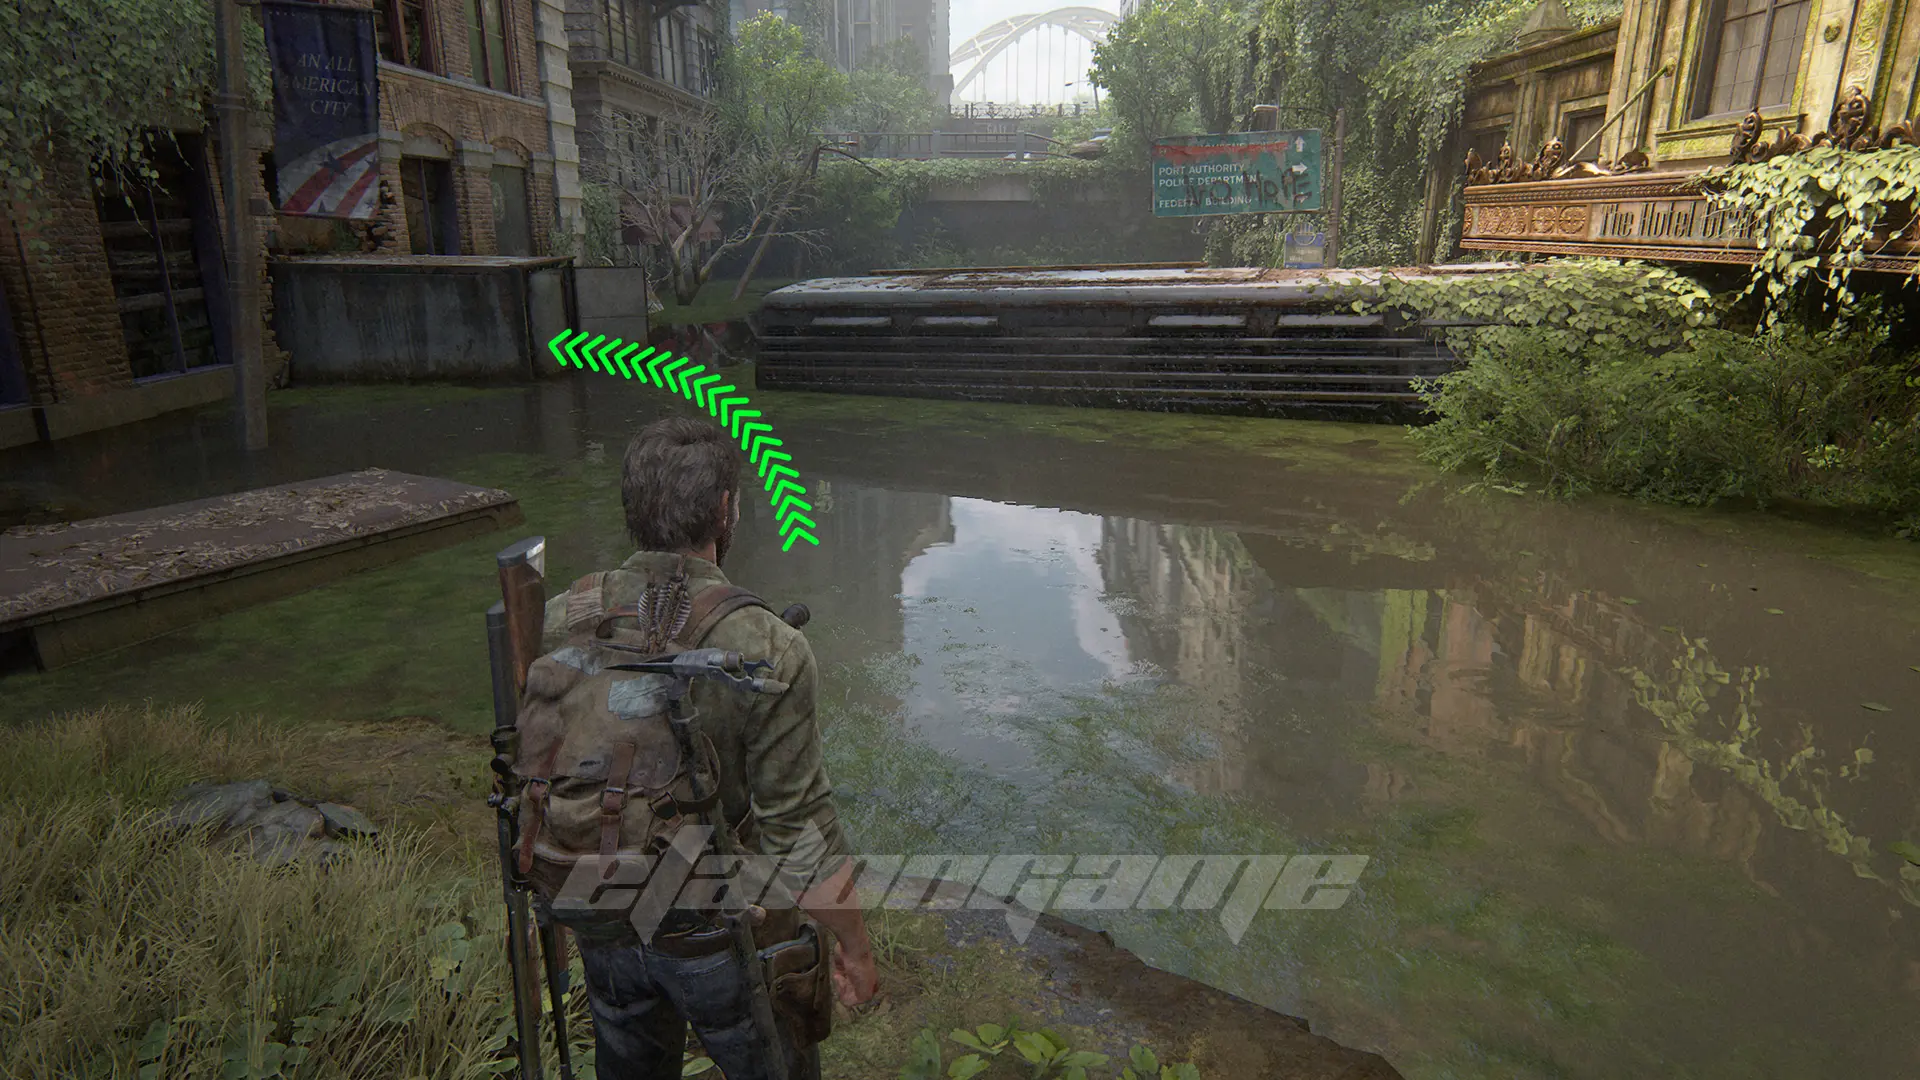
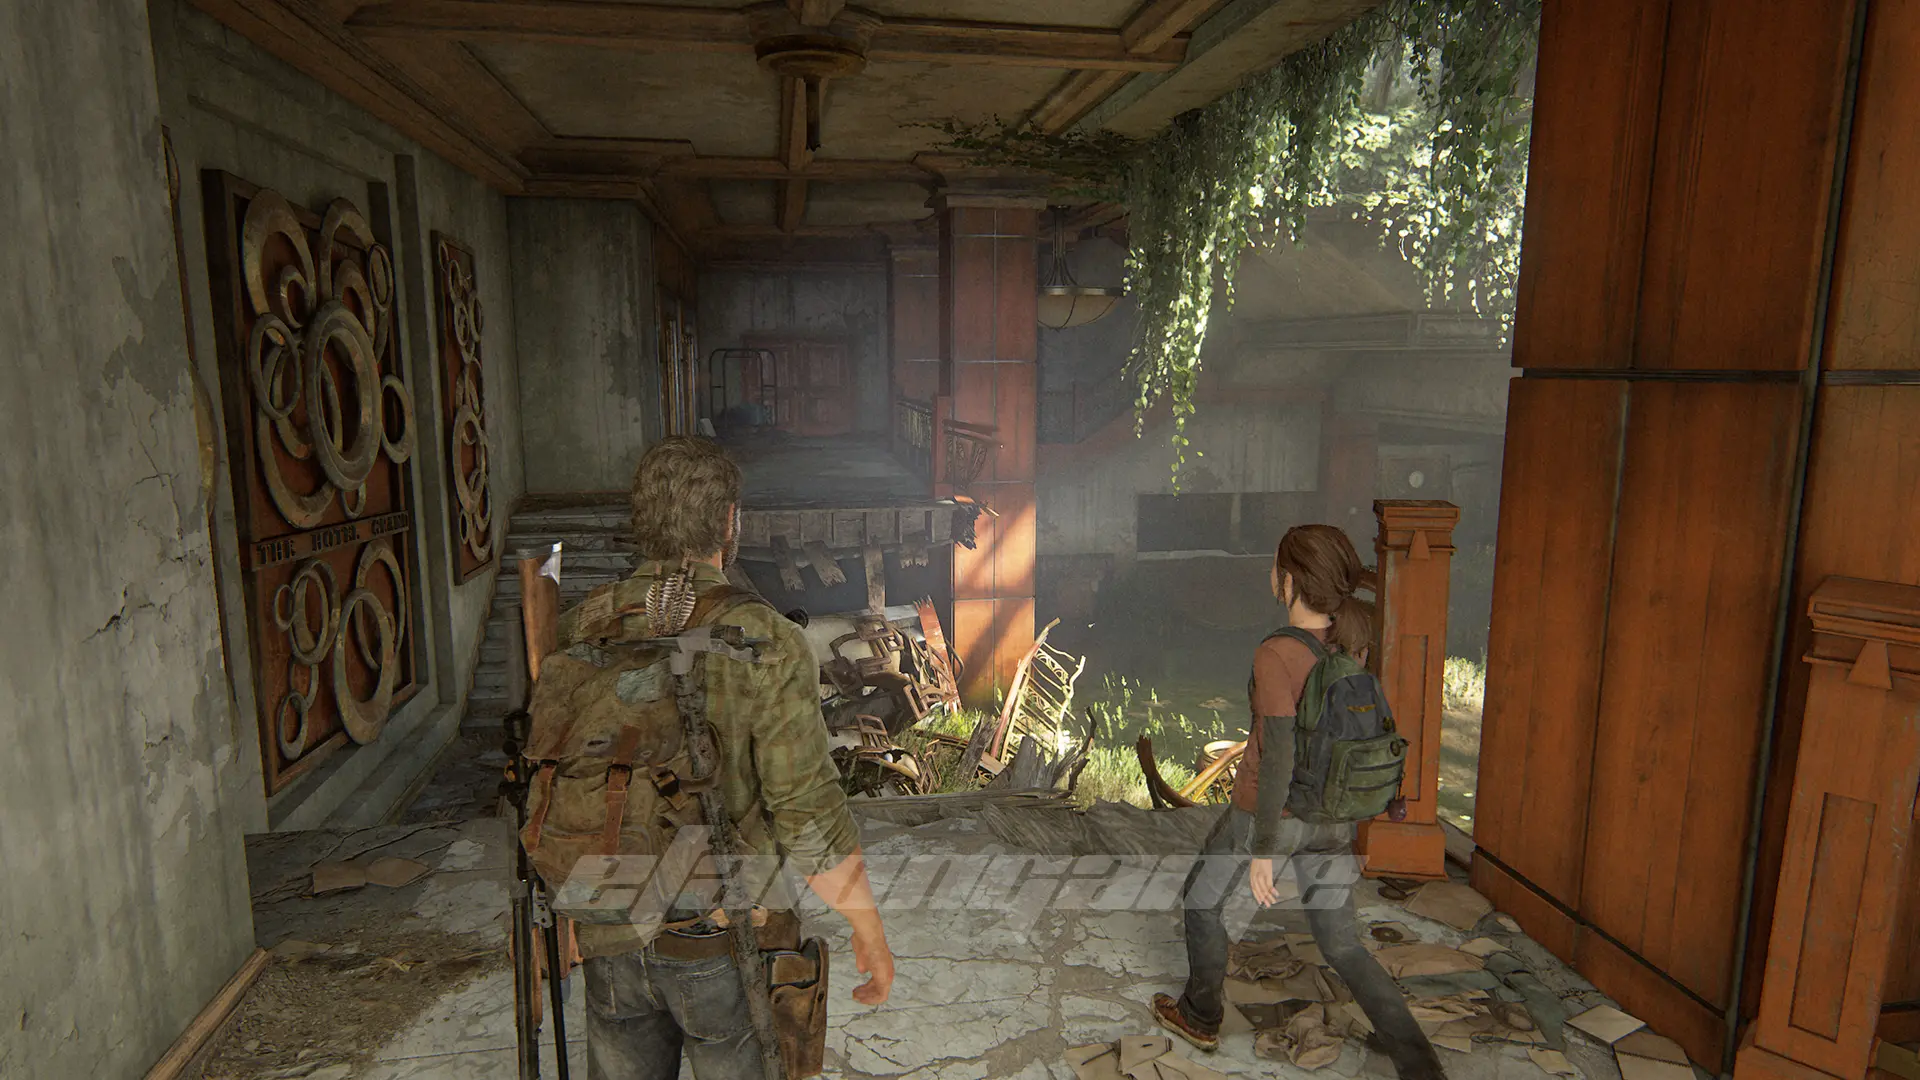
To advance further in the story, you need to swim through the flooded van. Inside, take the stairs to the second floor, and pick up the note from the table.
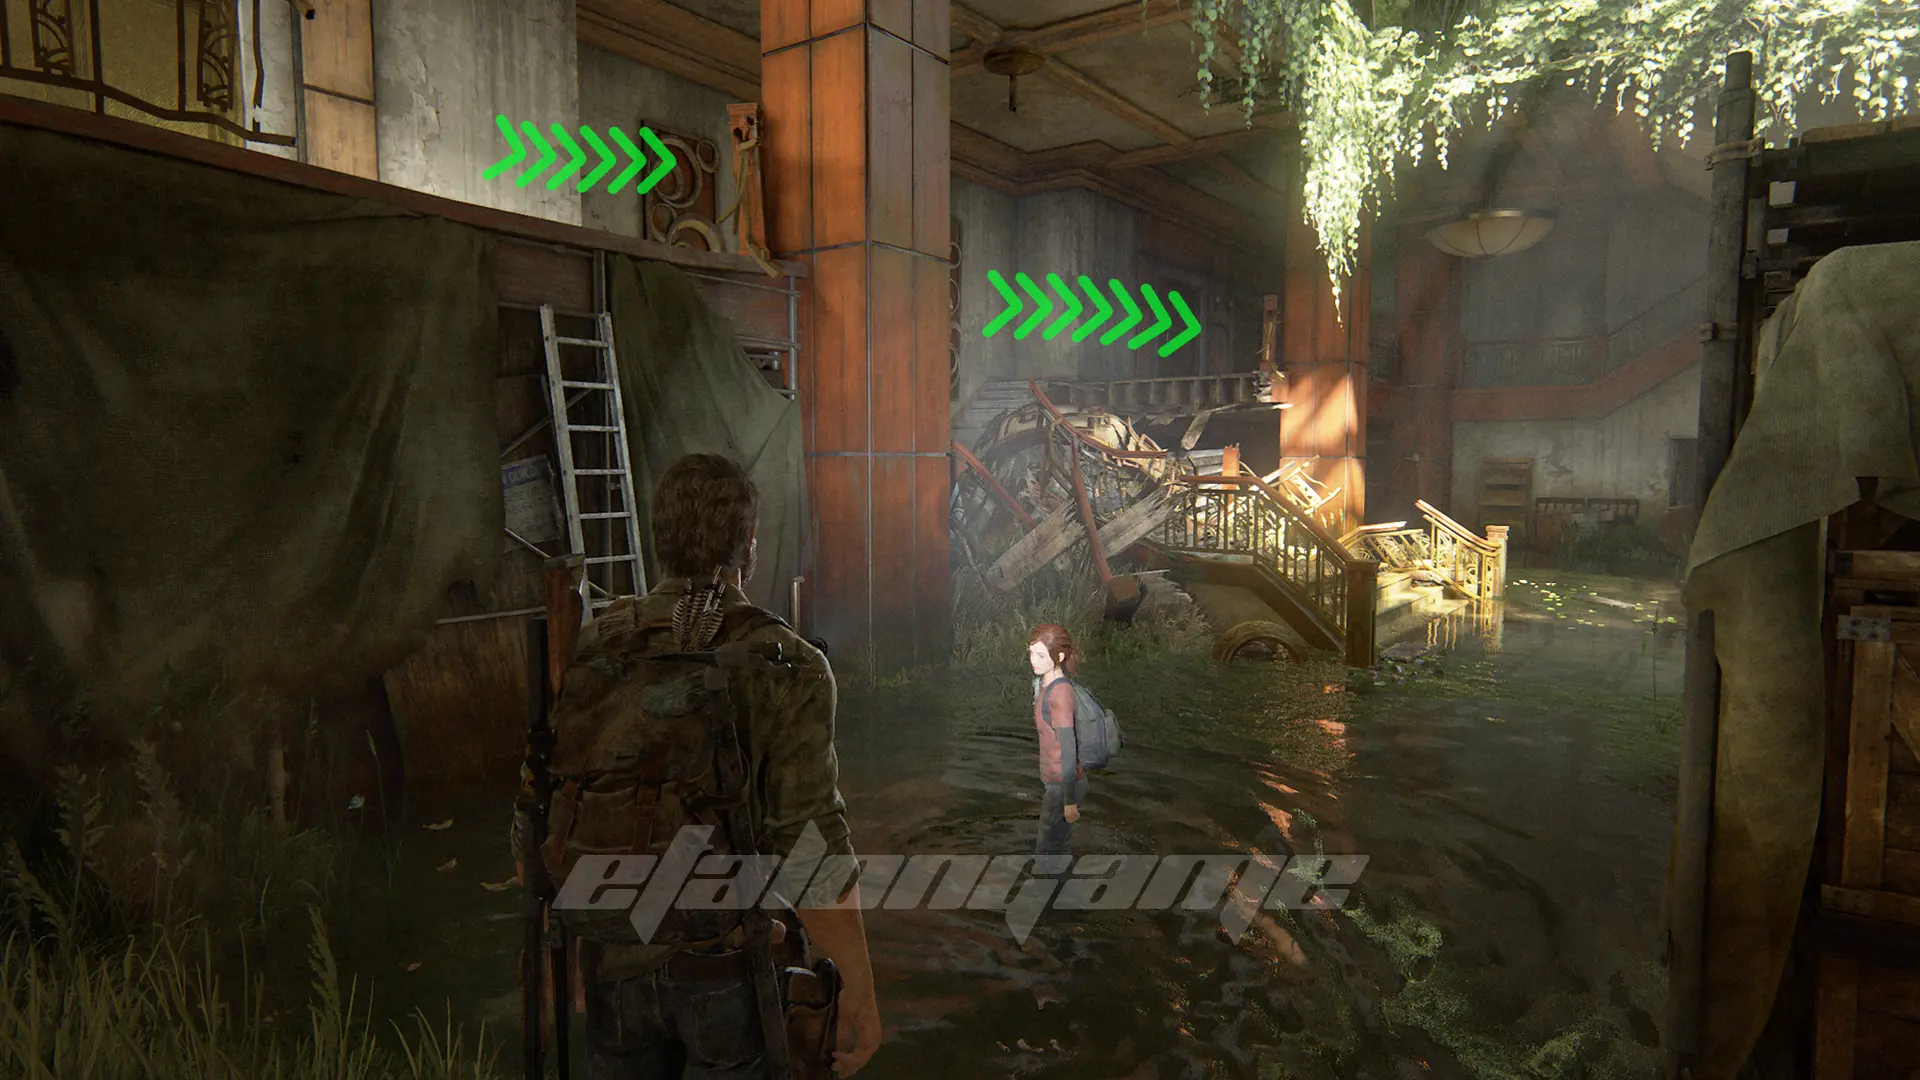
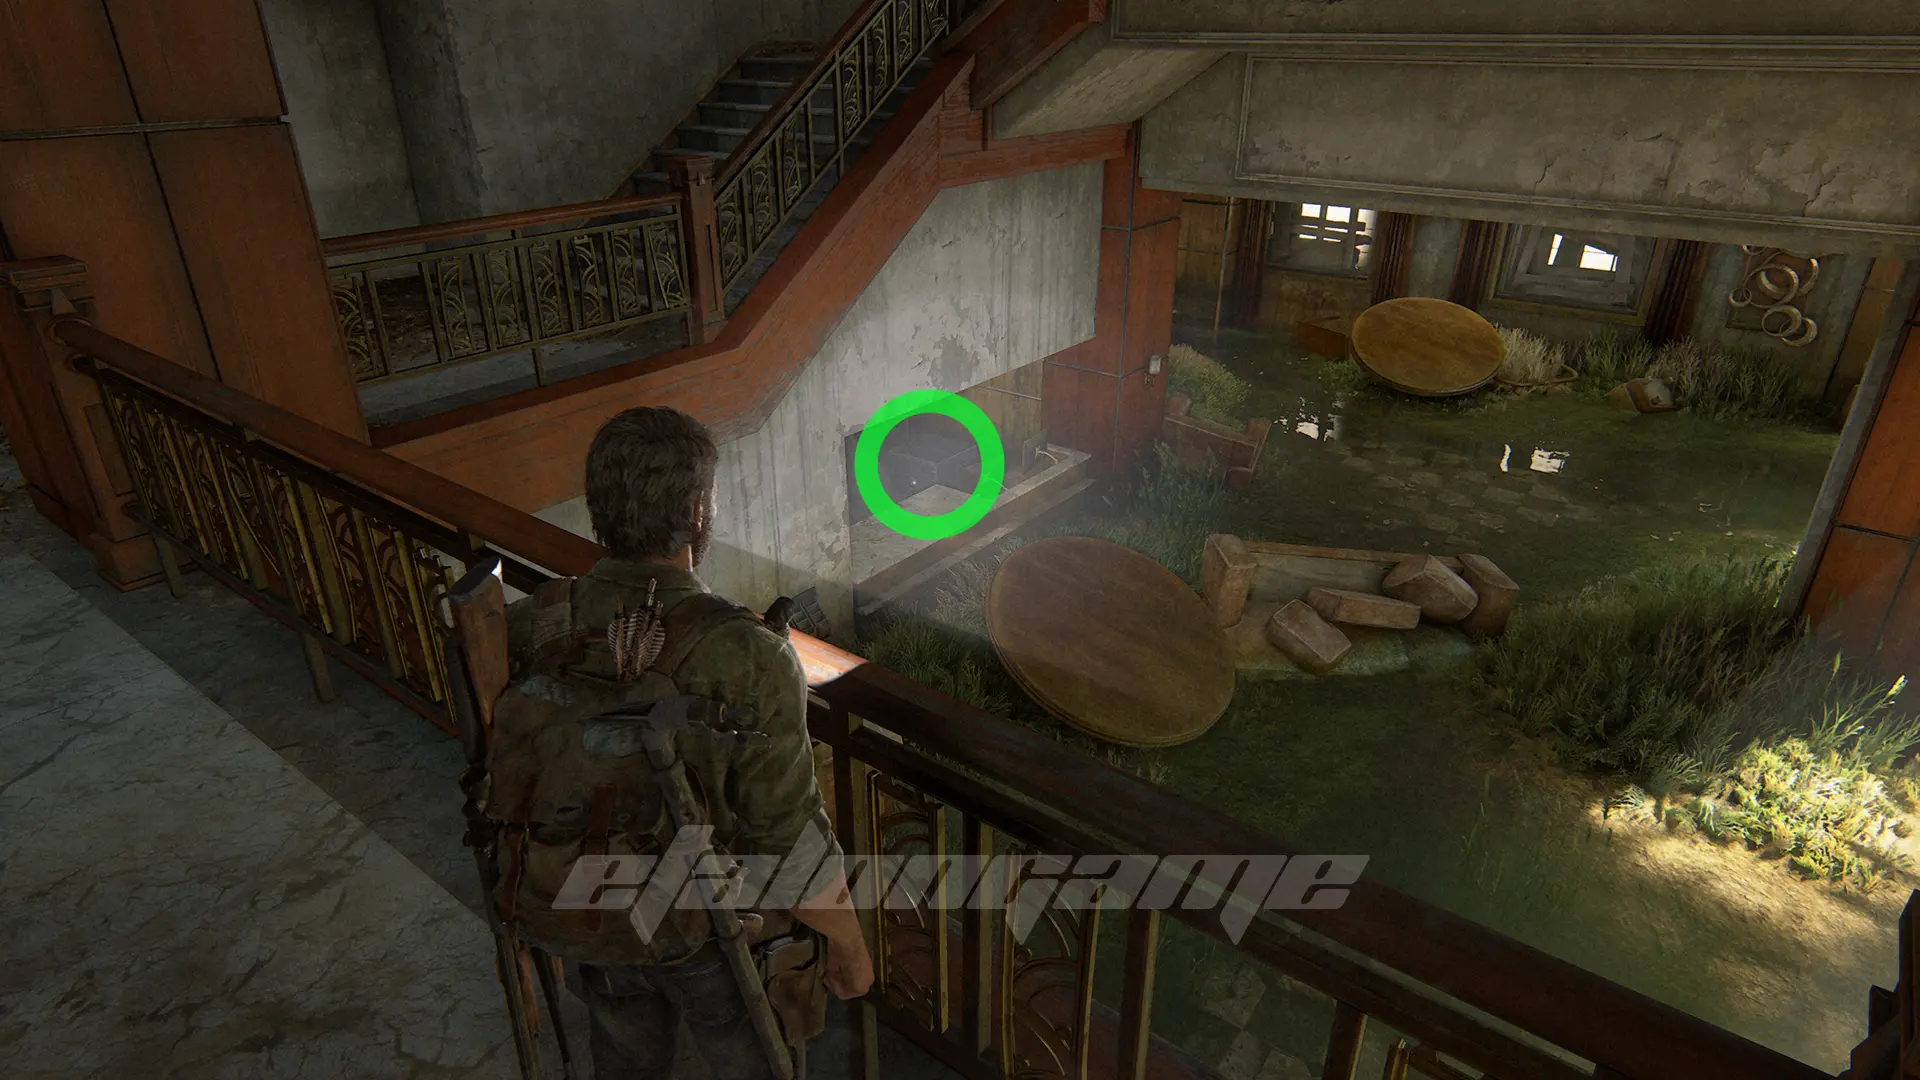
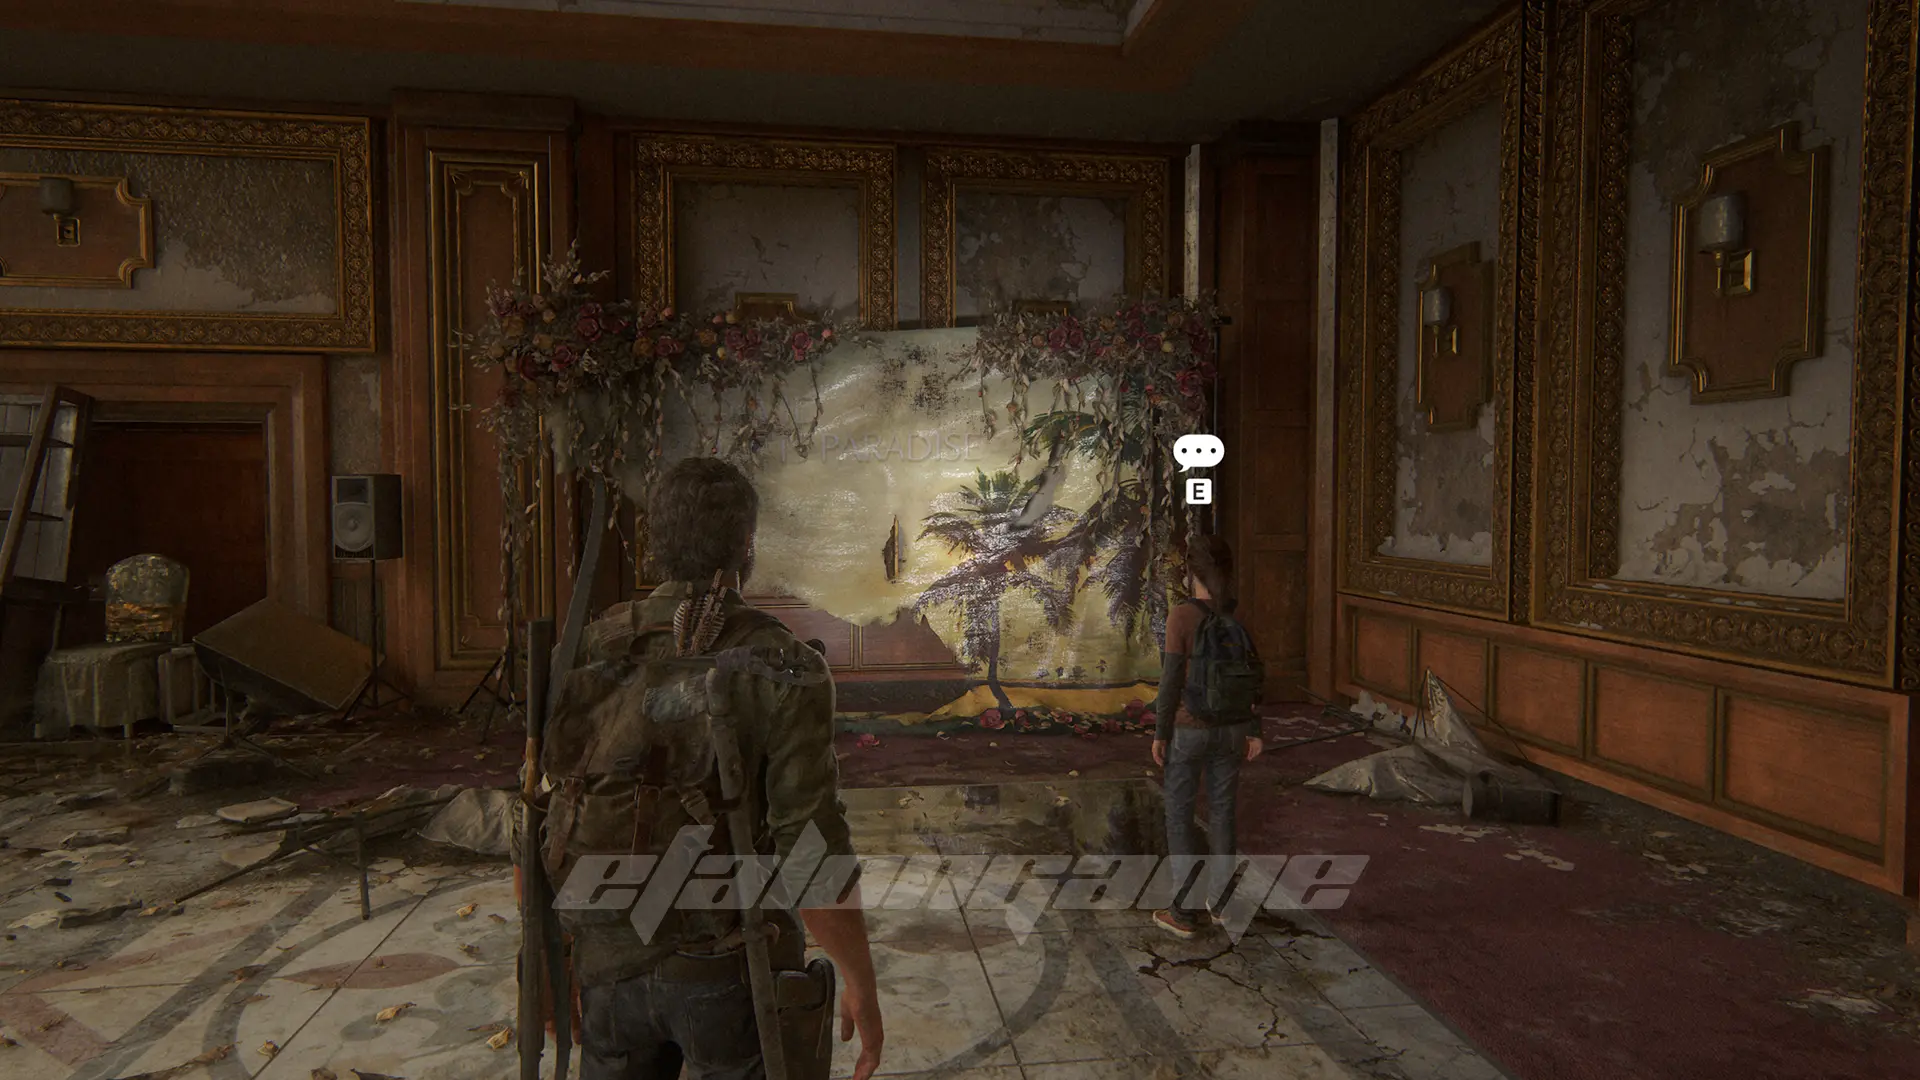
Hotel Lobby
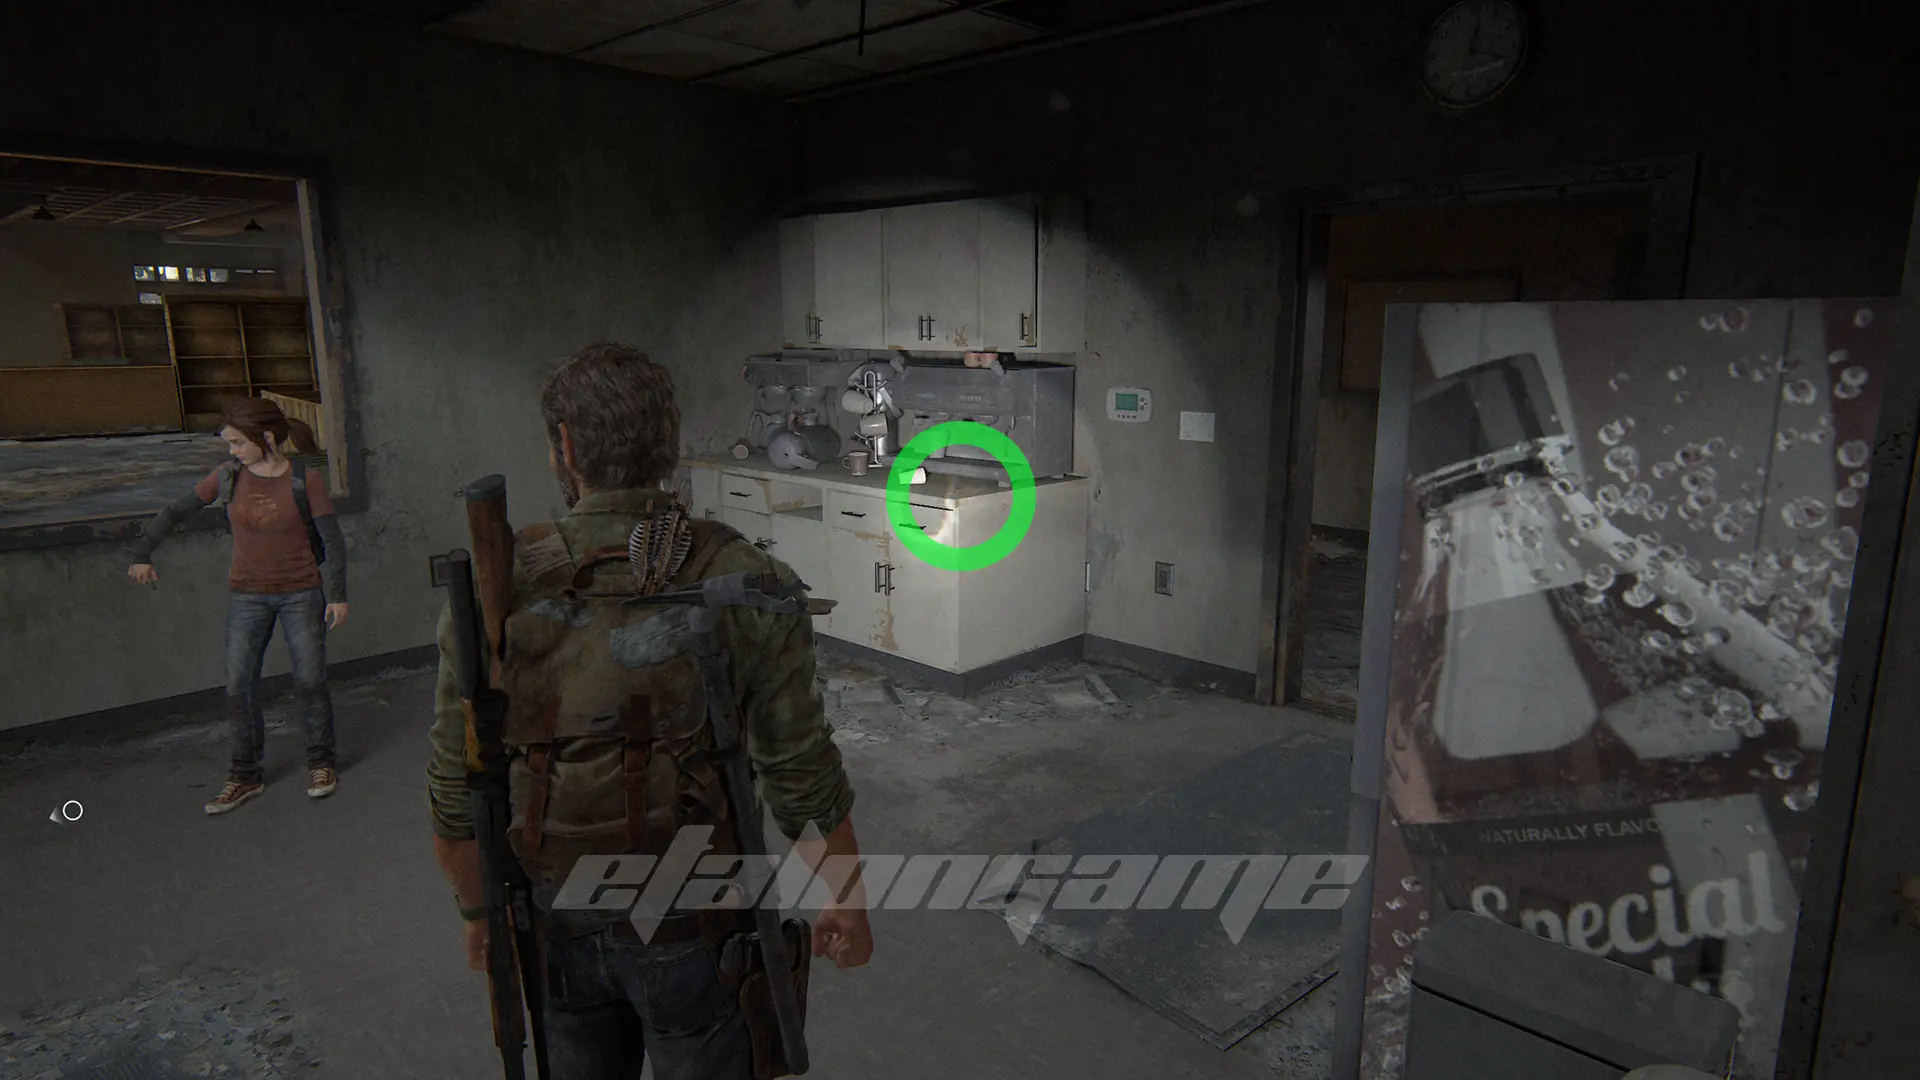
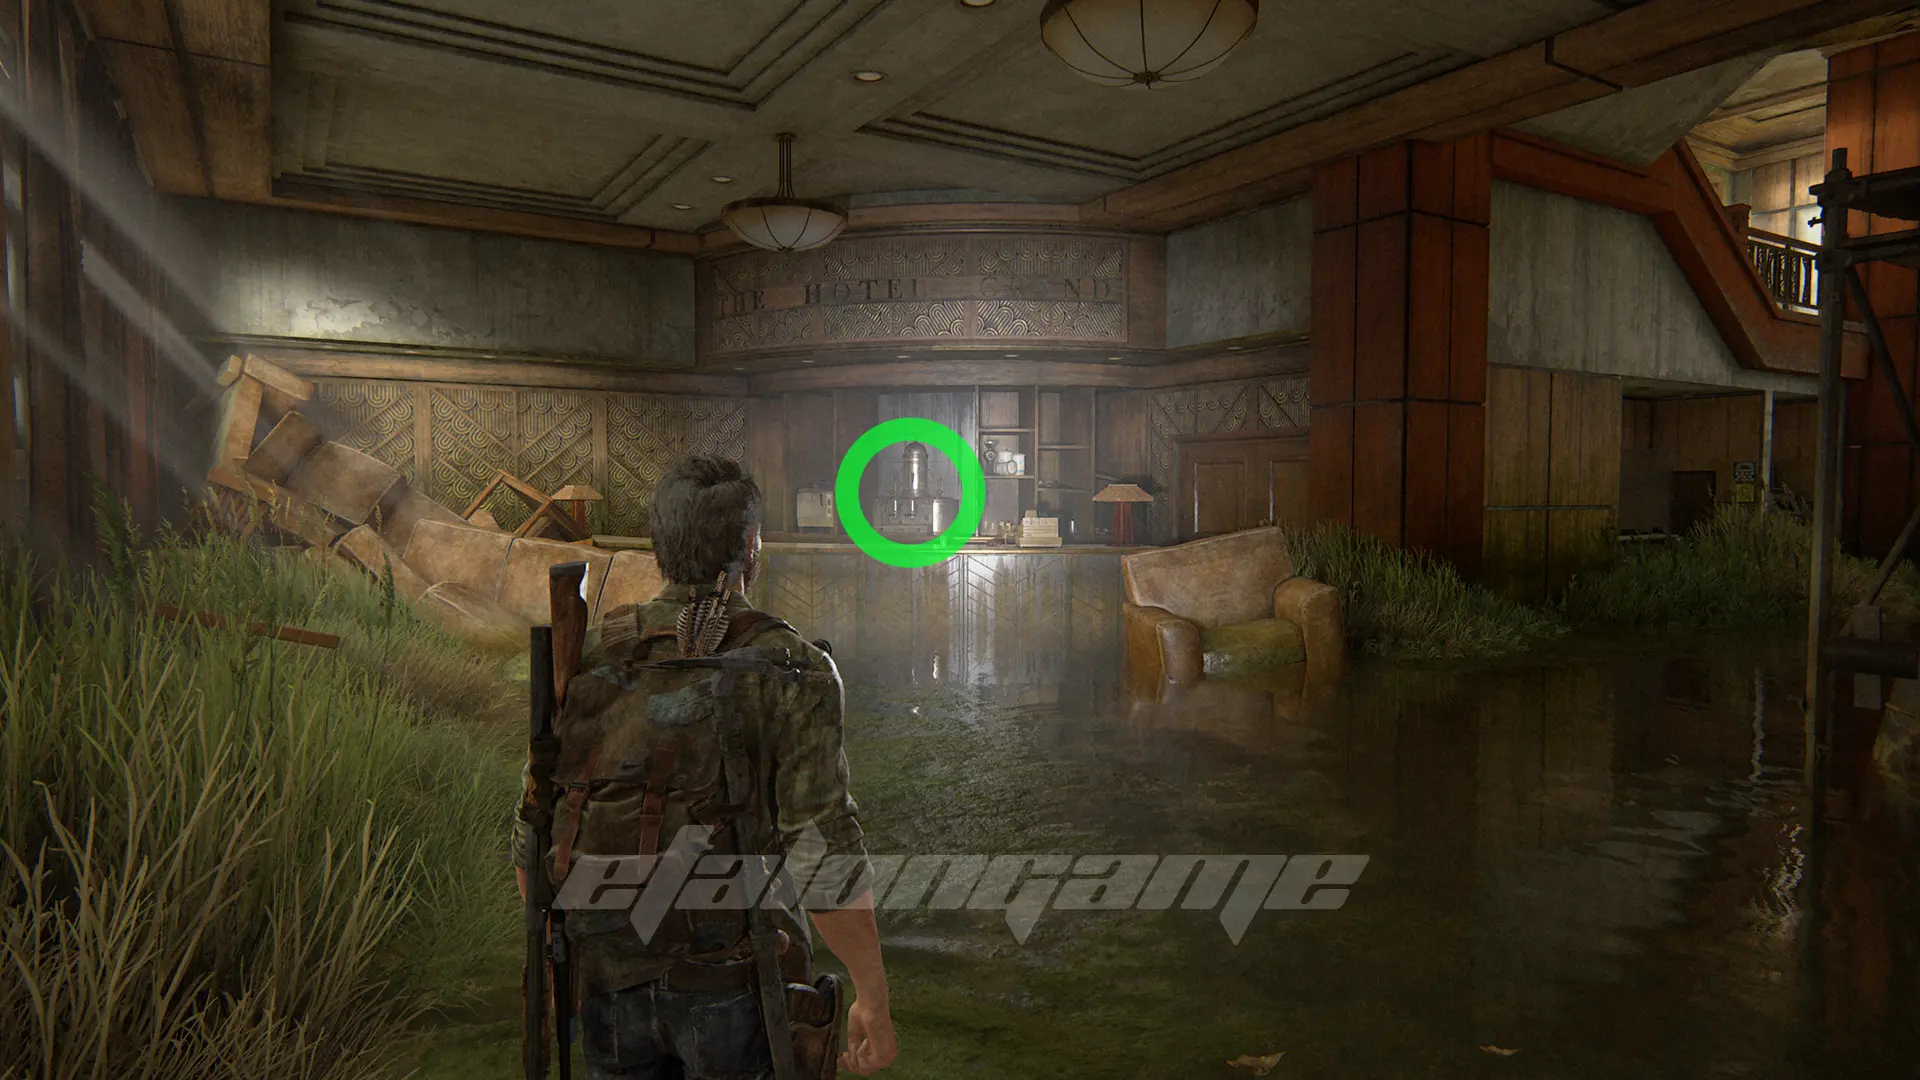
Option Conversation #5
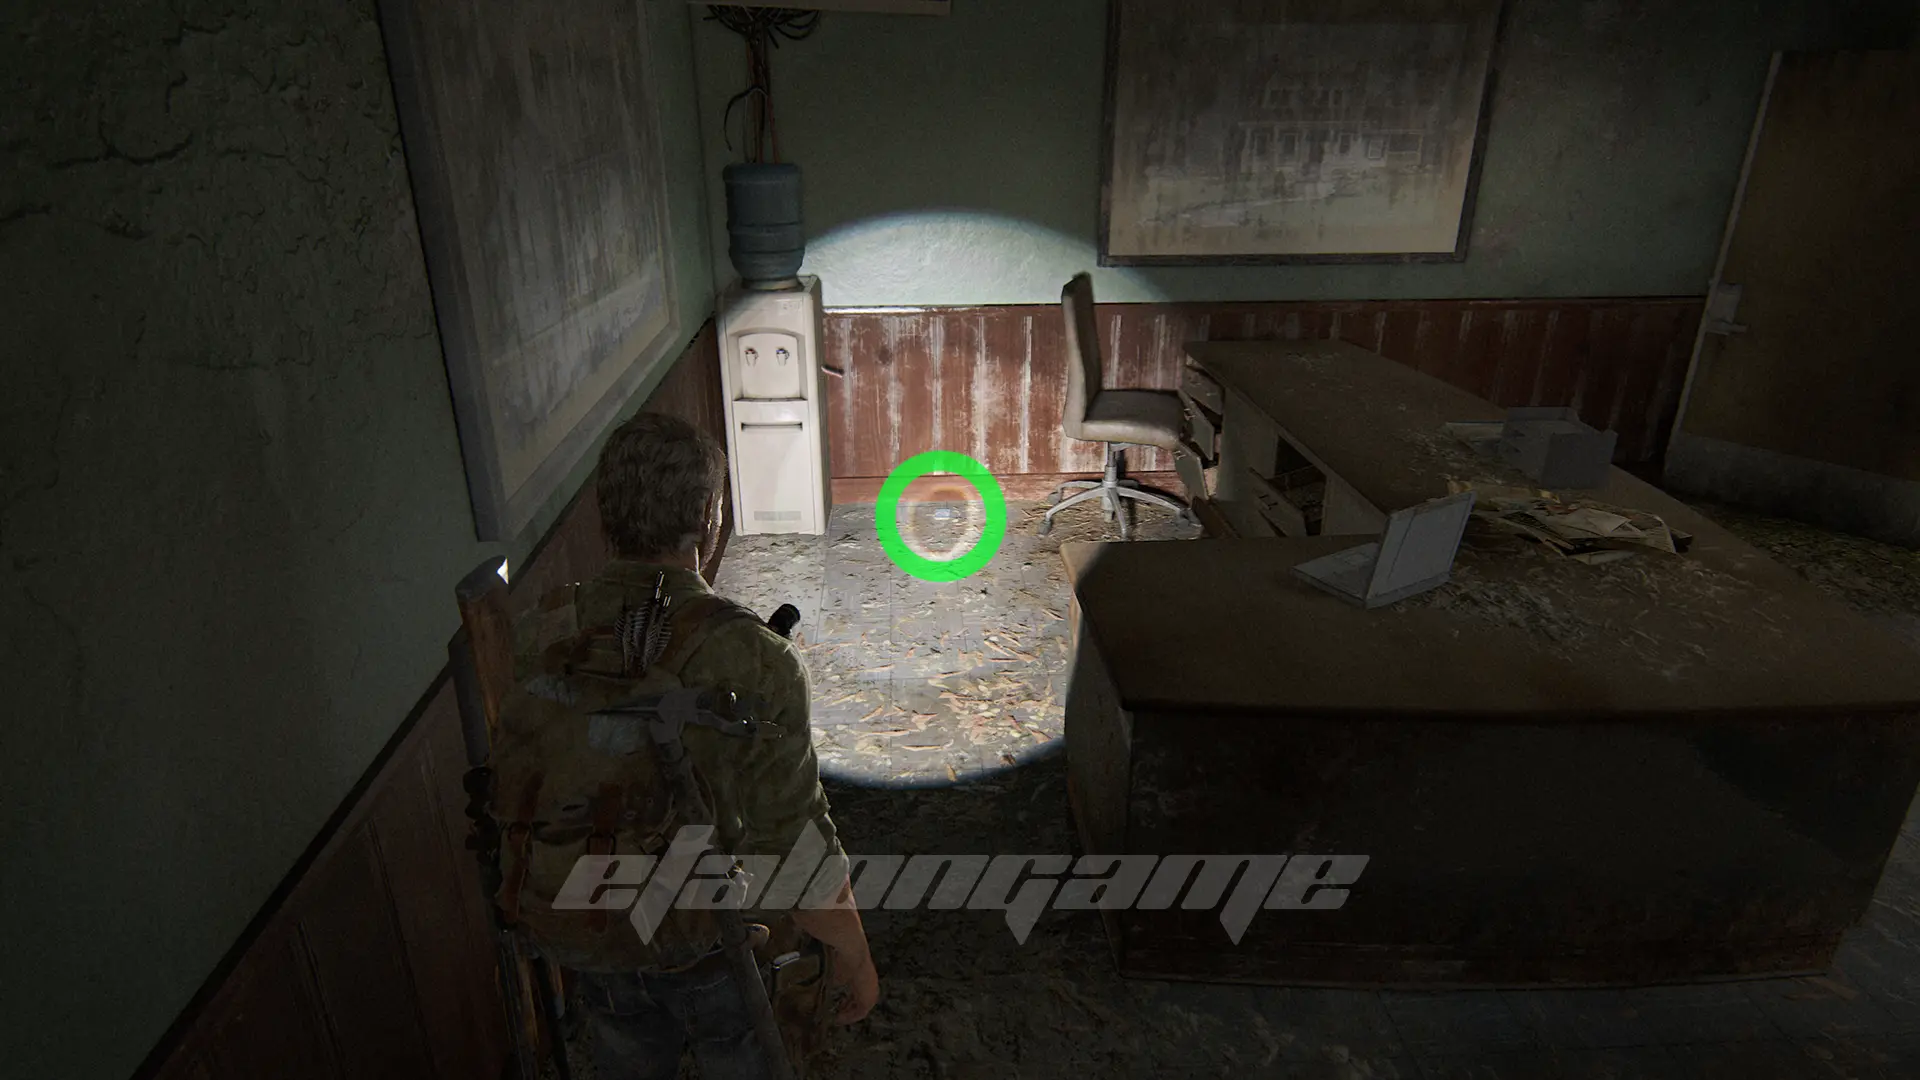
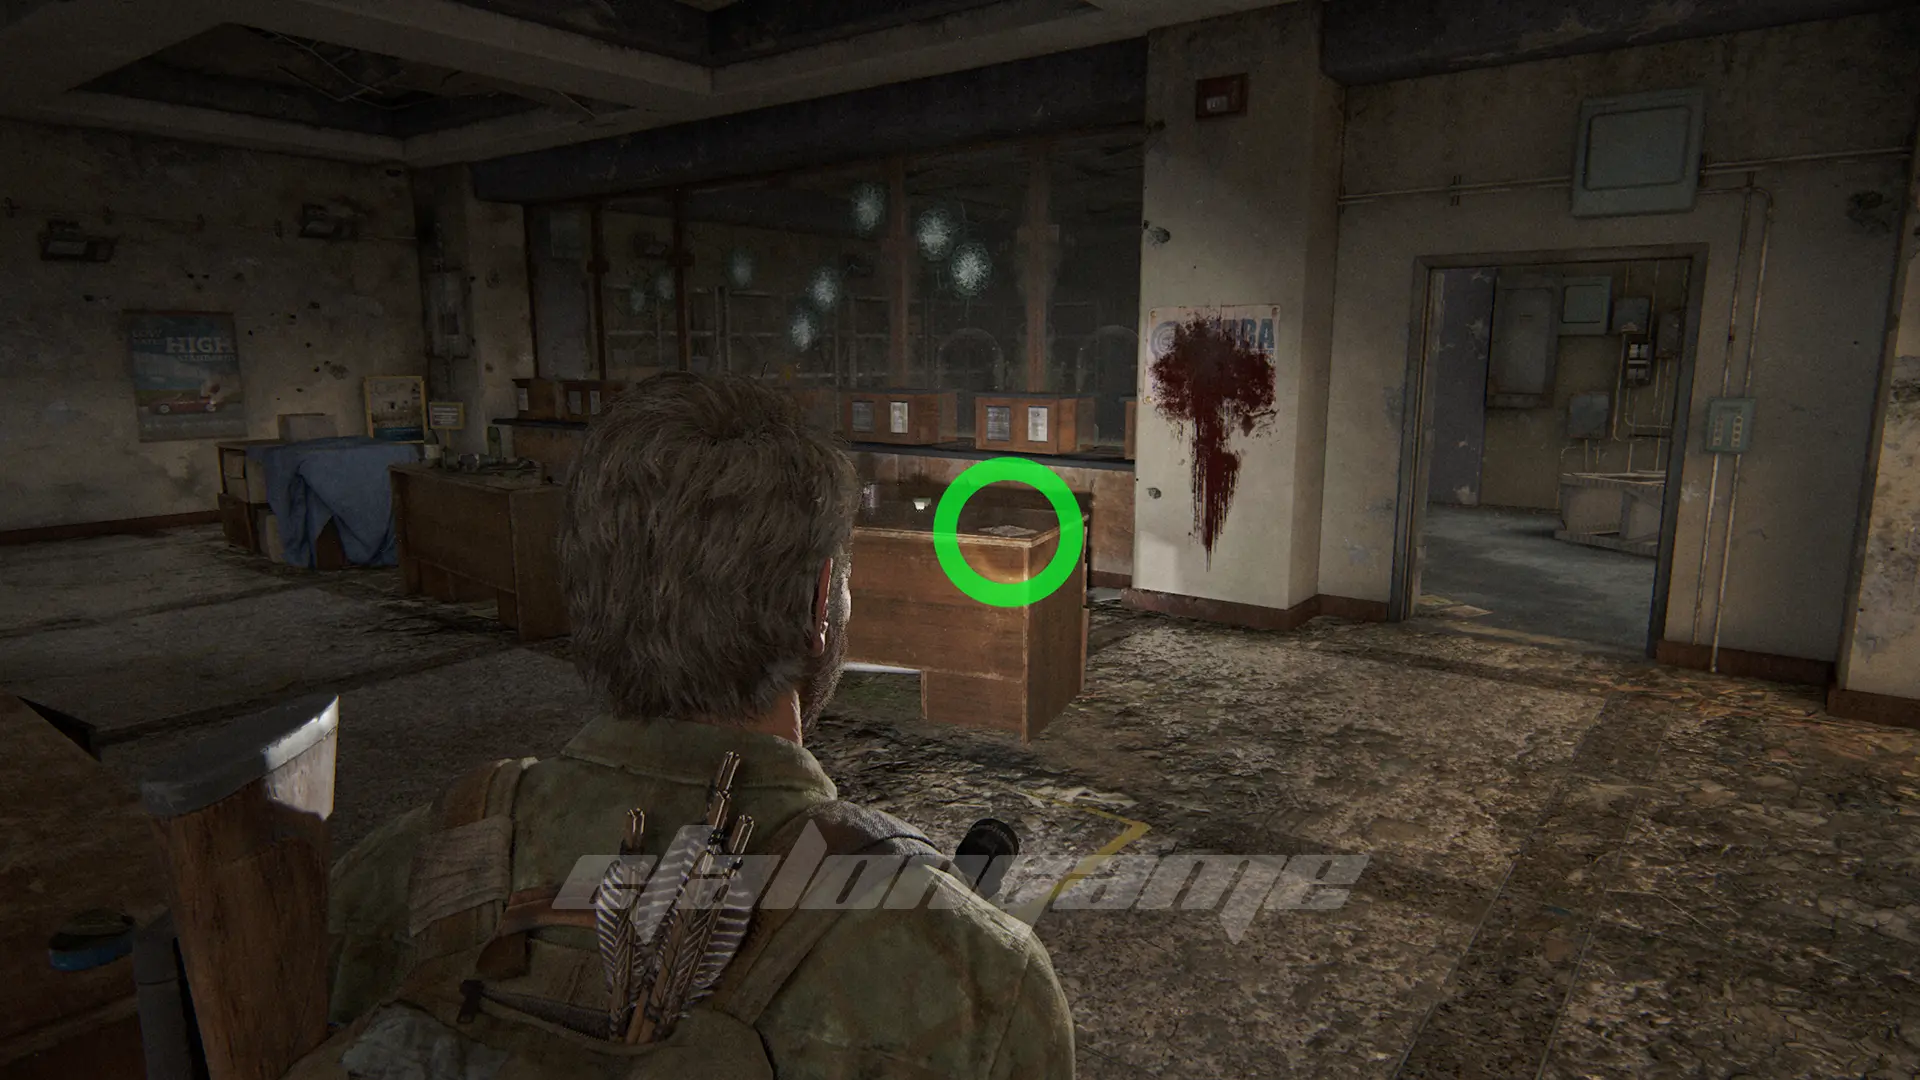
Once you’re inside the hotel, go left to the bar to examine the coffee machine.
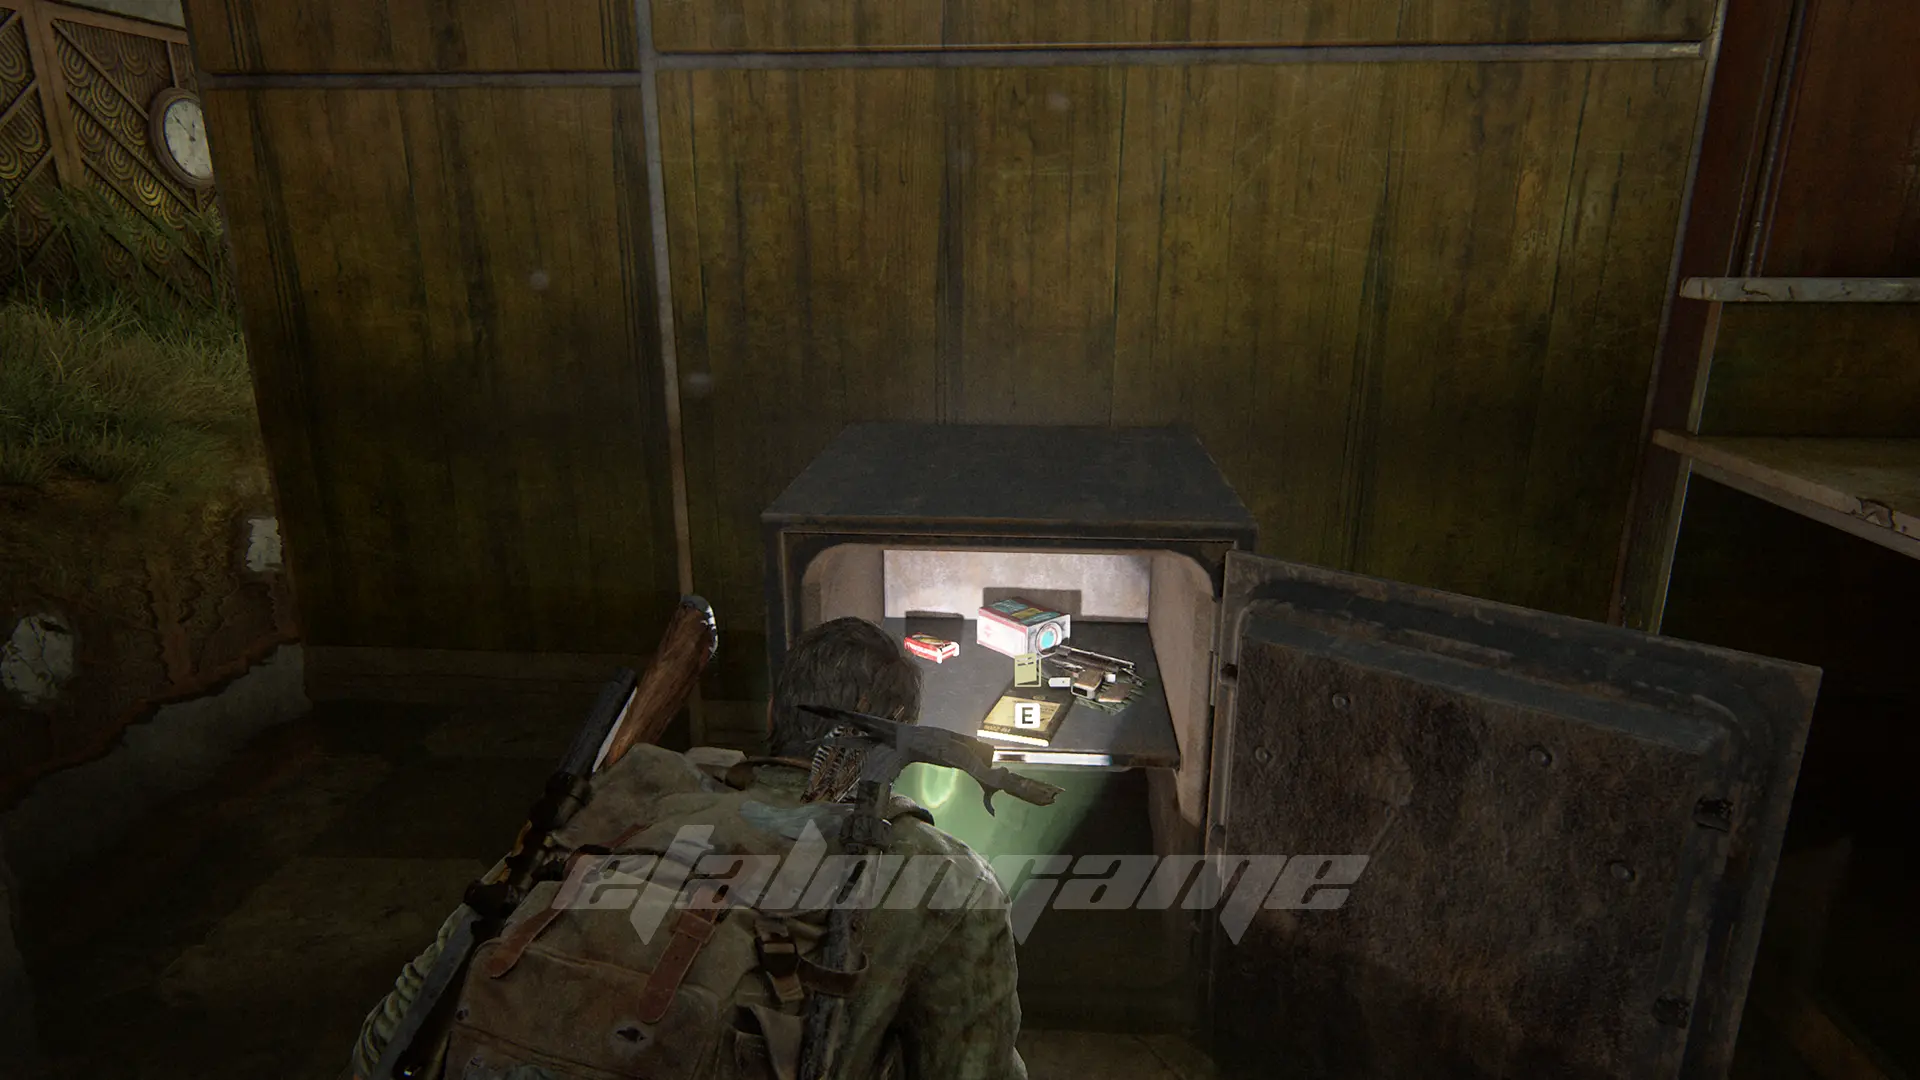
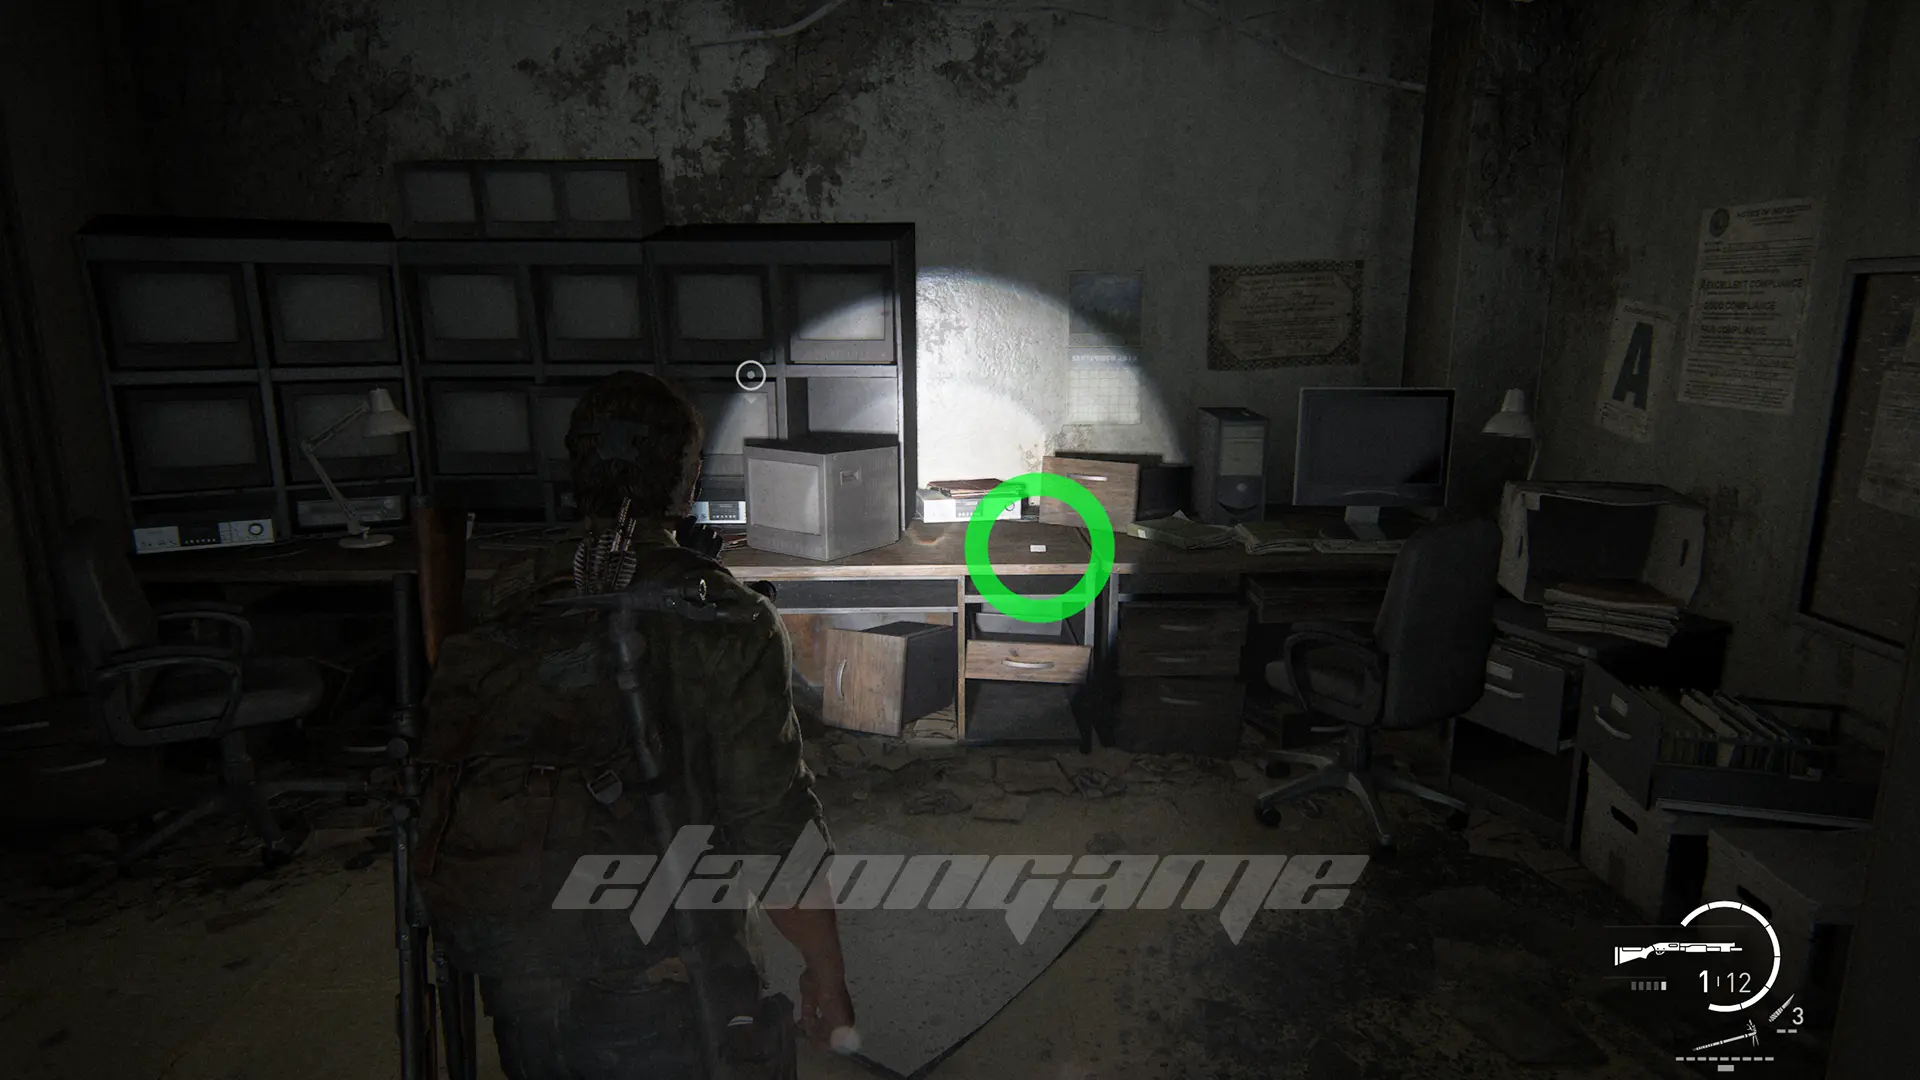
Artifact #11: Note to Staff
Use the portable ladder to go up to the second floor, then go right through the wreckage. You will find this note in the suitcase, it has the code to the safe written in it.
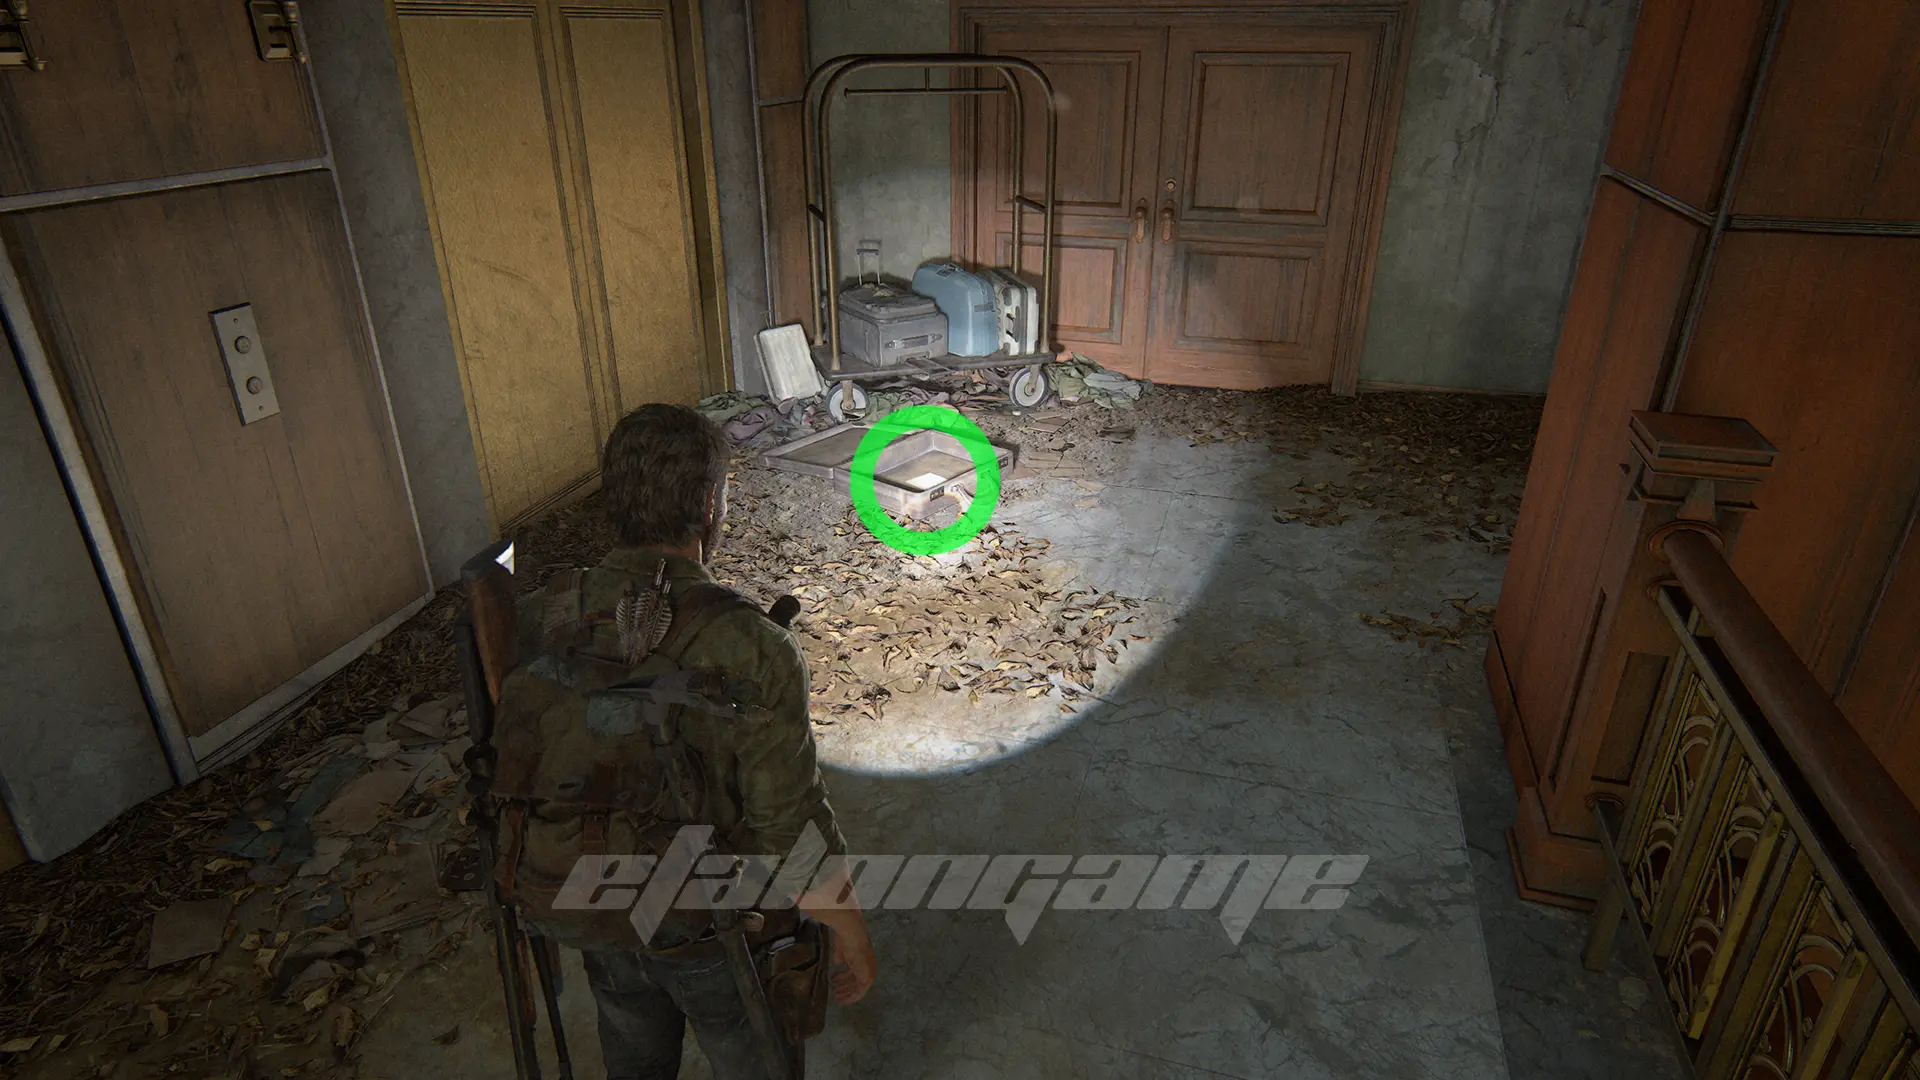
Safe
The code for the safe: 22-10-56
Go back to the first floor and go to the reception area in the opposite corner of the hall. There is a safe there with parts for the workbench and a tutorial.
Training Manual #2: Melee – Knots
Inside the safe lies a tutorial that will increase the strength of your sharps.
Ellie’s Joke #4
Climb back up to the 2nd floor using the portable ladder and stand still for a few minutes. It may take Ellie longer to get the joke book, just wait.
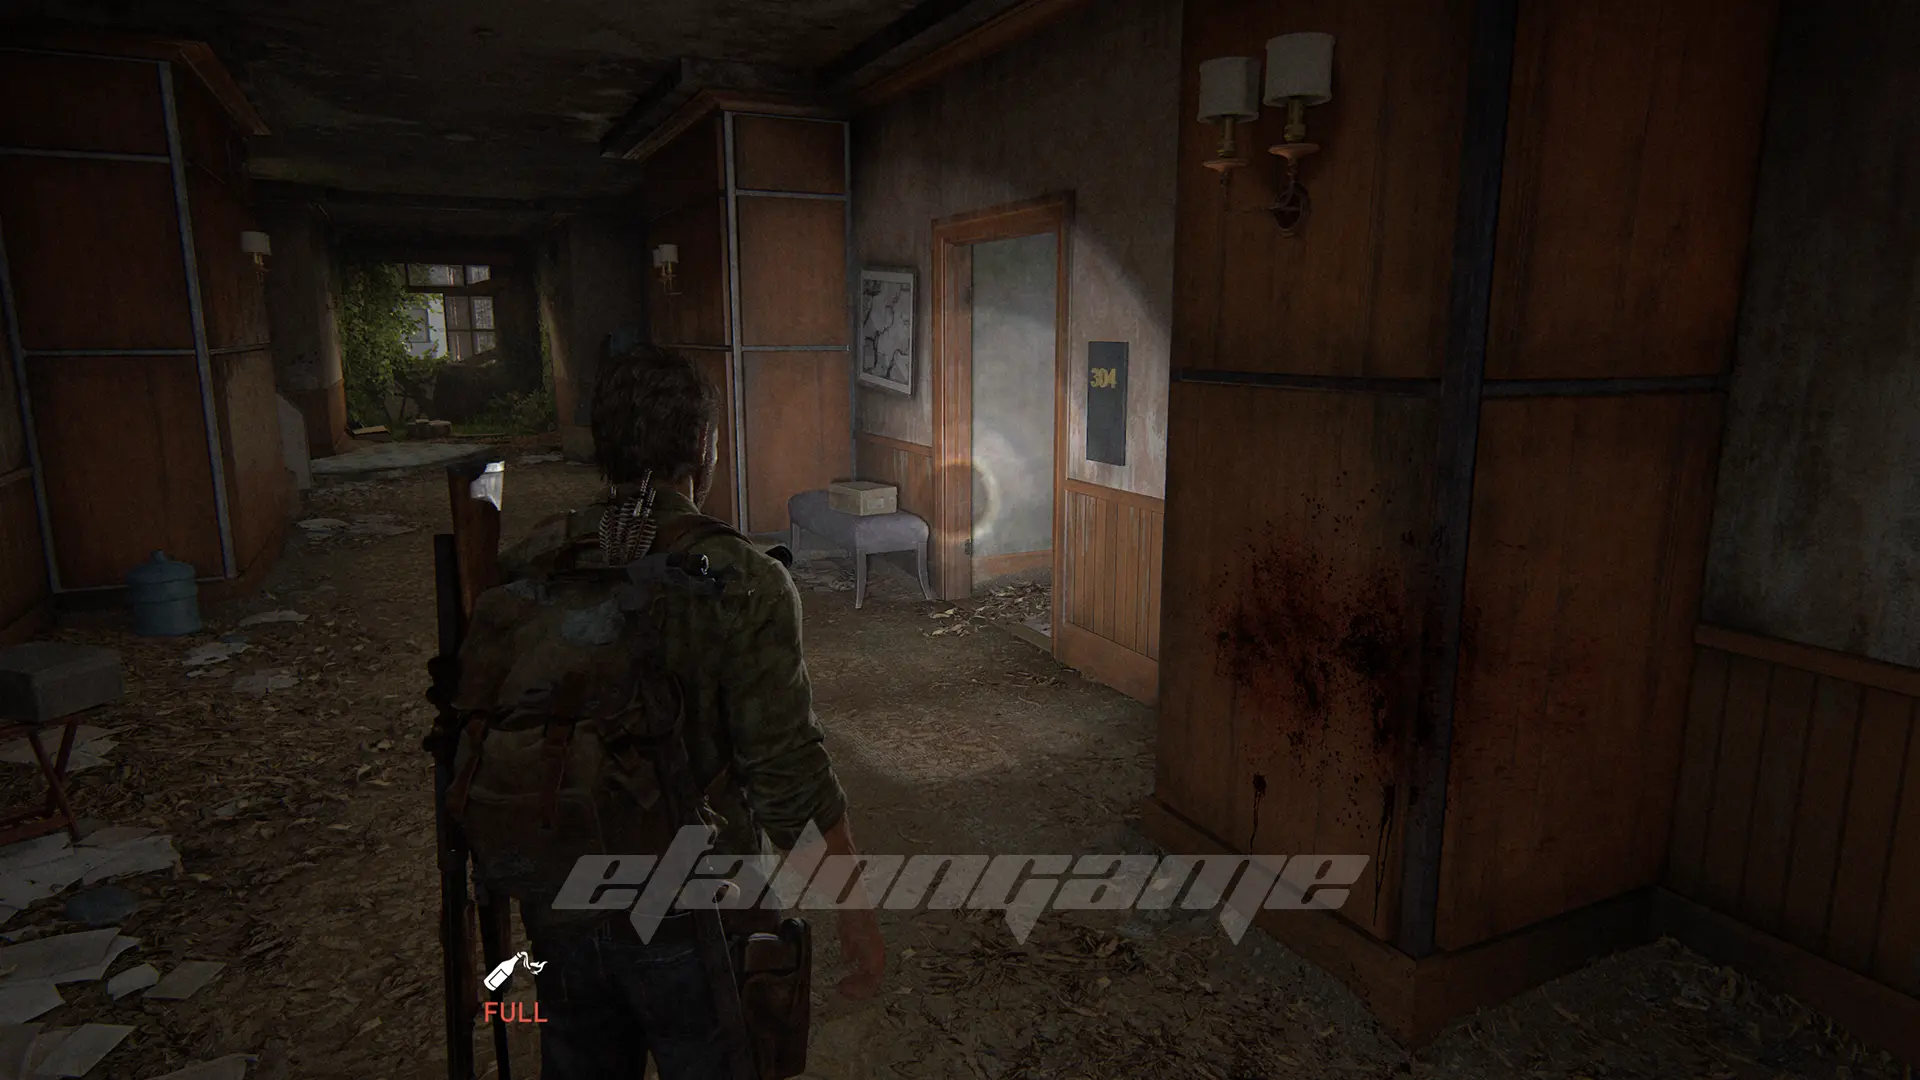
Option Conversation #6
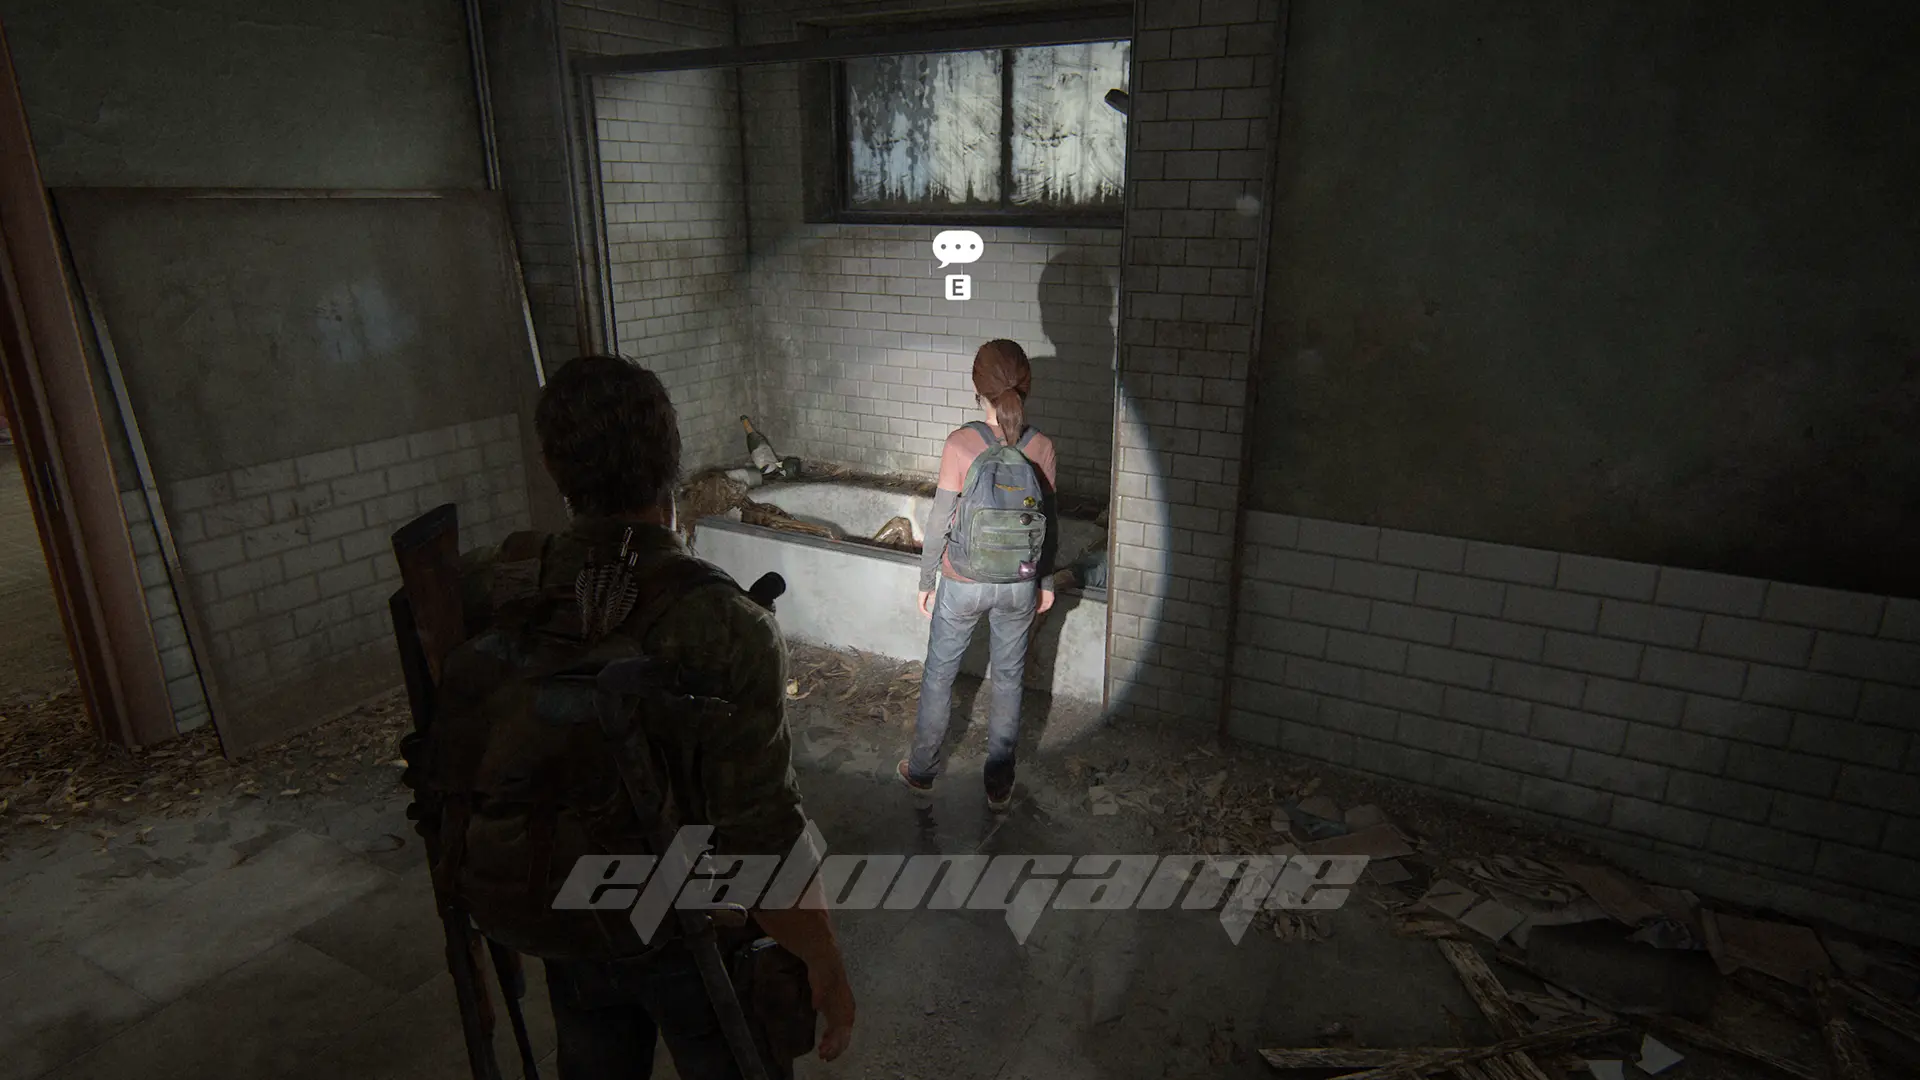
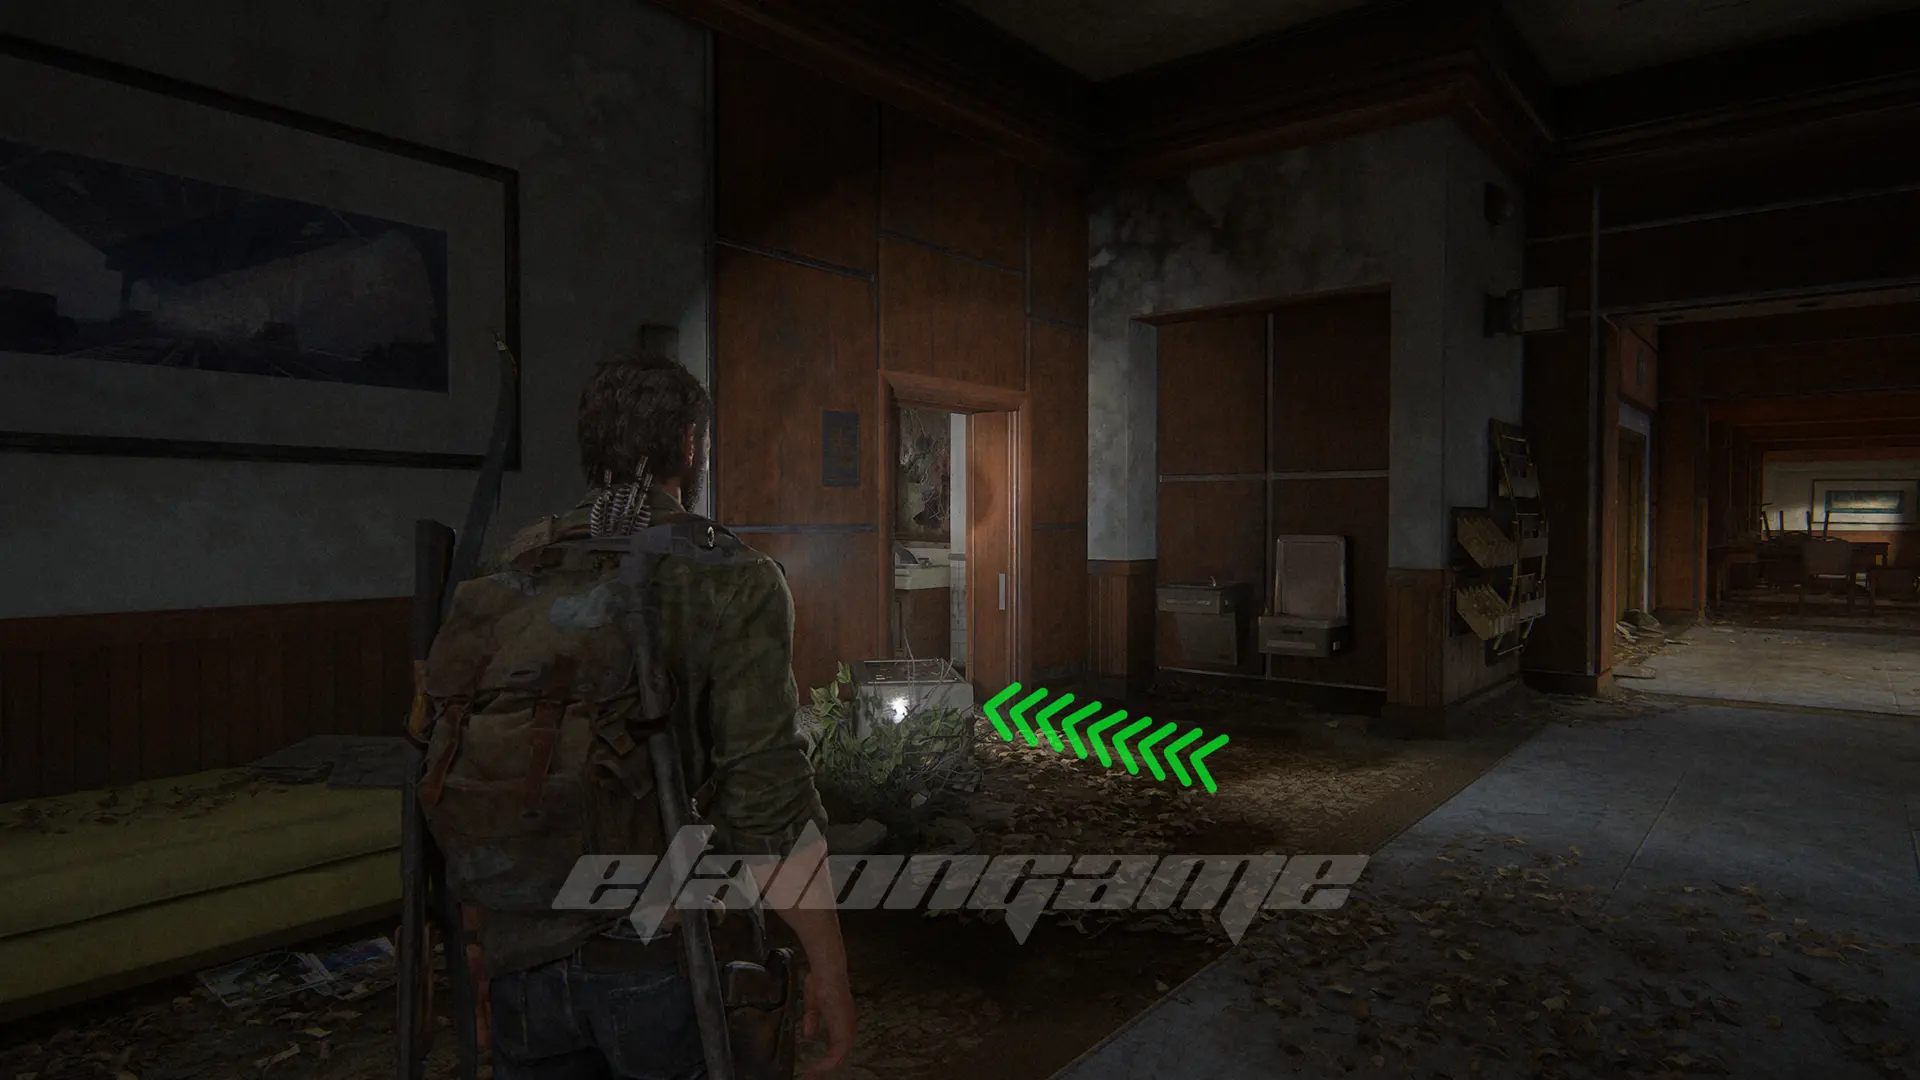
After going upstairs and dealing with all the Hunters, you need to find room 304. Ellie will want to talk to you by the body in the bathroom.
Artifact #12: Hotel Pass
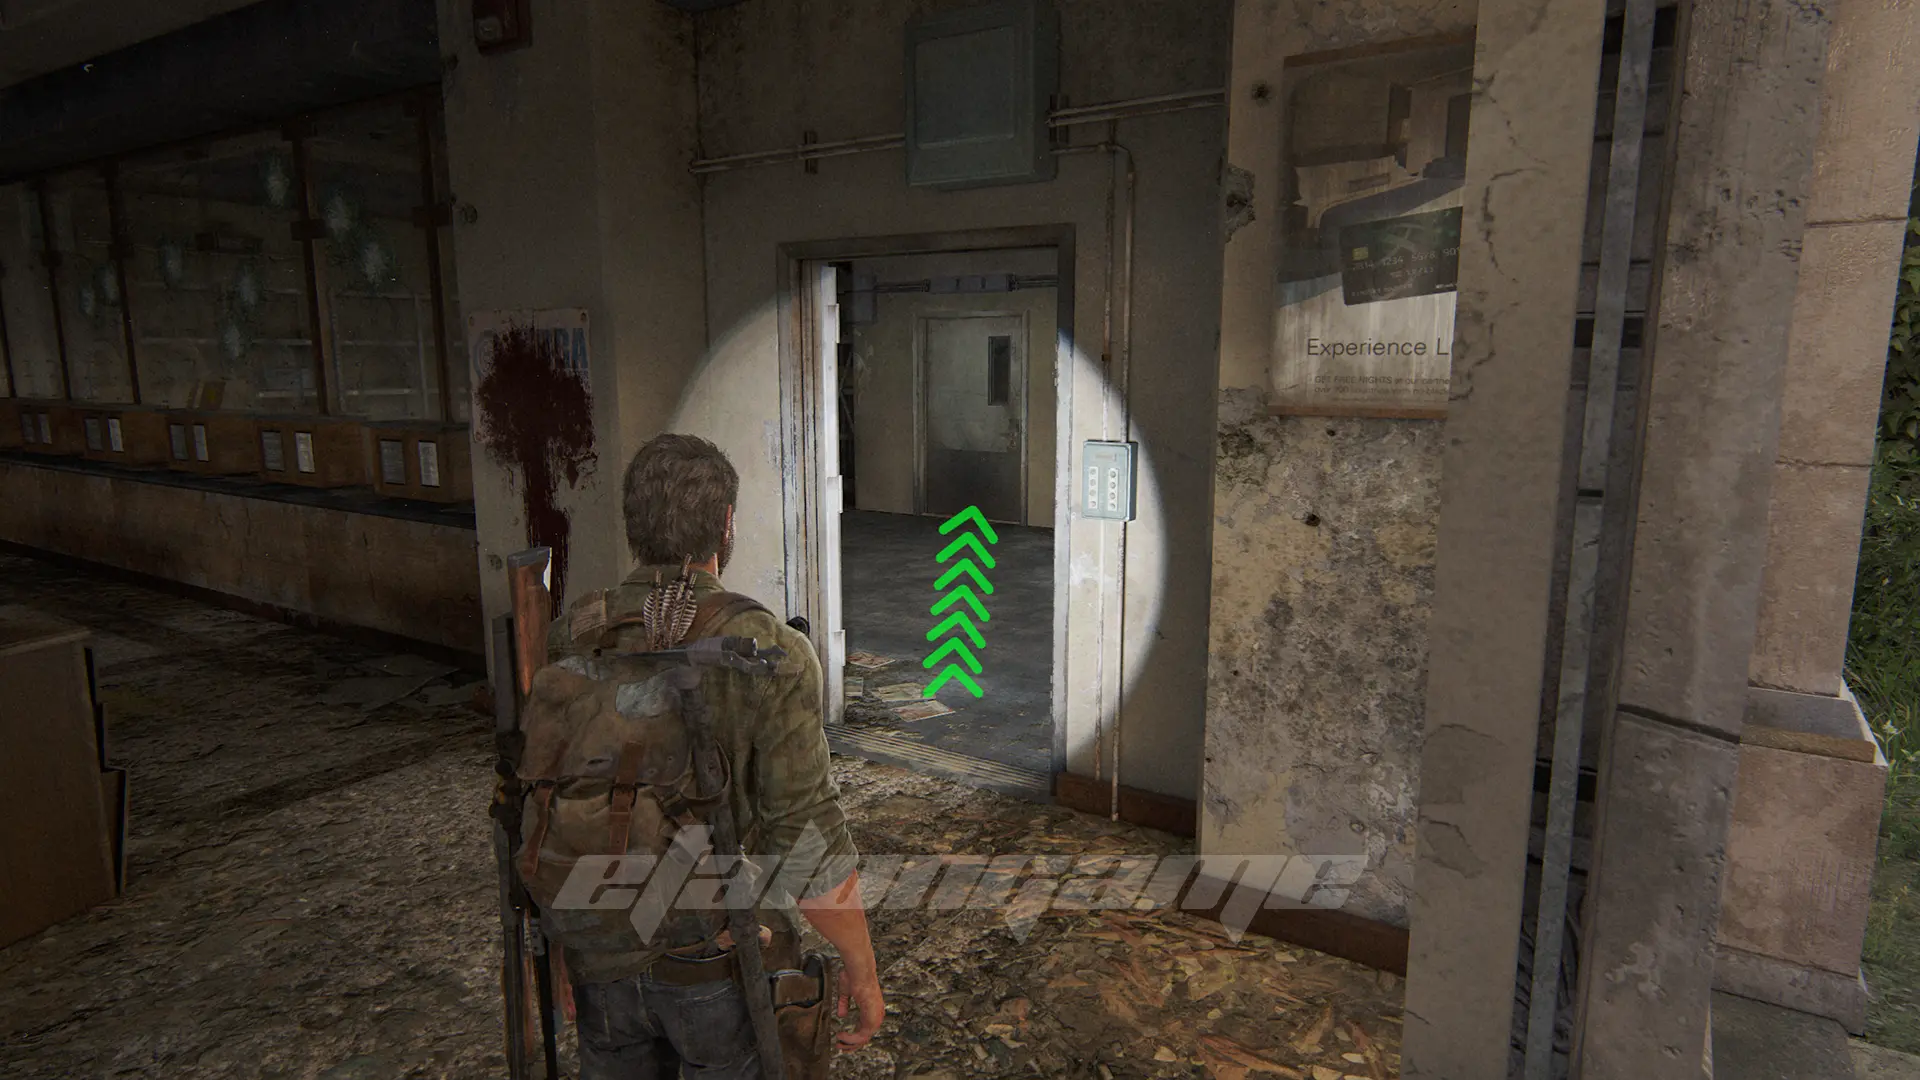
A story item that you will need during your adventures in the basement. Lies on the table in the security room.
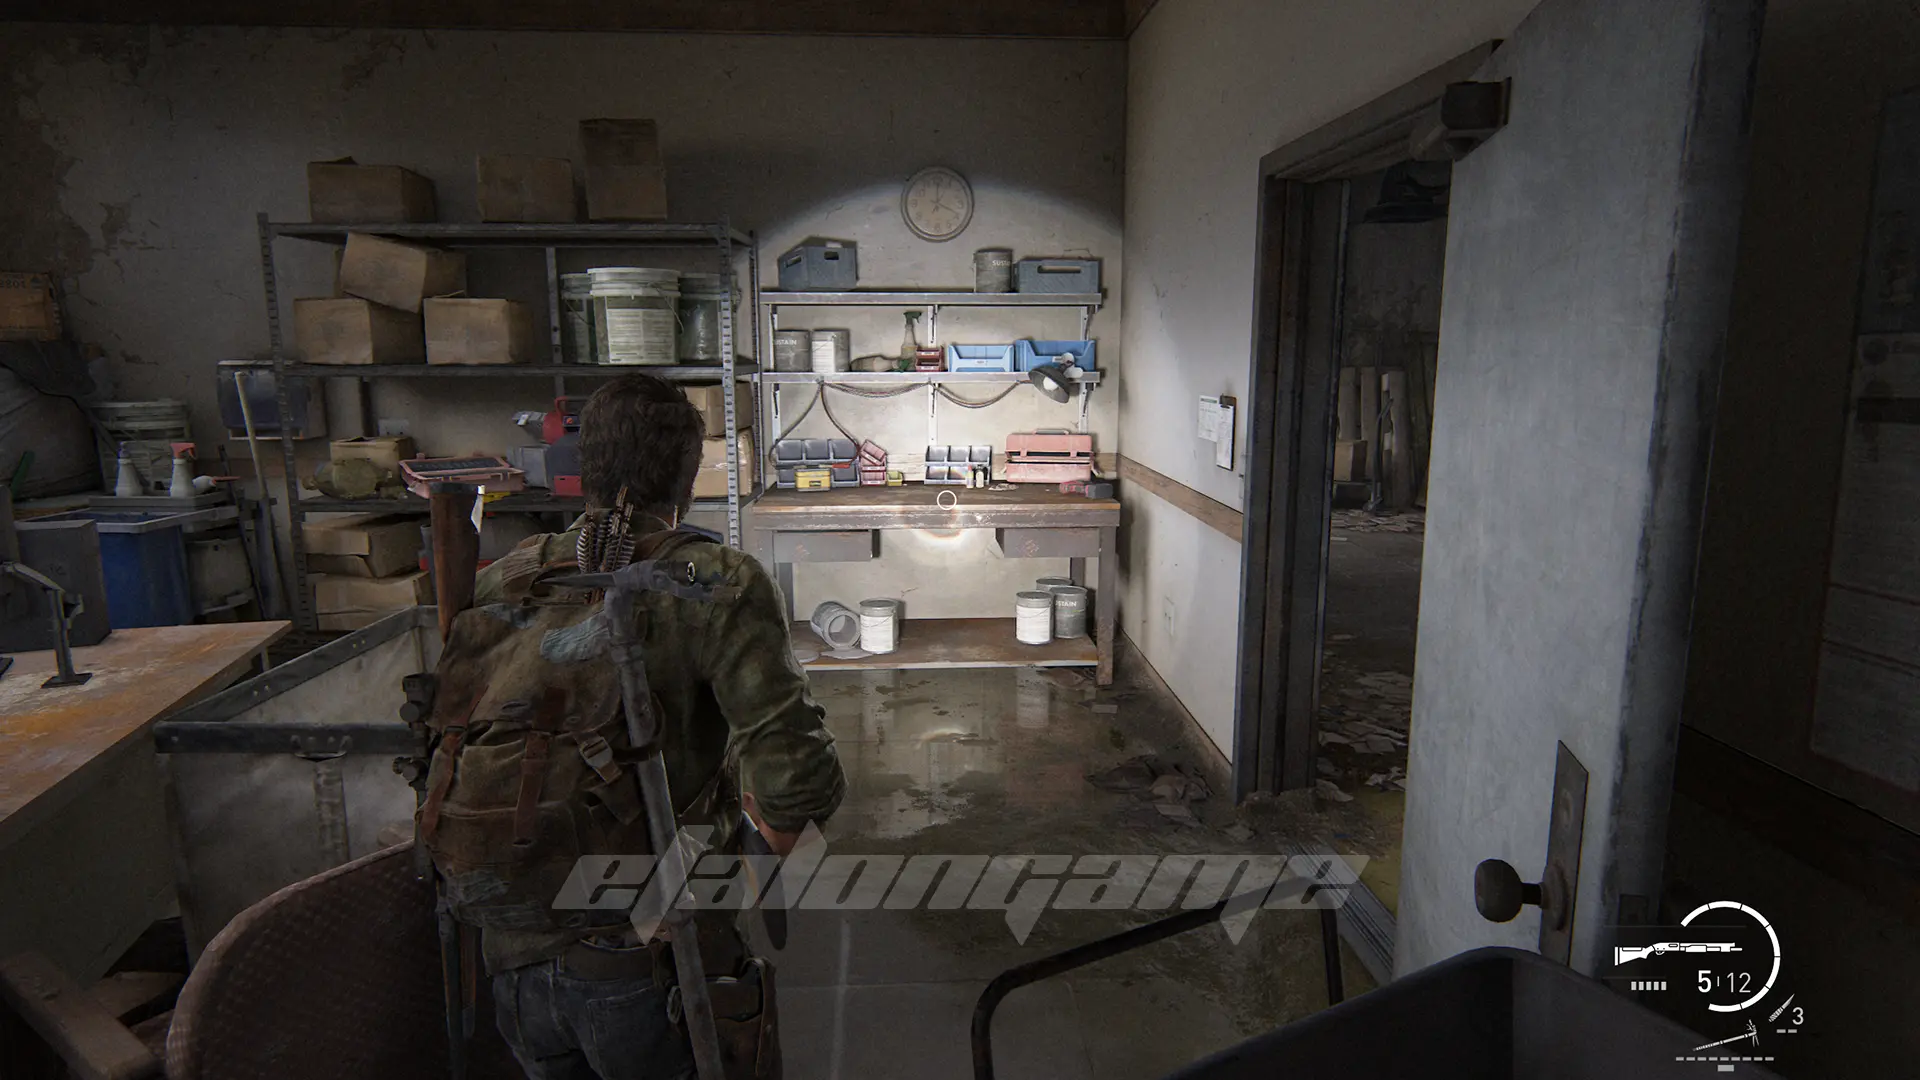
Workbench #2
Once out of the basement, you’ll find this workbench in the room on the right.
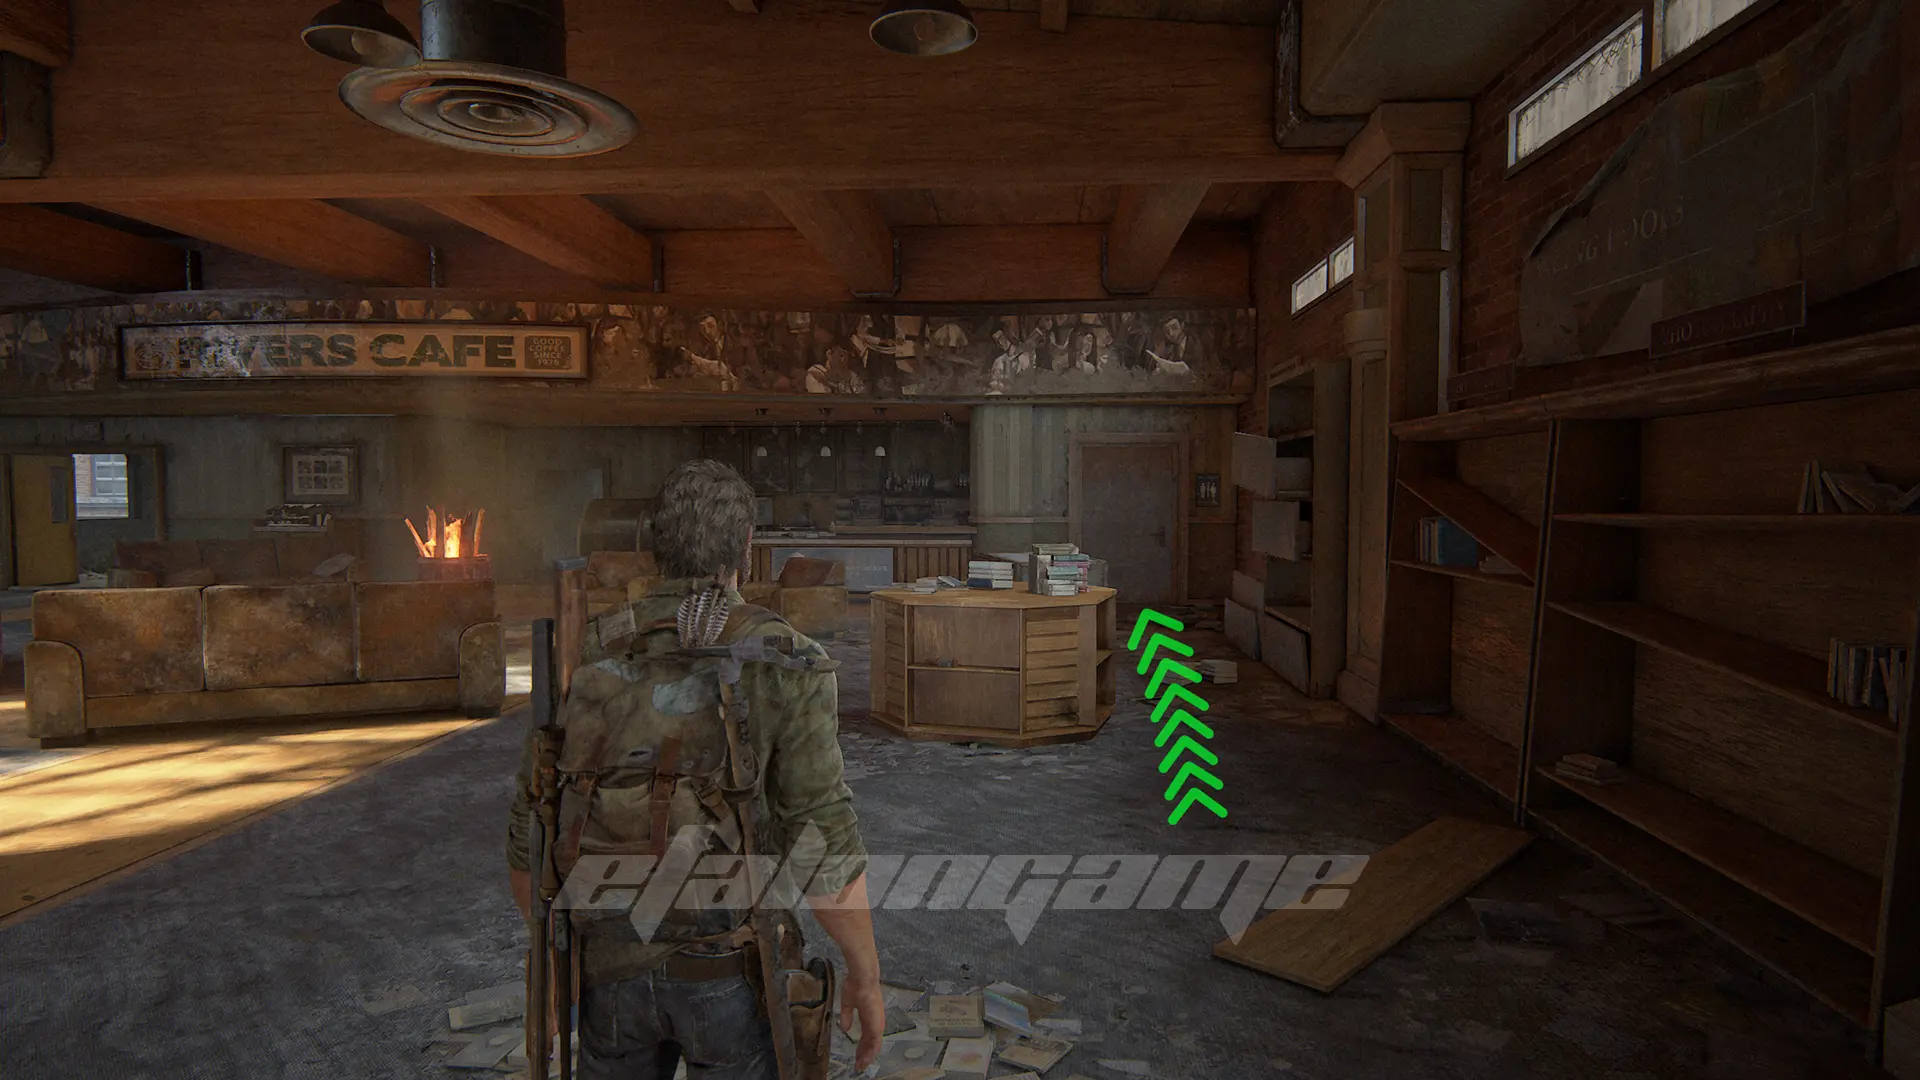
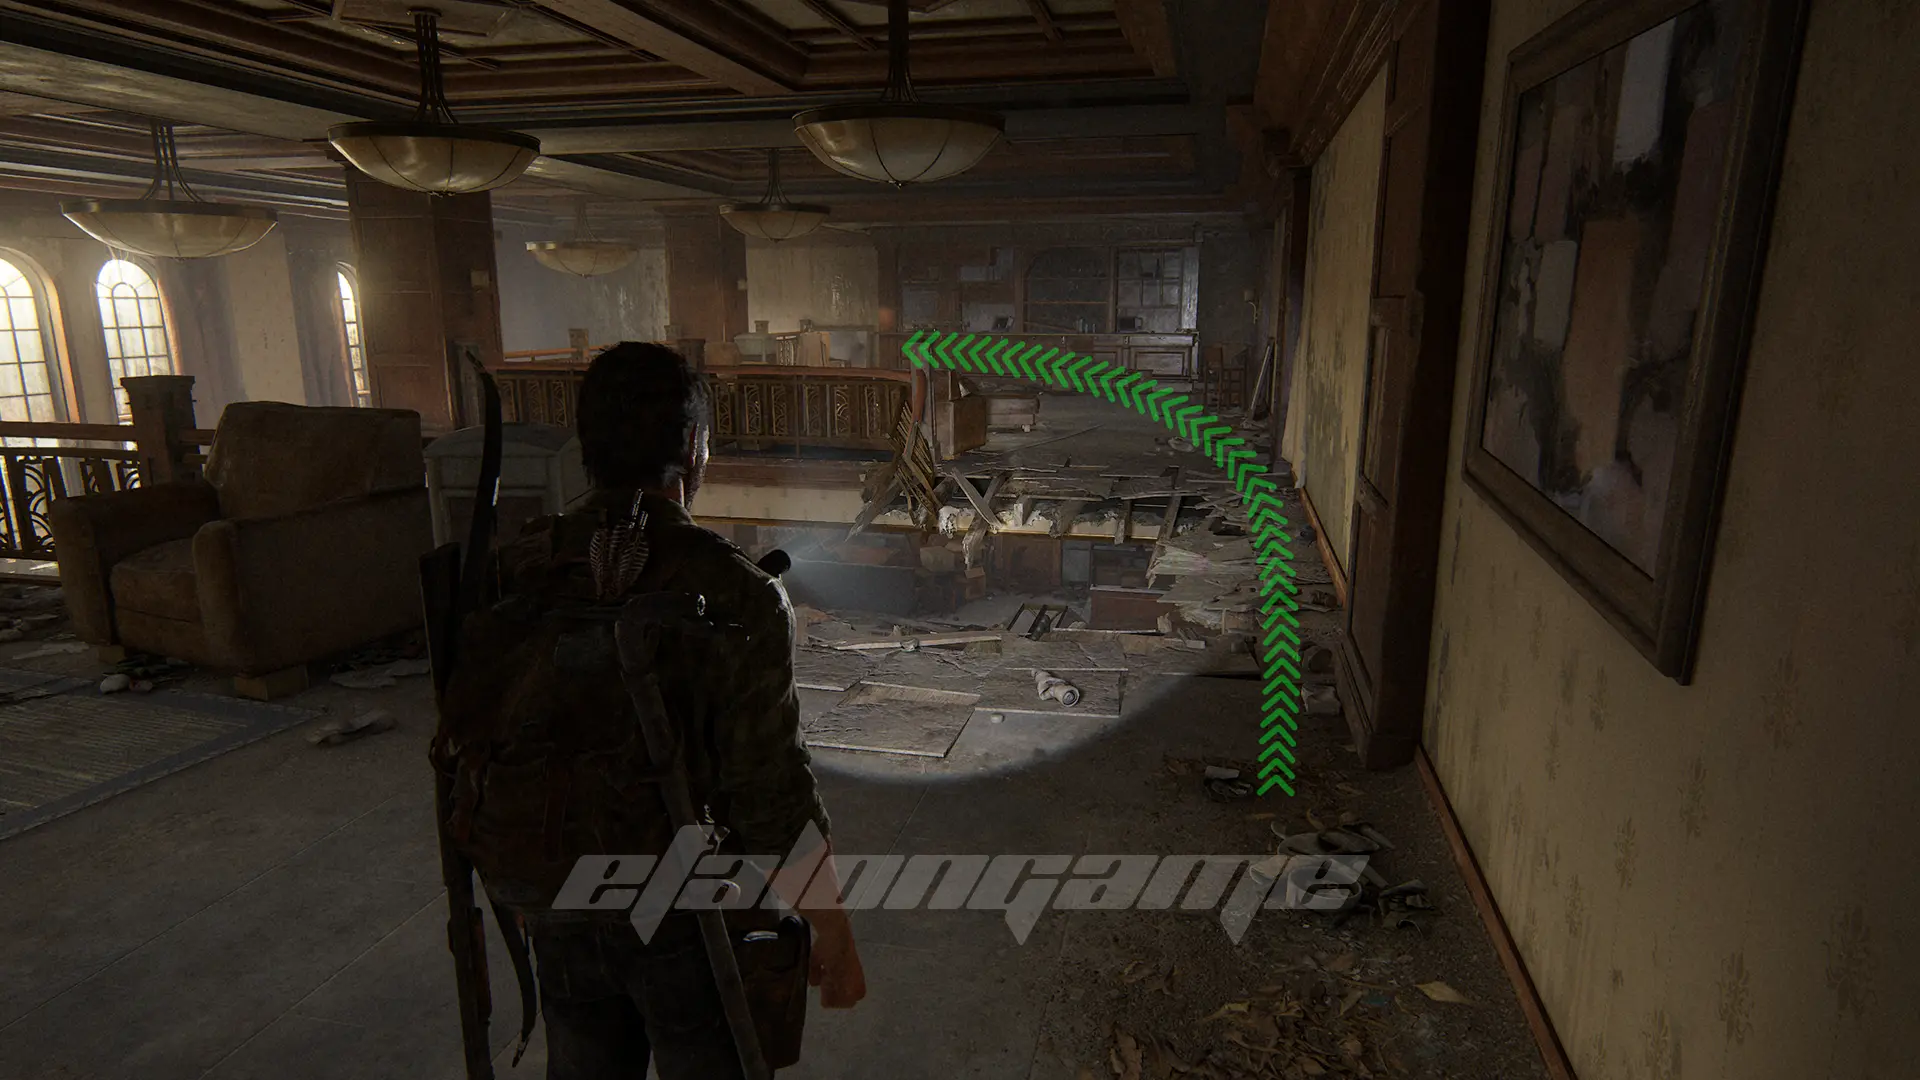
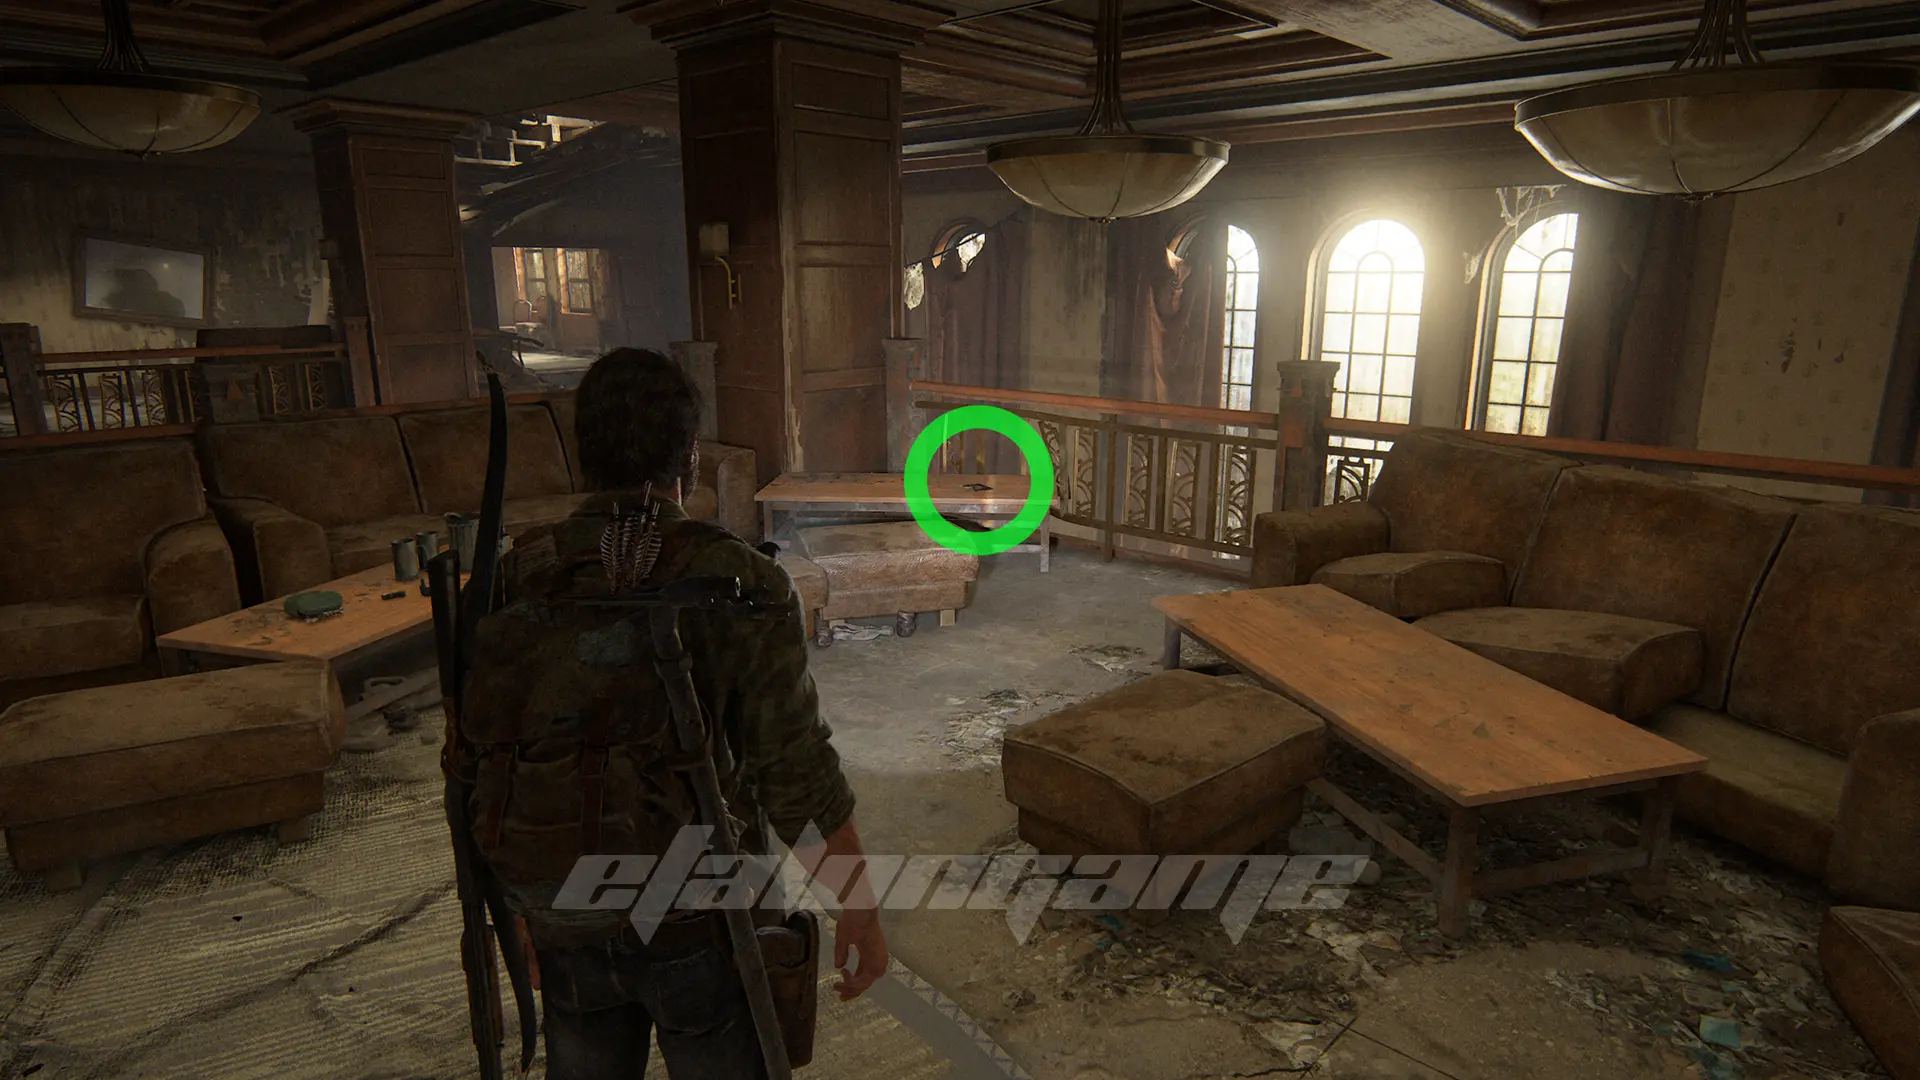
Comics #2: Accretion
When you meet Ellie, take the stairs to the balcony and then immediately turn left. Through the debris, make your way to the area with the couches to find this comics on the table.
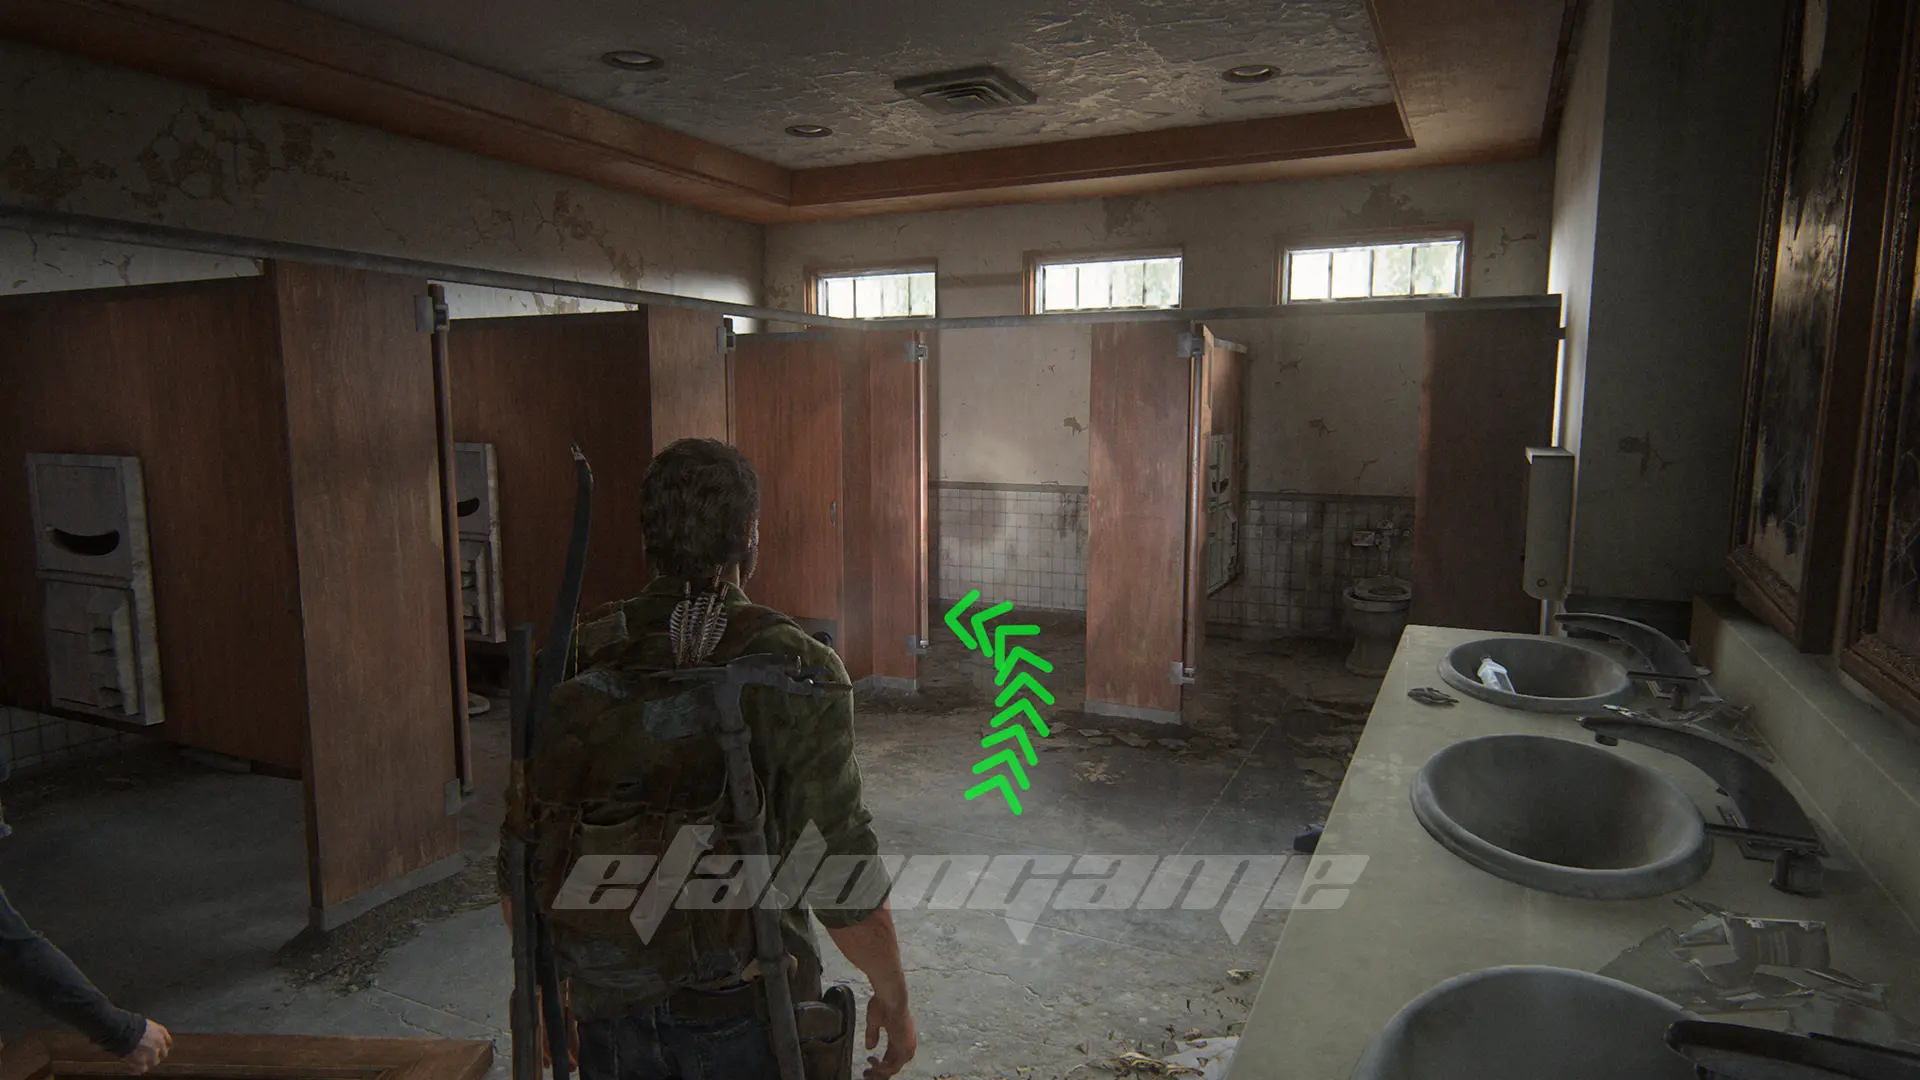
Firefly Pendant #2: Reed
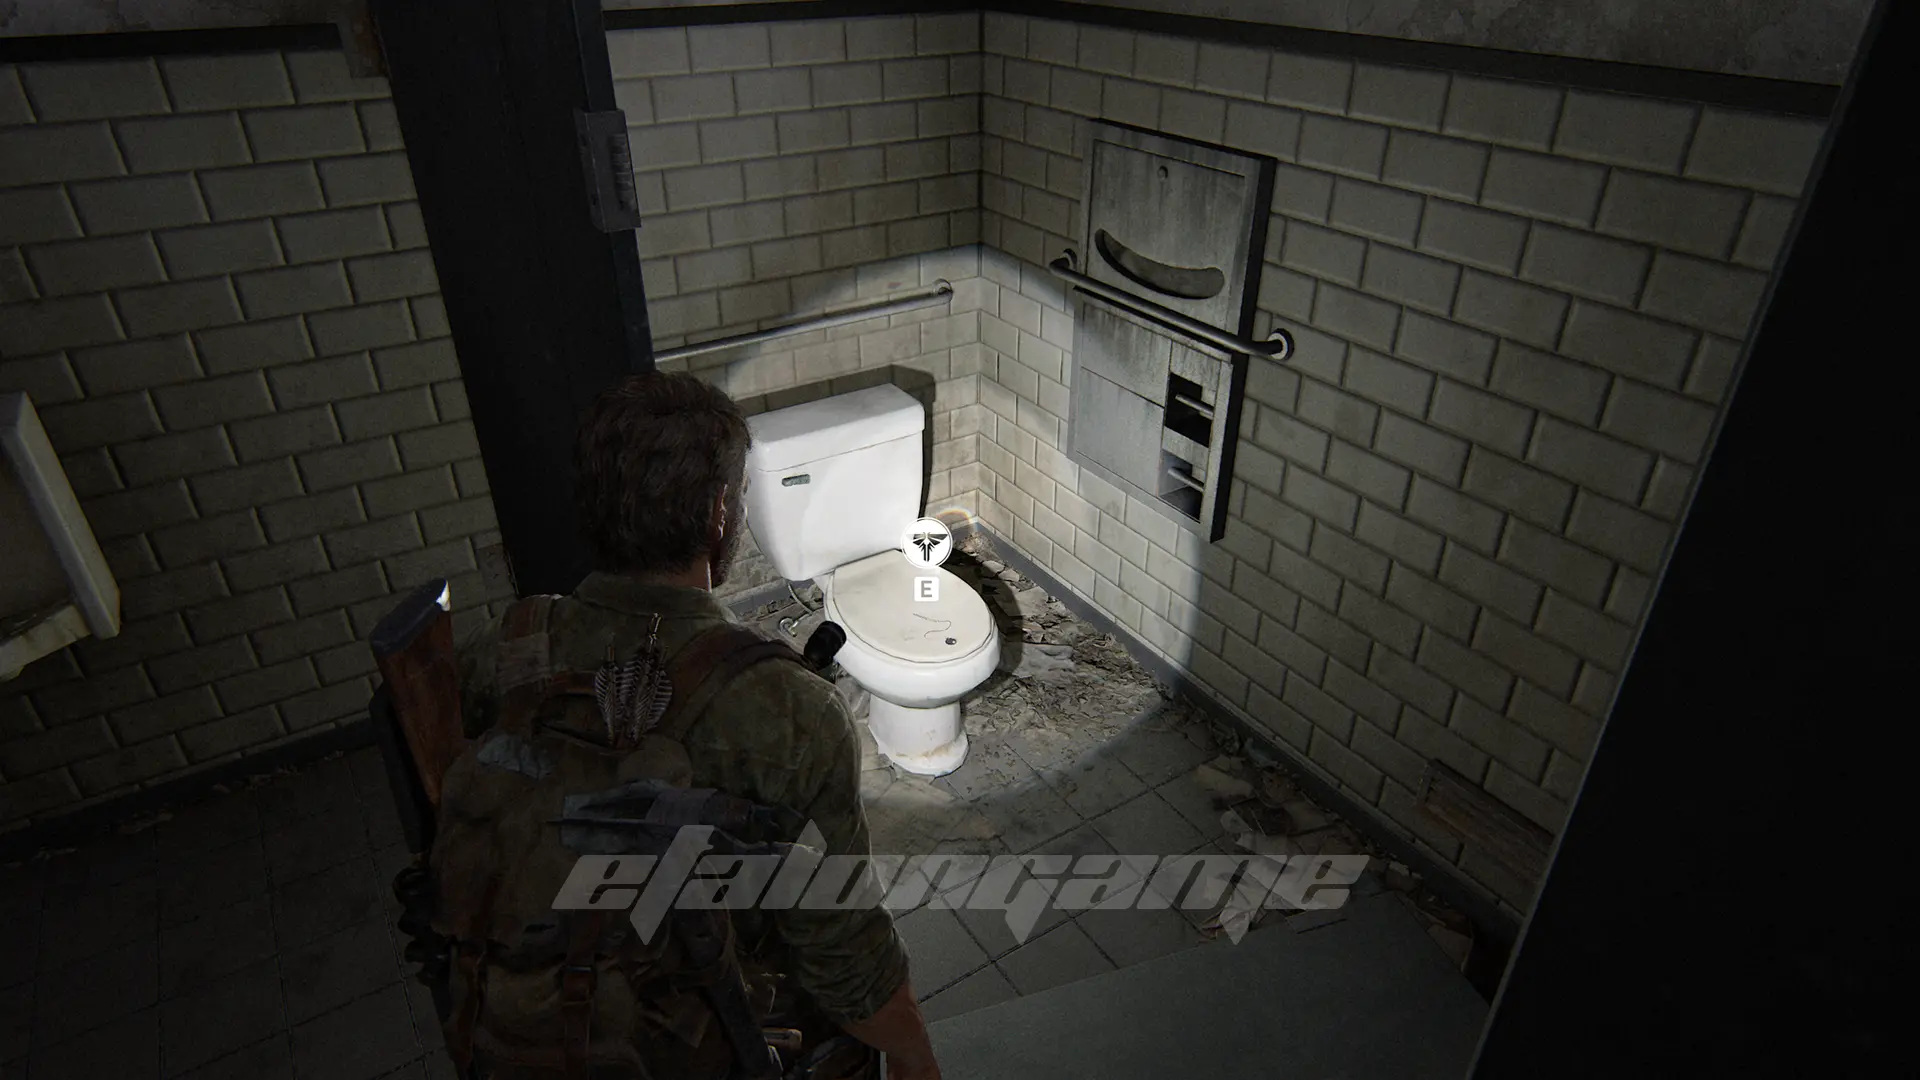
Walk forward until you jump down the ruined stairs. There will be restrooms on your left. Go into the women’s one to find this pendant on the floor in one of the stalls.
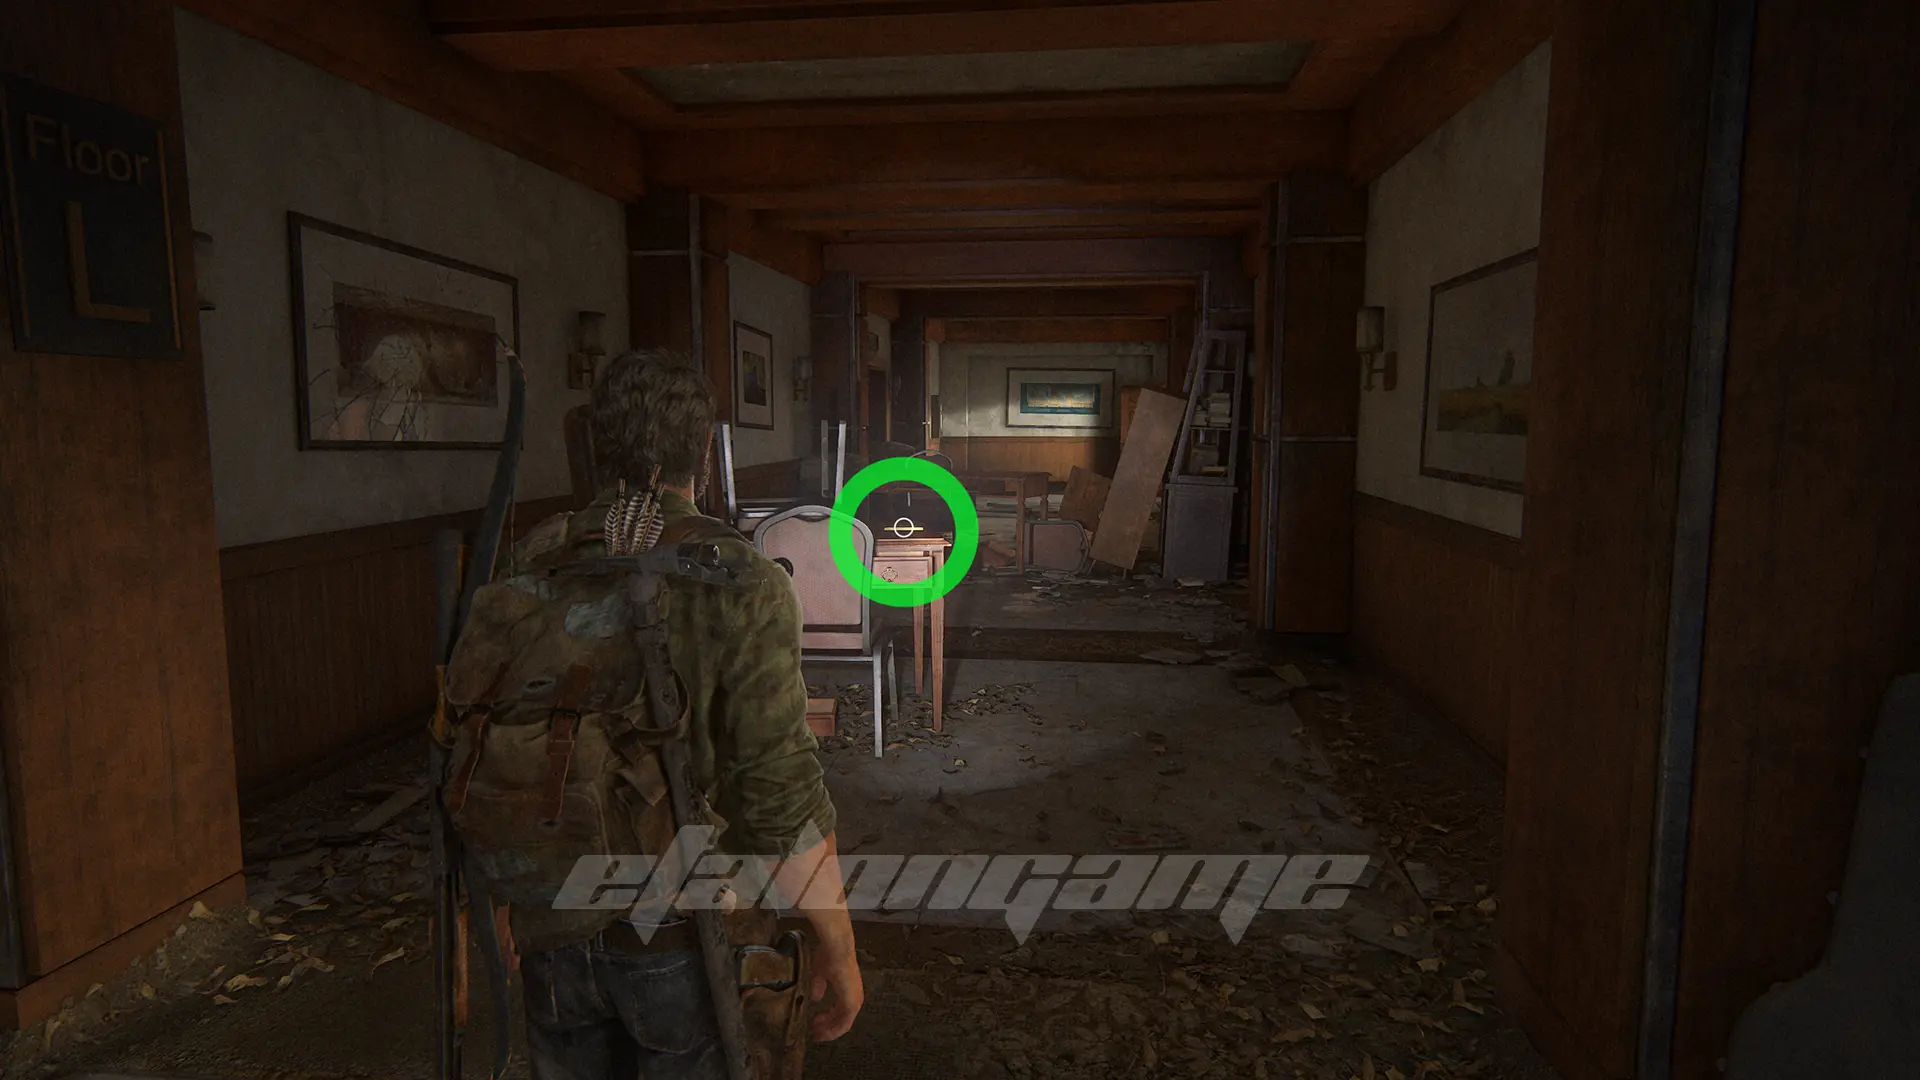
Training Manual #3: Melee – Knots
Go forward down the hallway and pick up the tutorial from the table, which will make your modifications withstand one more hit.
Option Conversation #7
Go to the dining hall and go to the photo area to listen to this dialogue. You need to talk to Ellie three times.
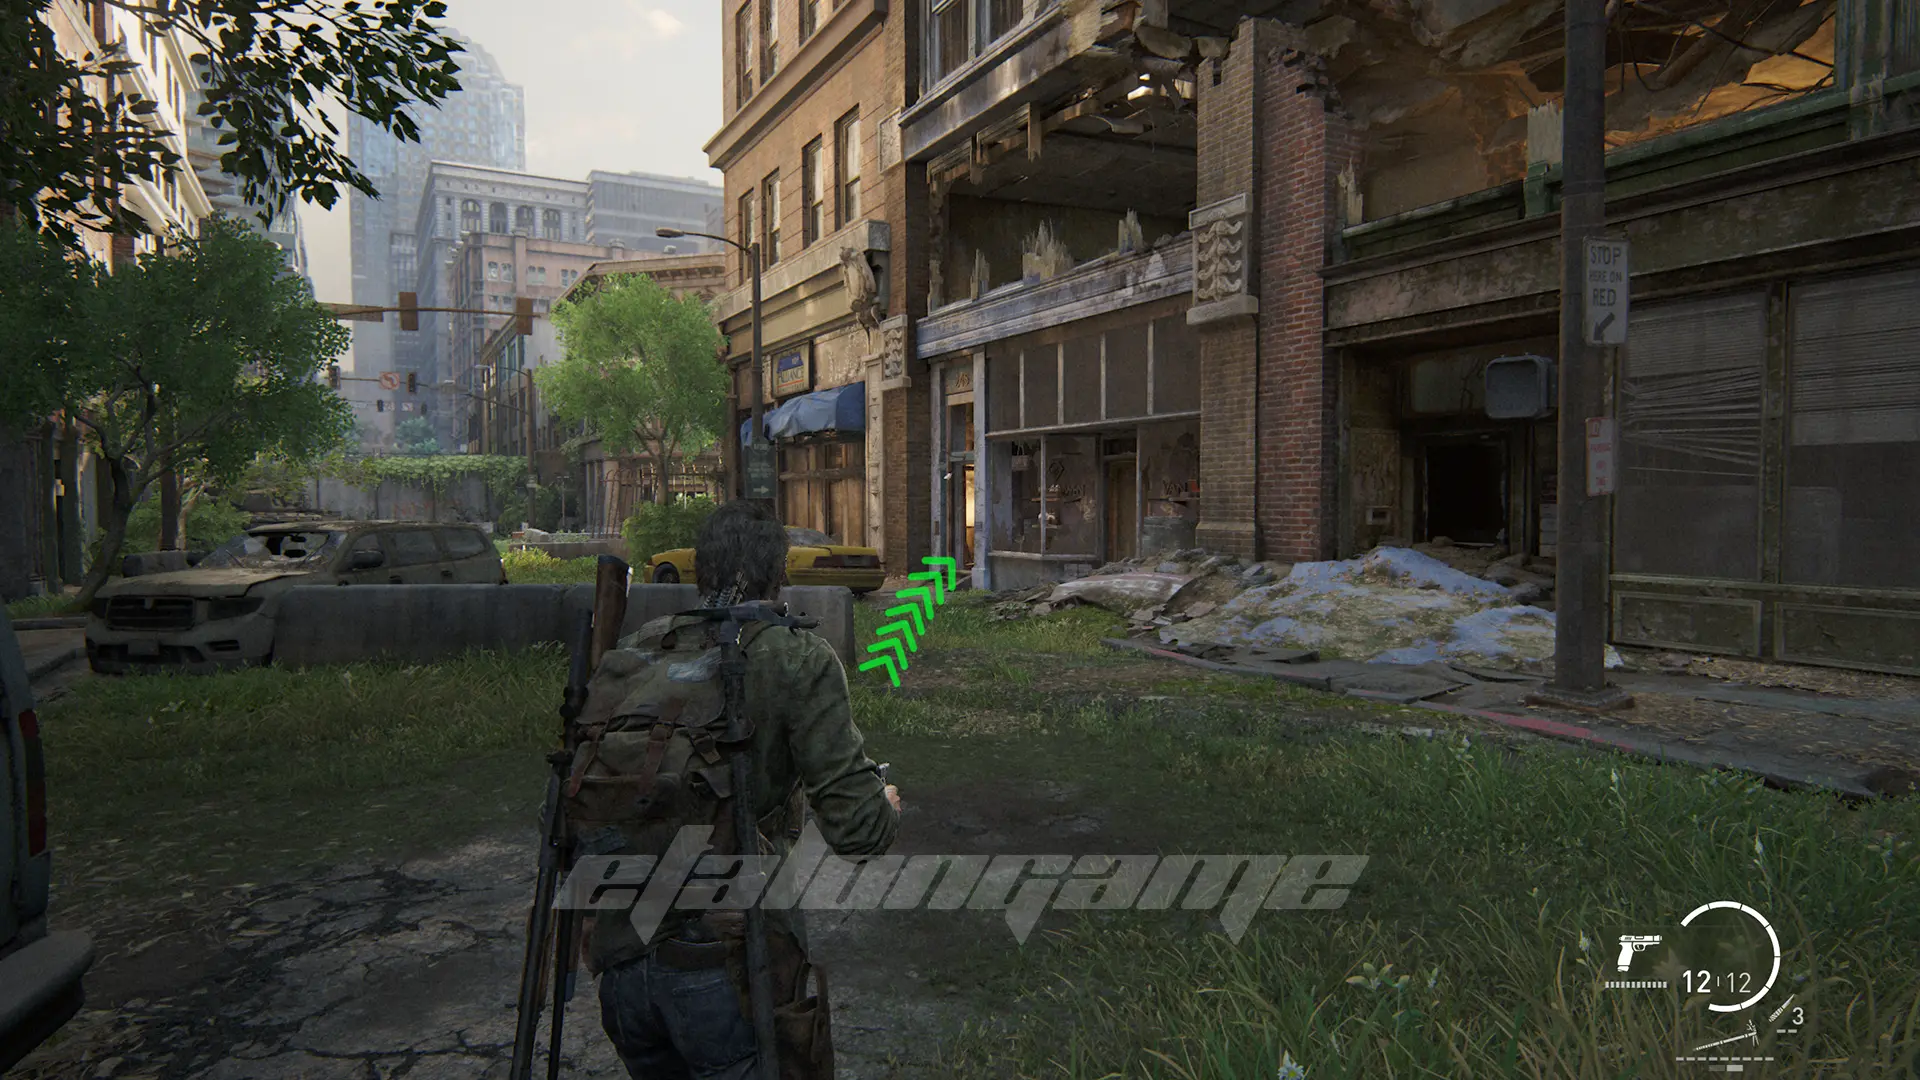
Financial District
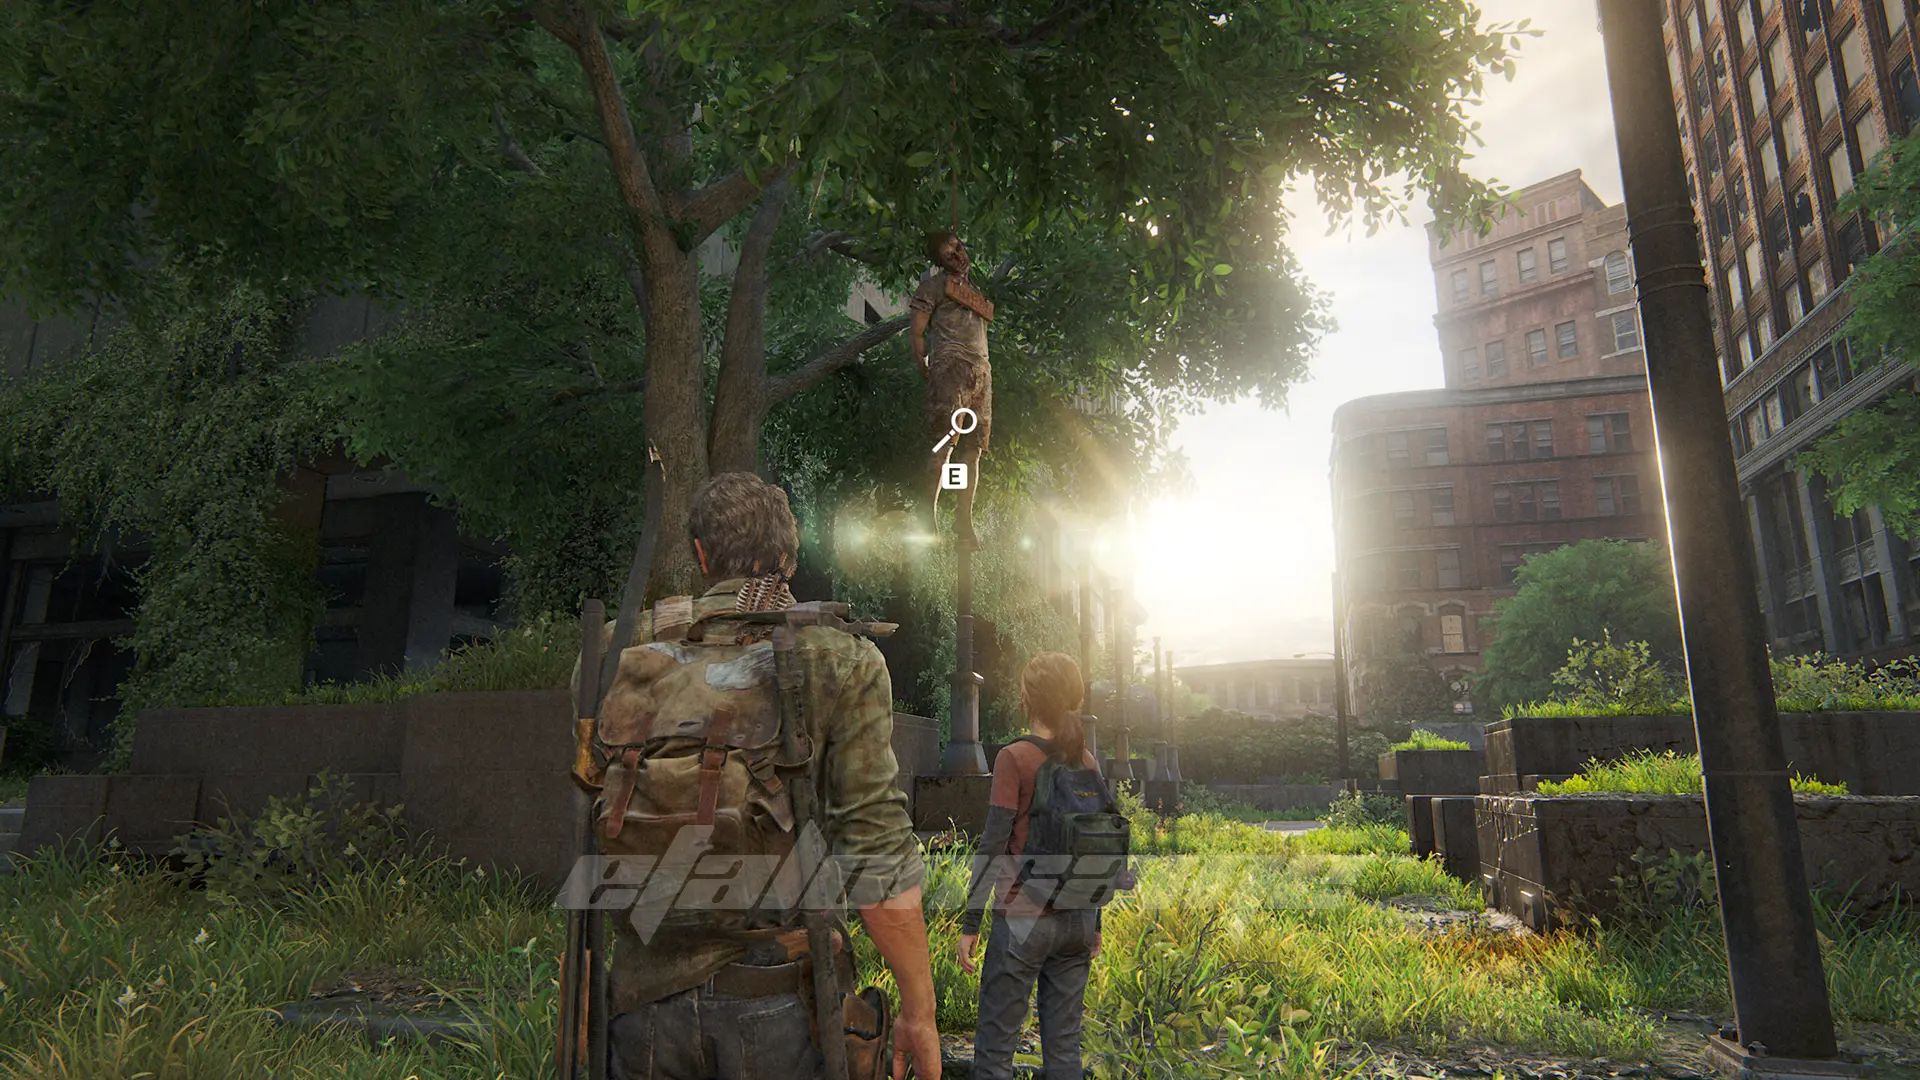
Option Conversation #8
After defeating the large group of Hunters, walk up to the corpse hanging from the tree. You must examine it to listen to this dialogue. If the button does not appear, reload the checkpoint or the console.
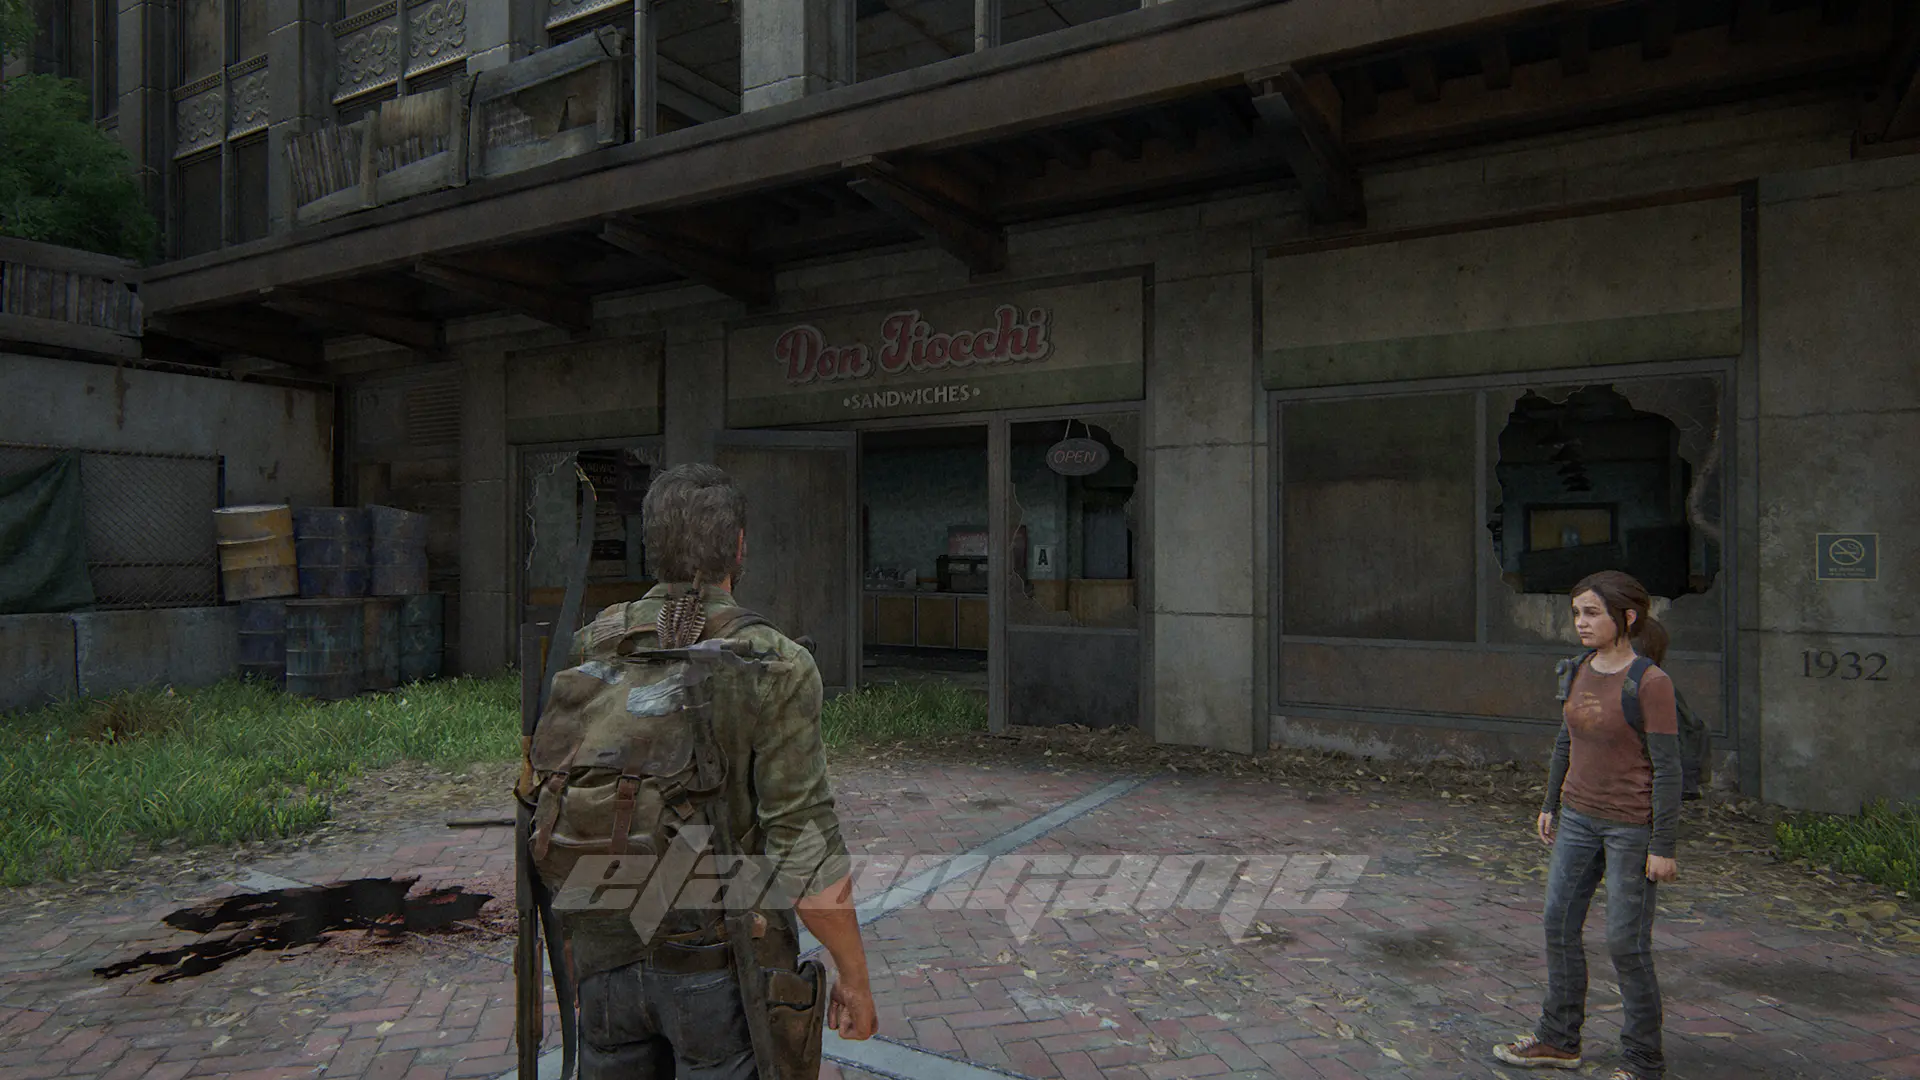
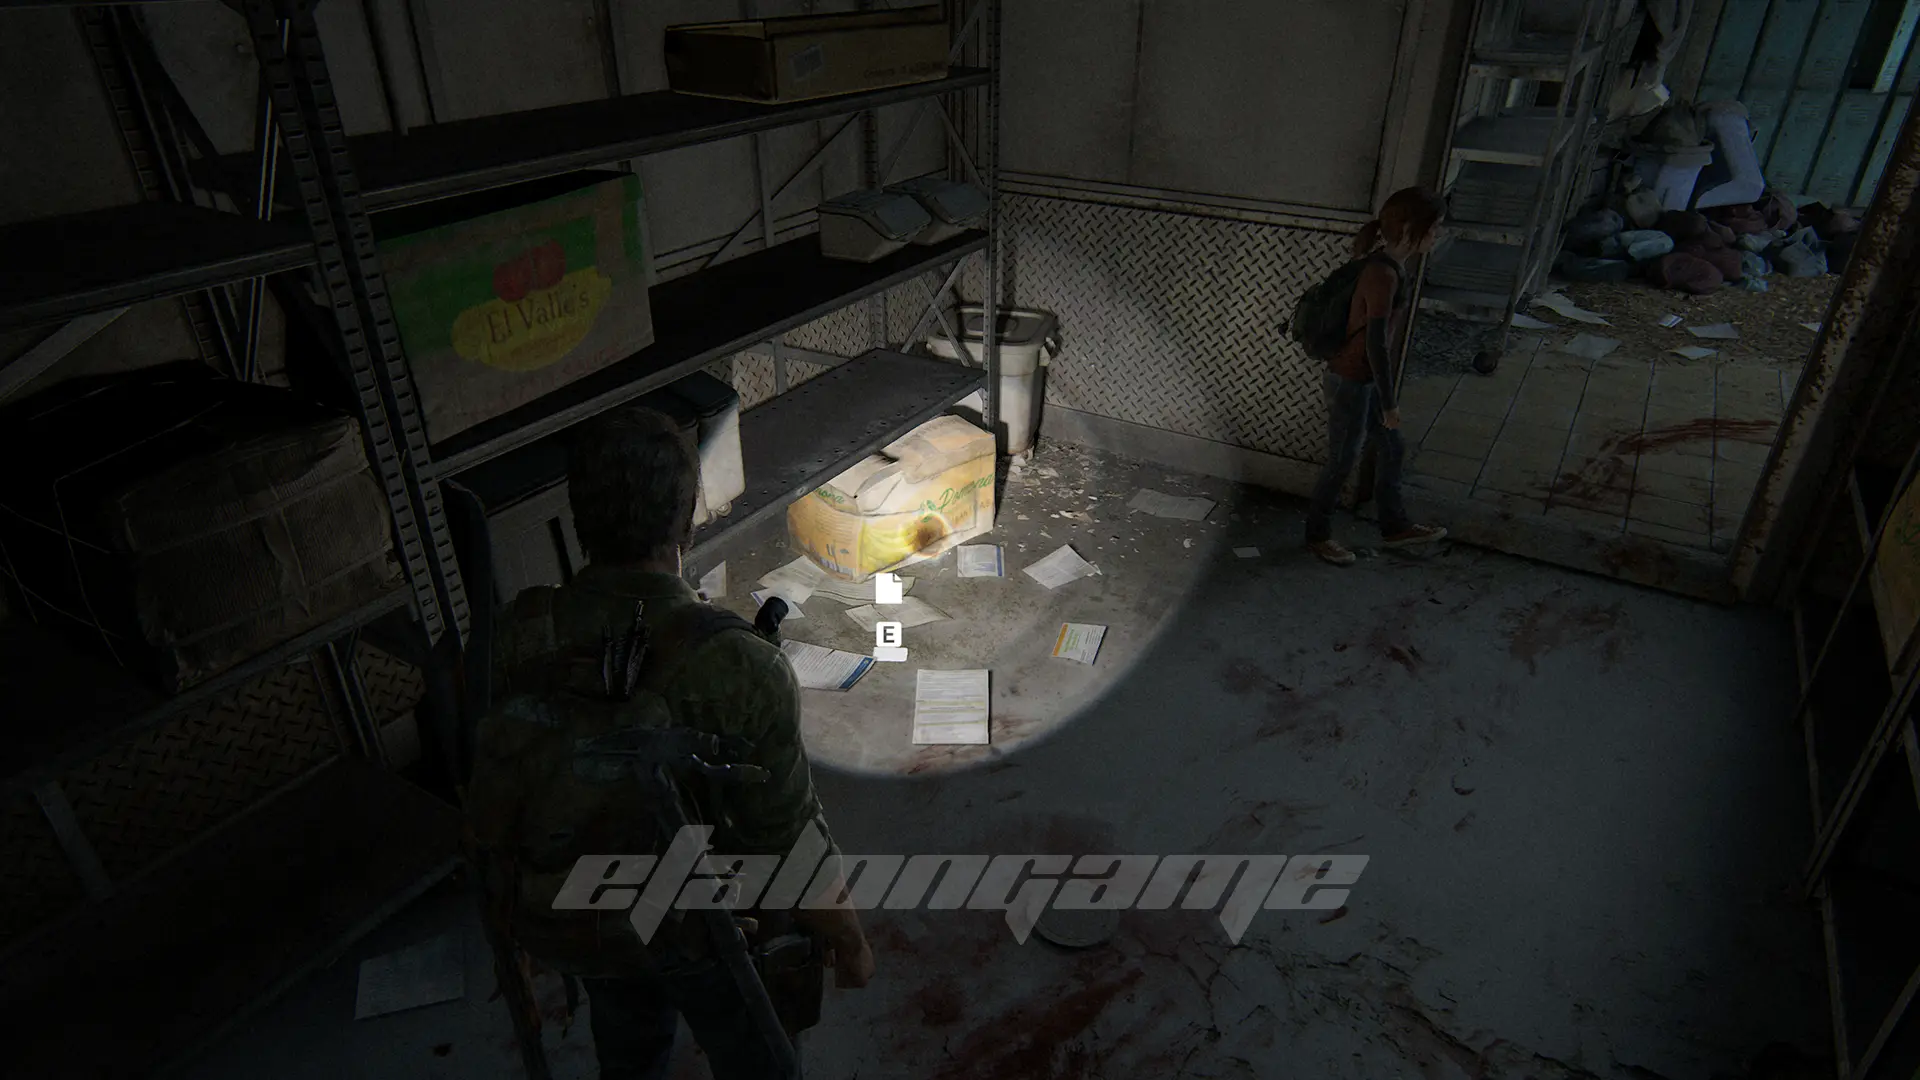
Artifact #13: Fireflies Note
Enter the Don Fiocchi Cafe on the right side of the street. The note is on the floor in the storage room.
Workbench #3
Go into the garage and climb over the debris, the workbench will be right in your path.
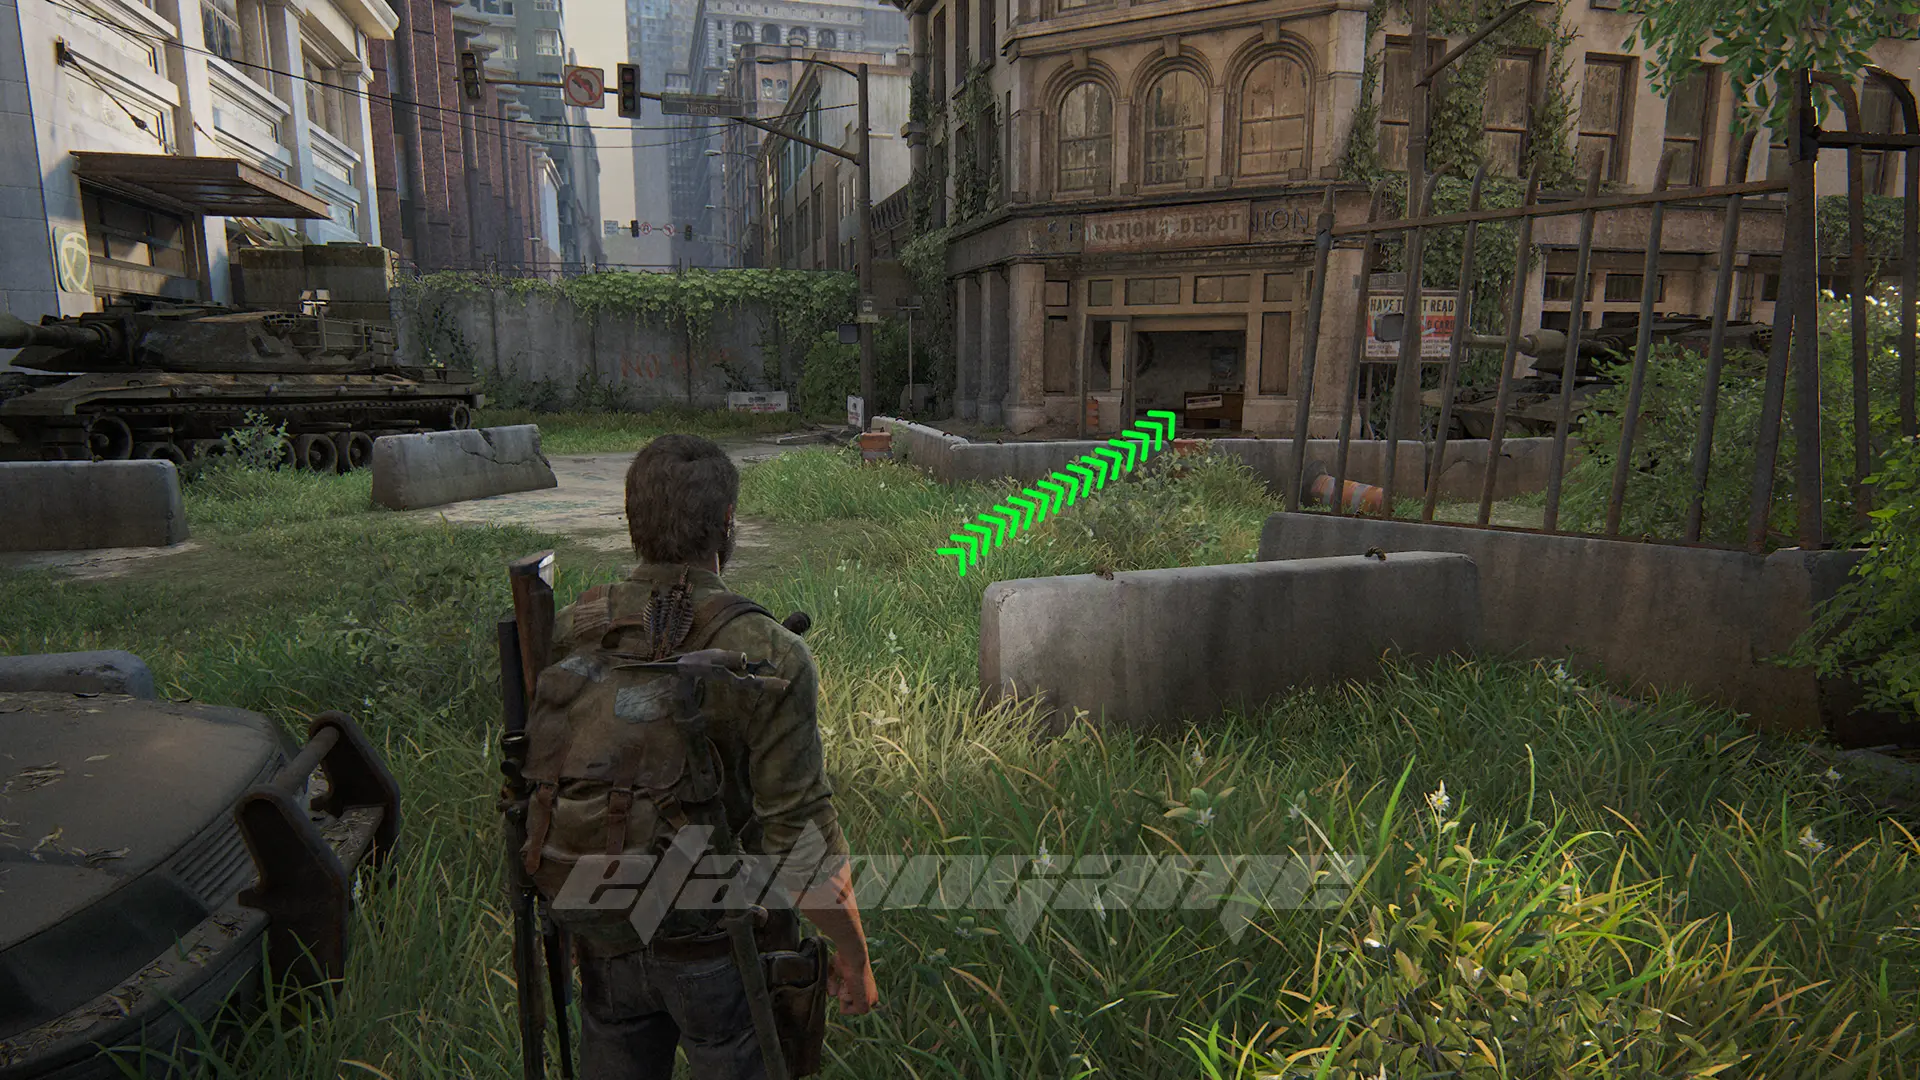
Artifact #14: Final Attack Note
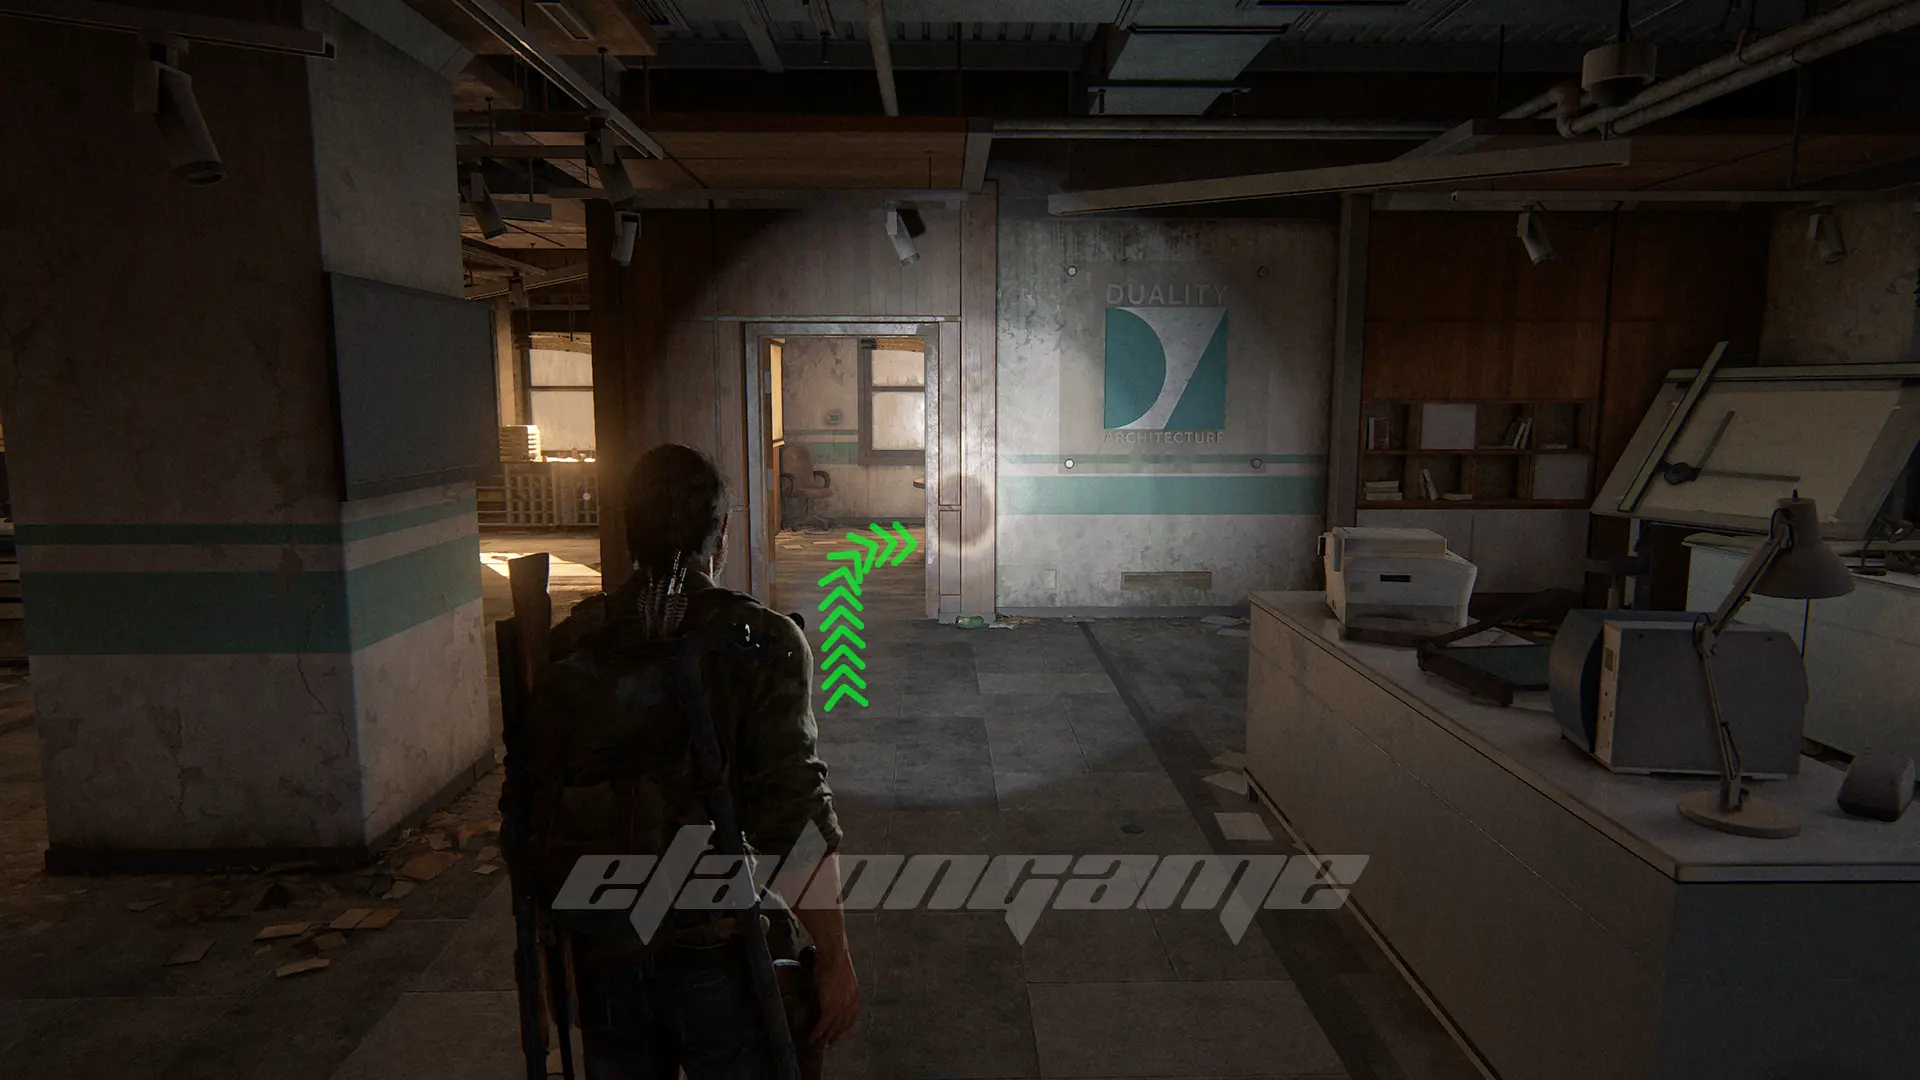
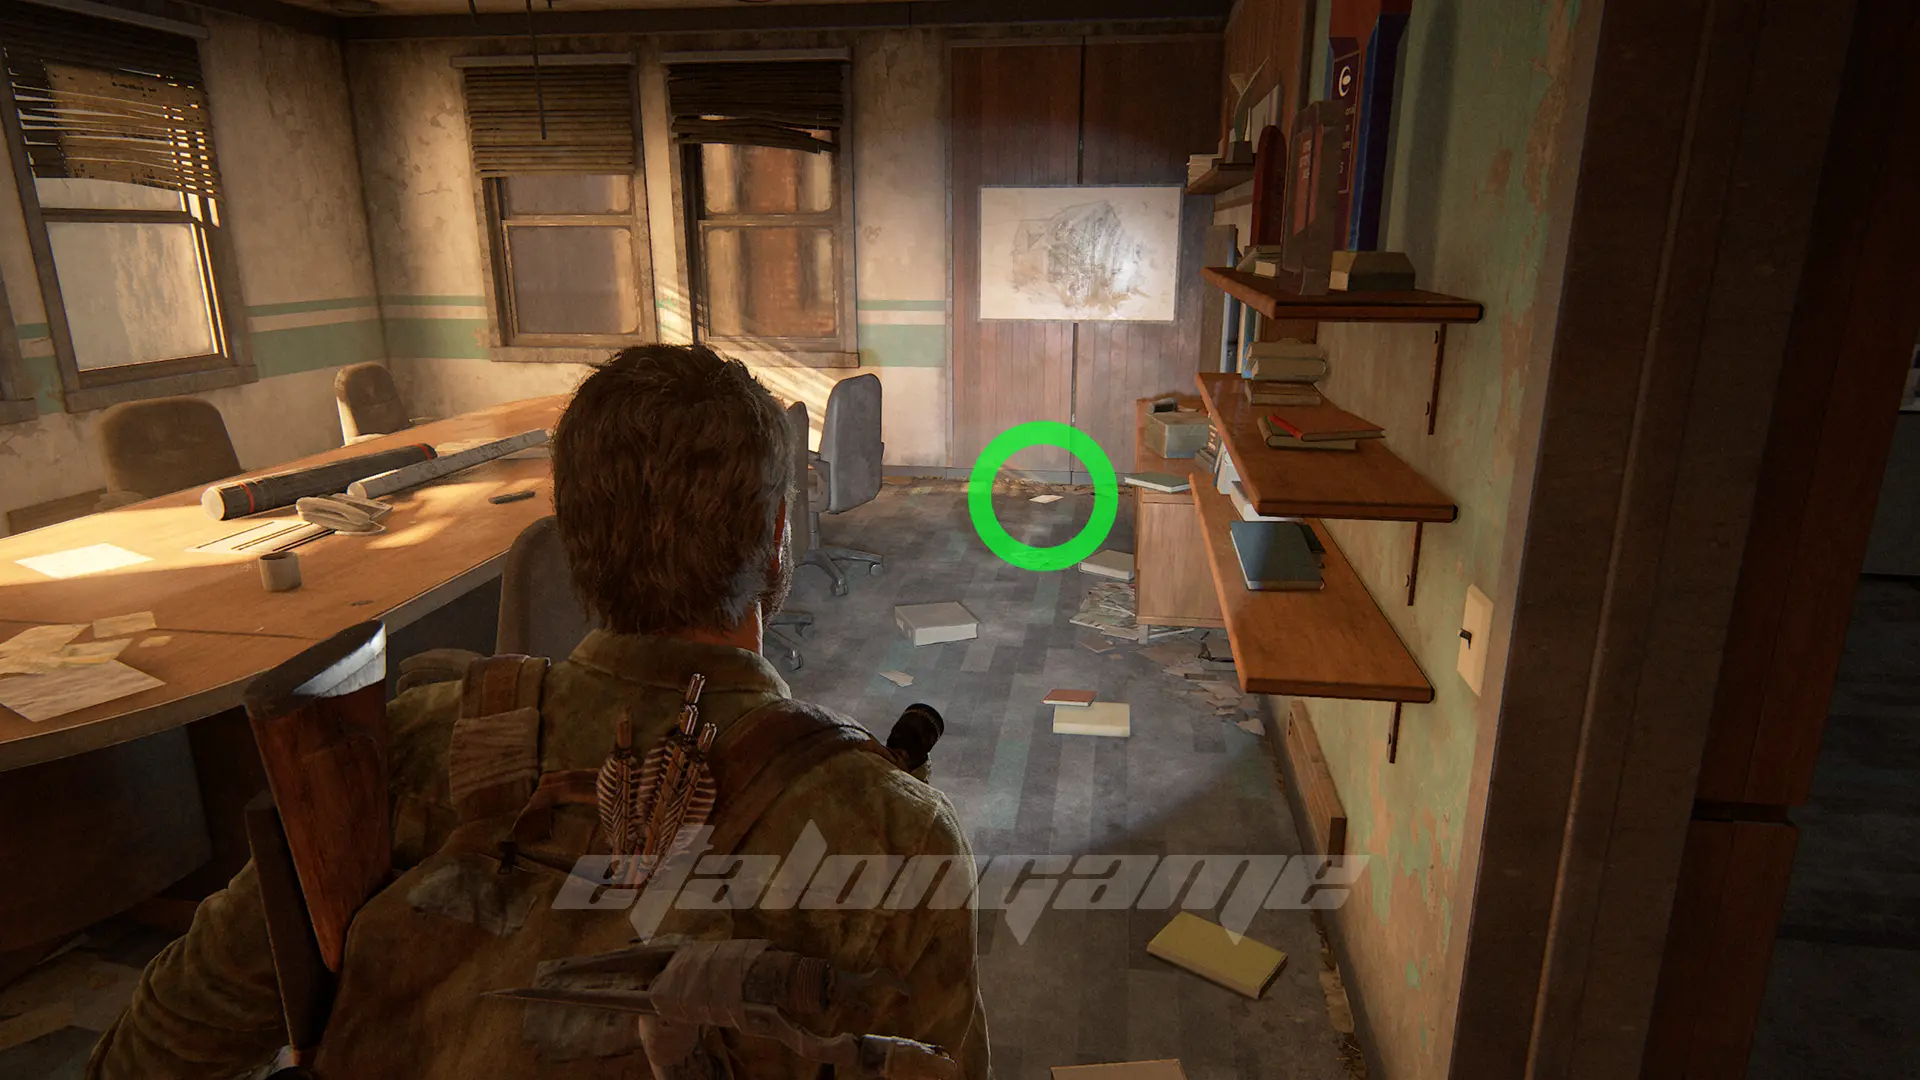
After the cutscene, go up to the Bank of Meridian, deal with the two Hunters, and make your way to the office to find this note by the broken window.
Artifact #15: Mob Attack Note
In the next area where you fight the Hunters, go into the building with the broken window frames on the right side and go up to the second floor. The note lies near the cooler.
Artifact #16: Truck Note
In the same area, go into the building to the right of the tank and pick up the note from the table.
Shiv Door #3
From the previous note, go to the next room to find a locked door. You’ll need a shiv to open it and pick up supplements and parts for the workbench.
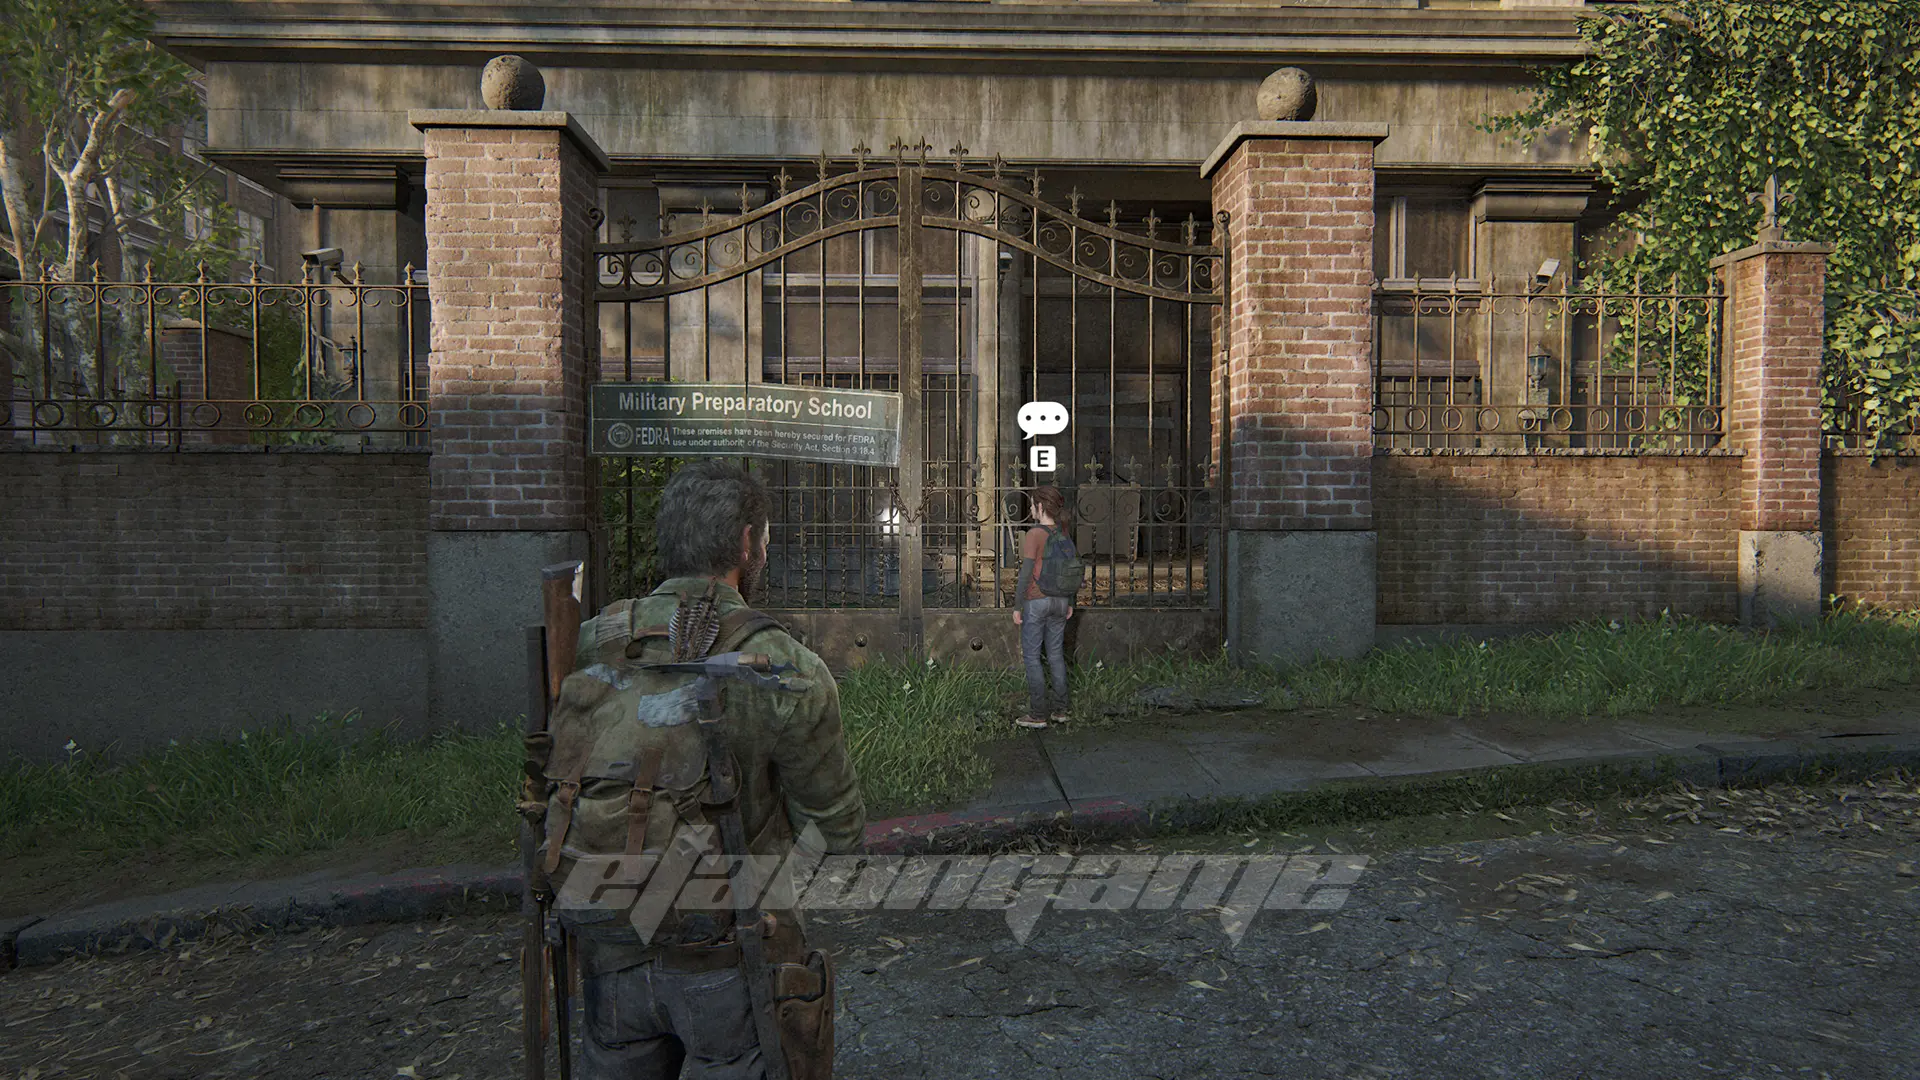
Option Conversation #9
After Ellie helps you over the wall, she will stop at the school gate on the right side for dialogue.
Option Conversation #10
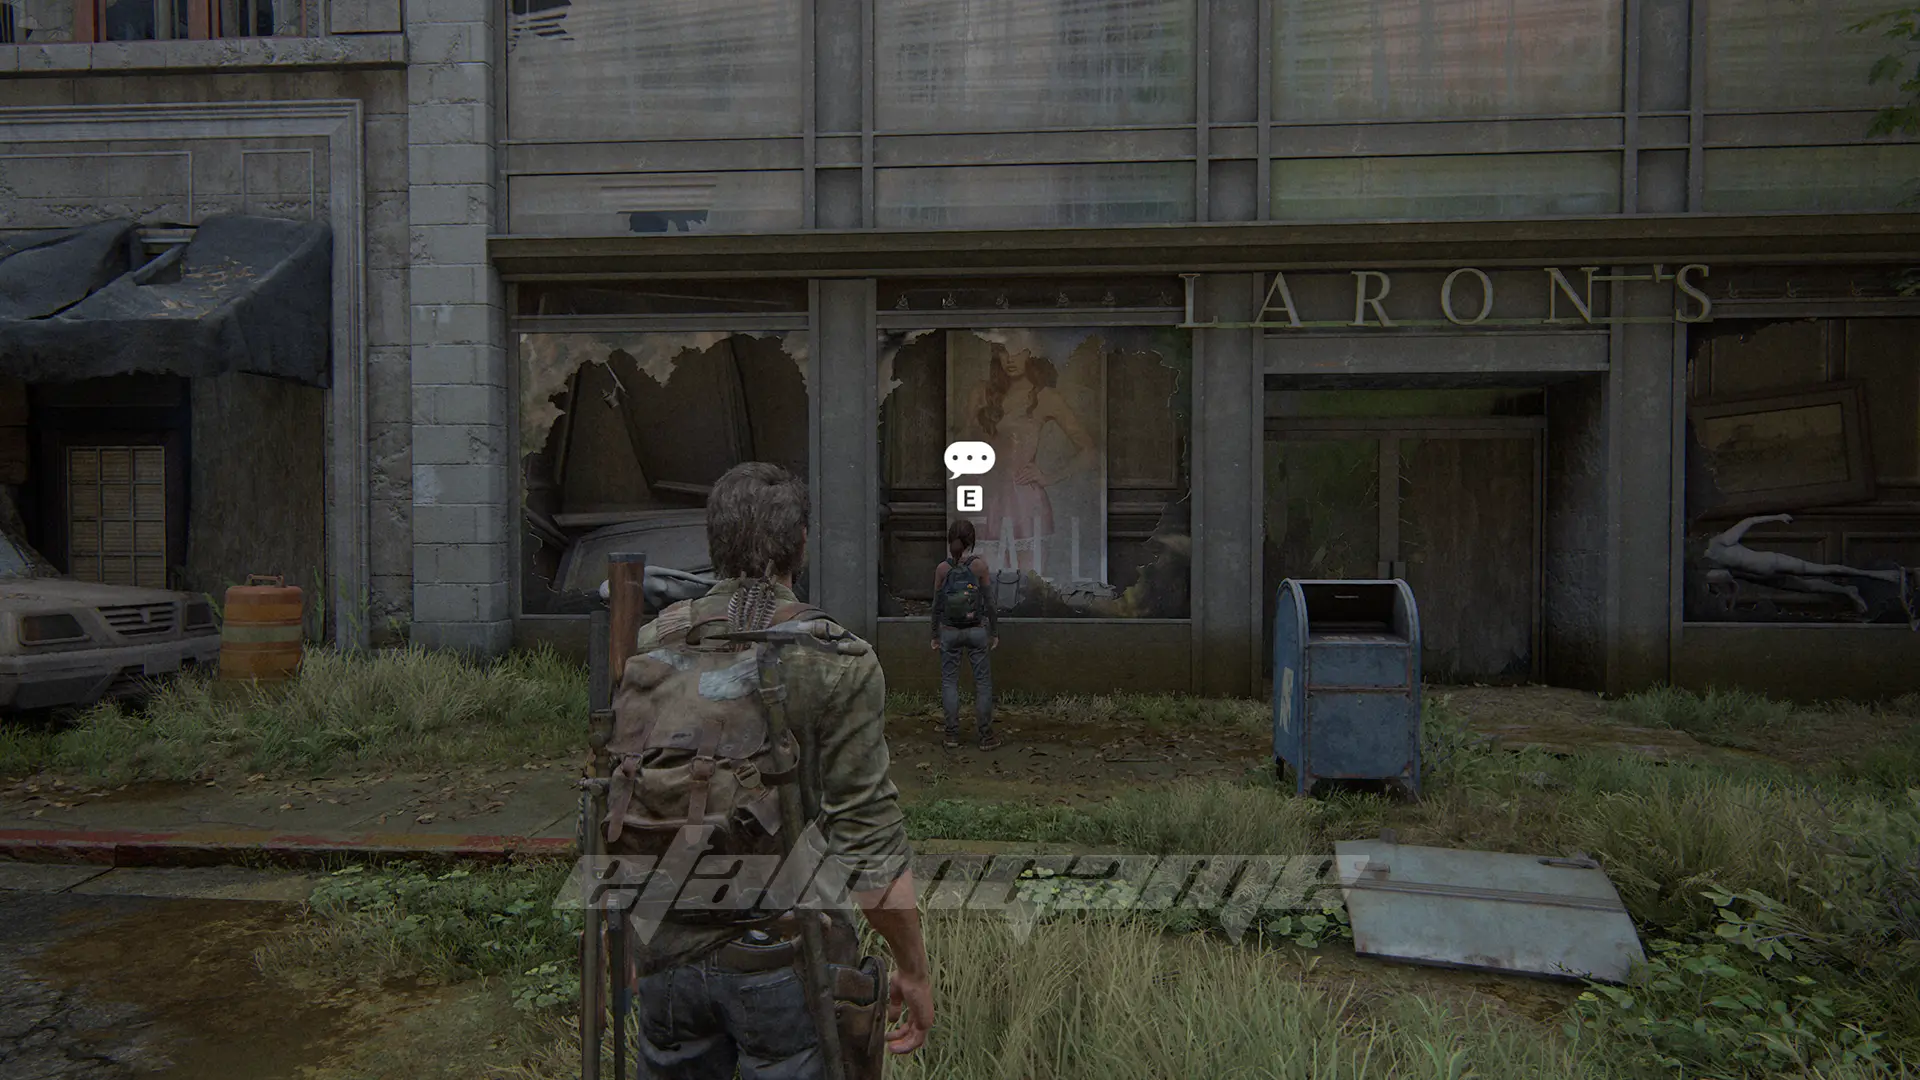
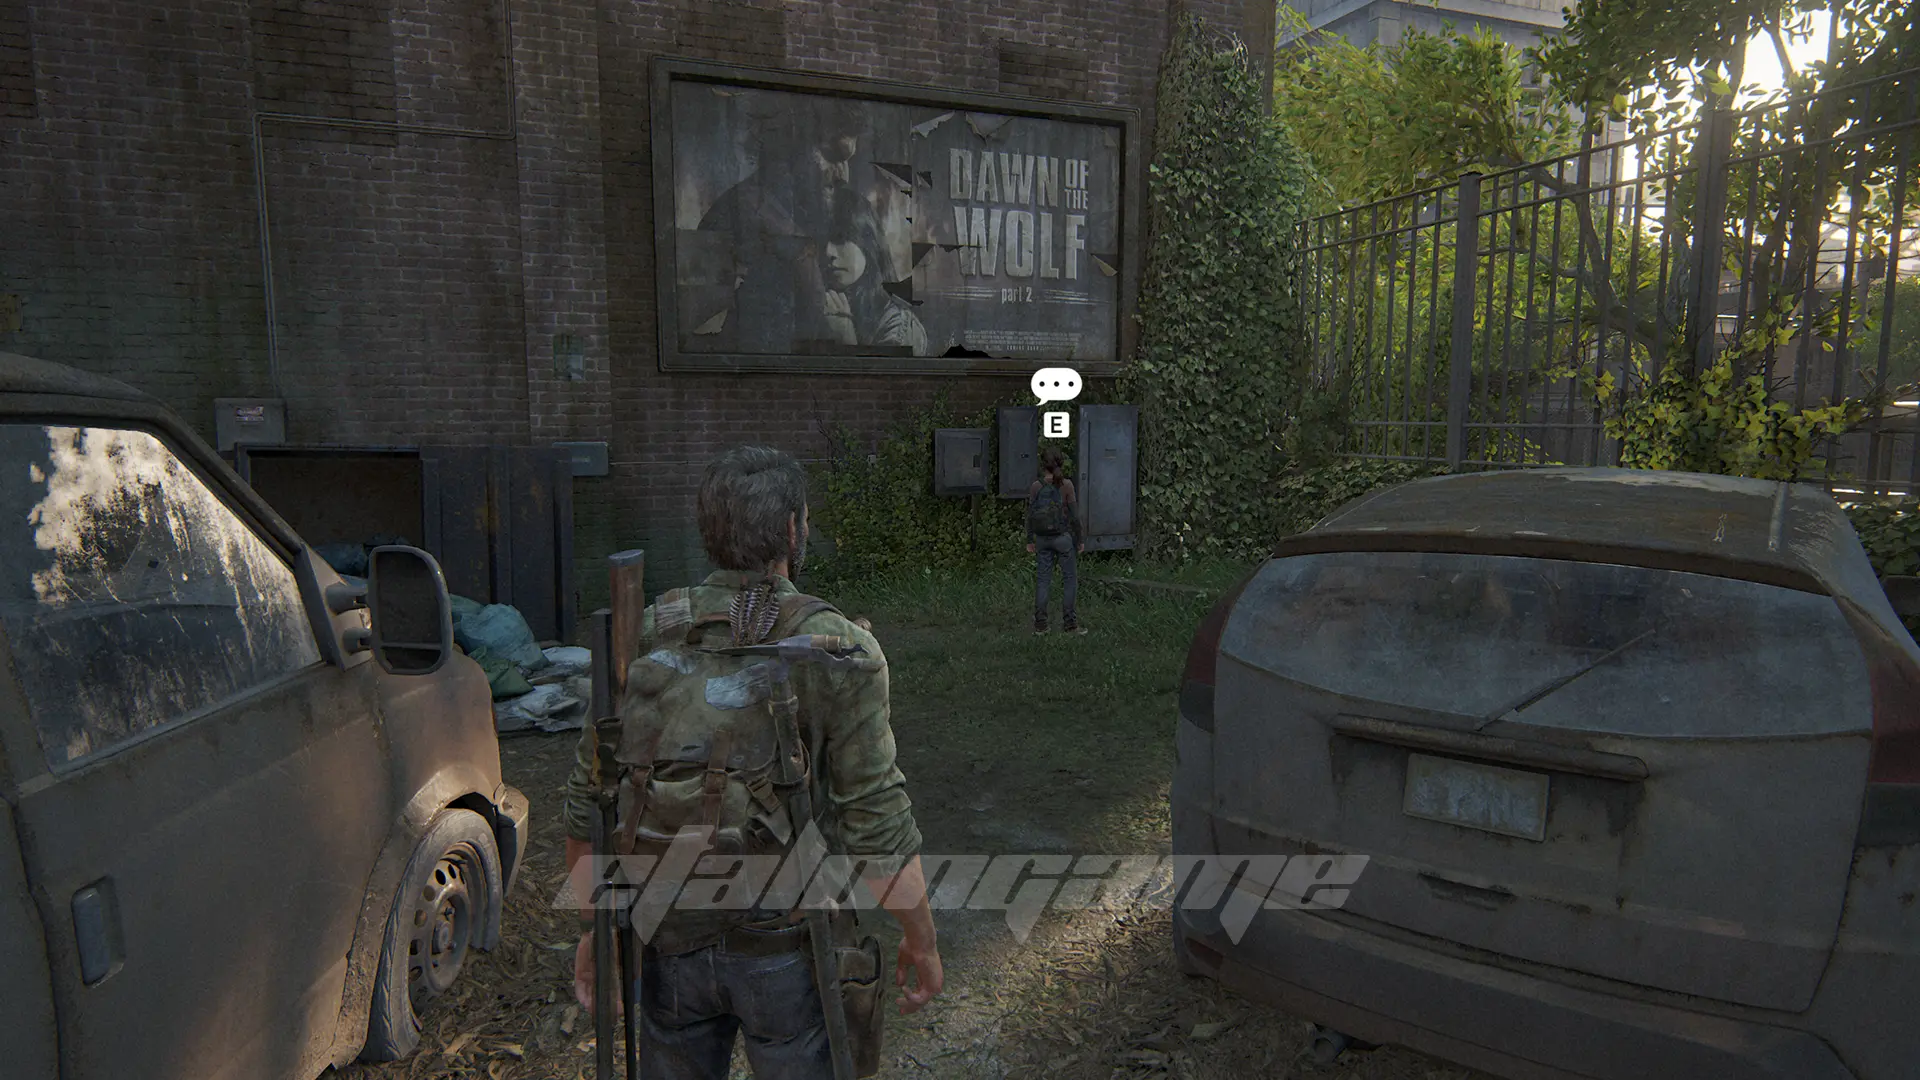
Further down the street, there is a movie poster hanging on a house that Ellie will run up to. Go up to her to talk.
Escape the City
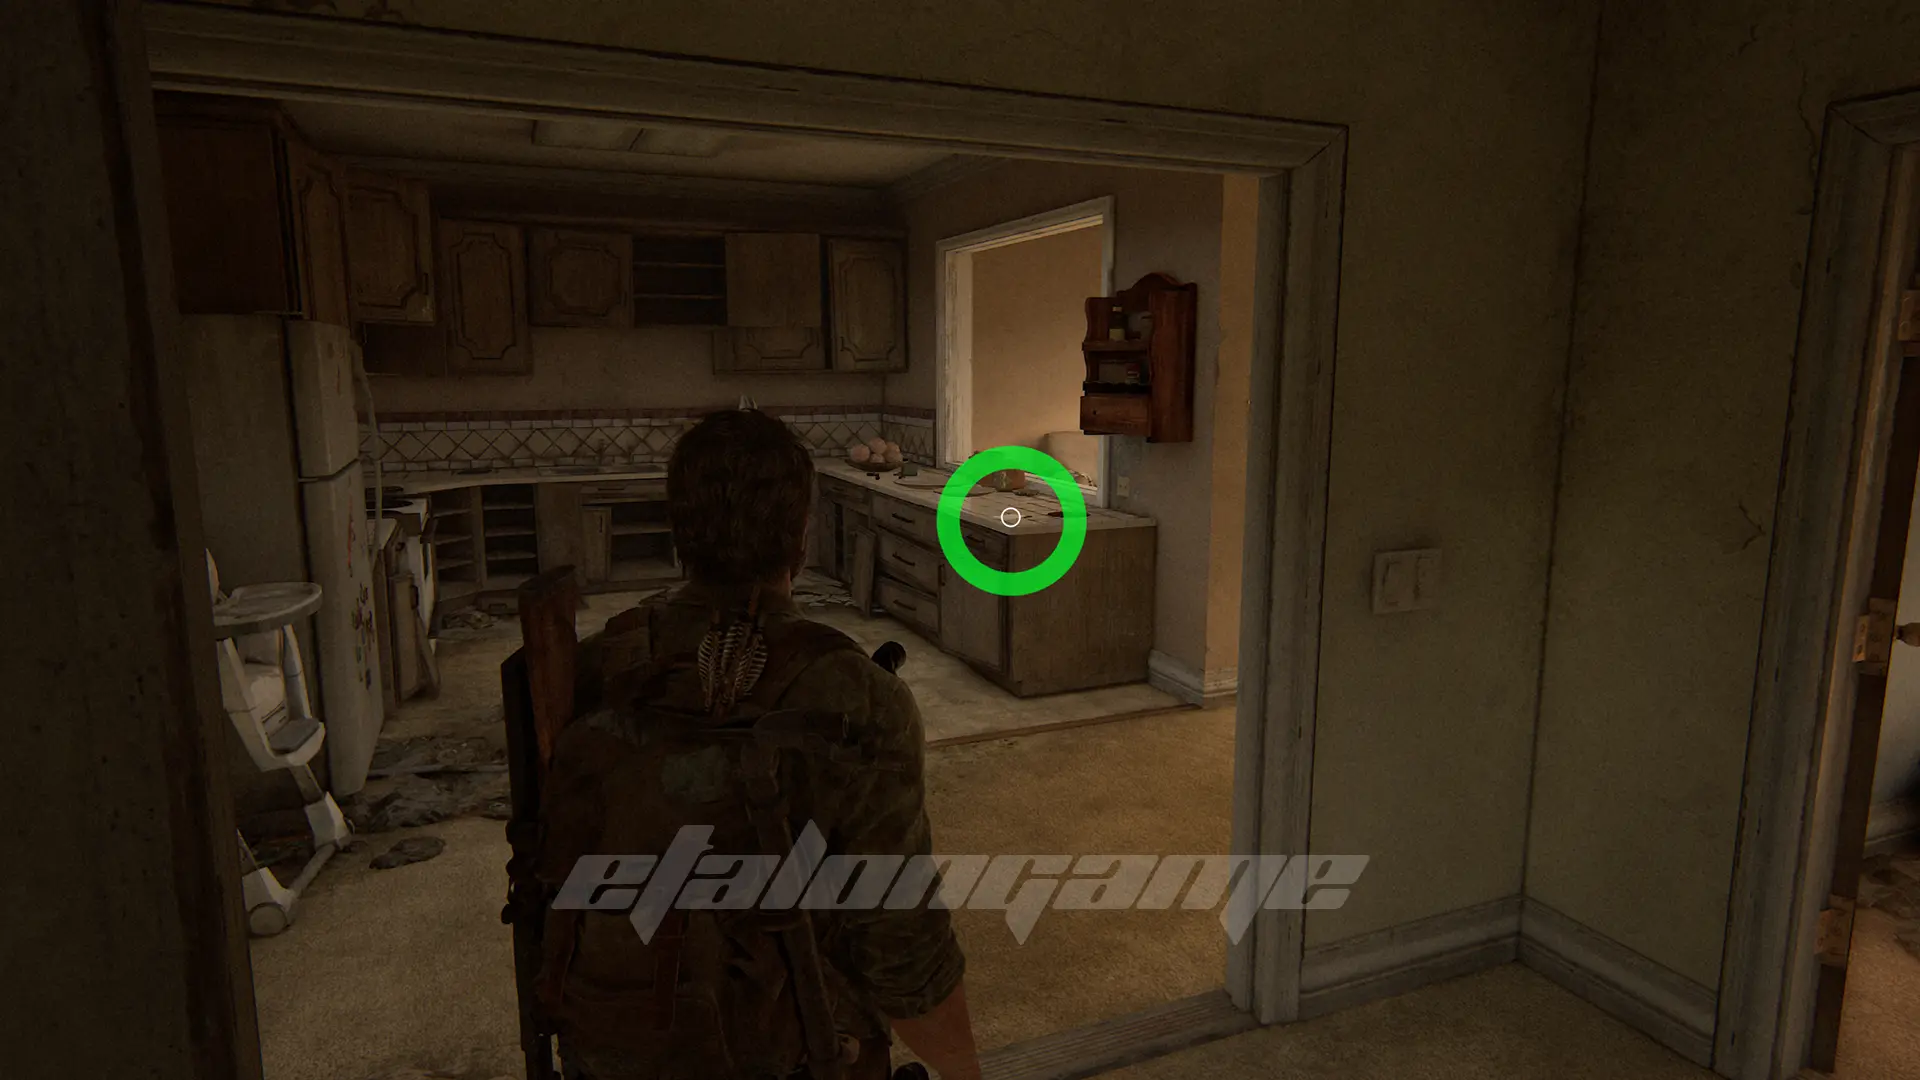
Training Manual #4: Molotov – Construction
After the scene in the apartment, go to the kitchen to pick up a tutorial that increases the damage radius of Molotov cocktails by 1.5 times.
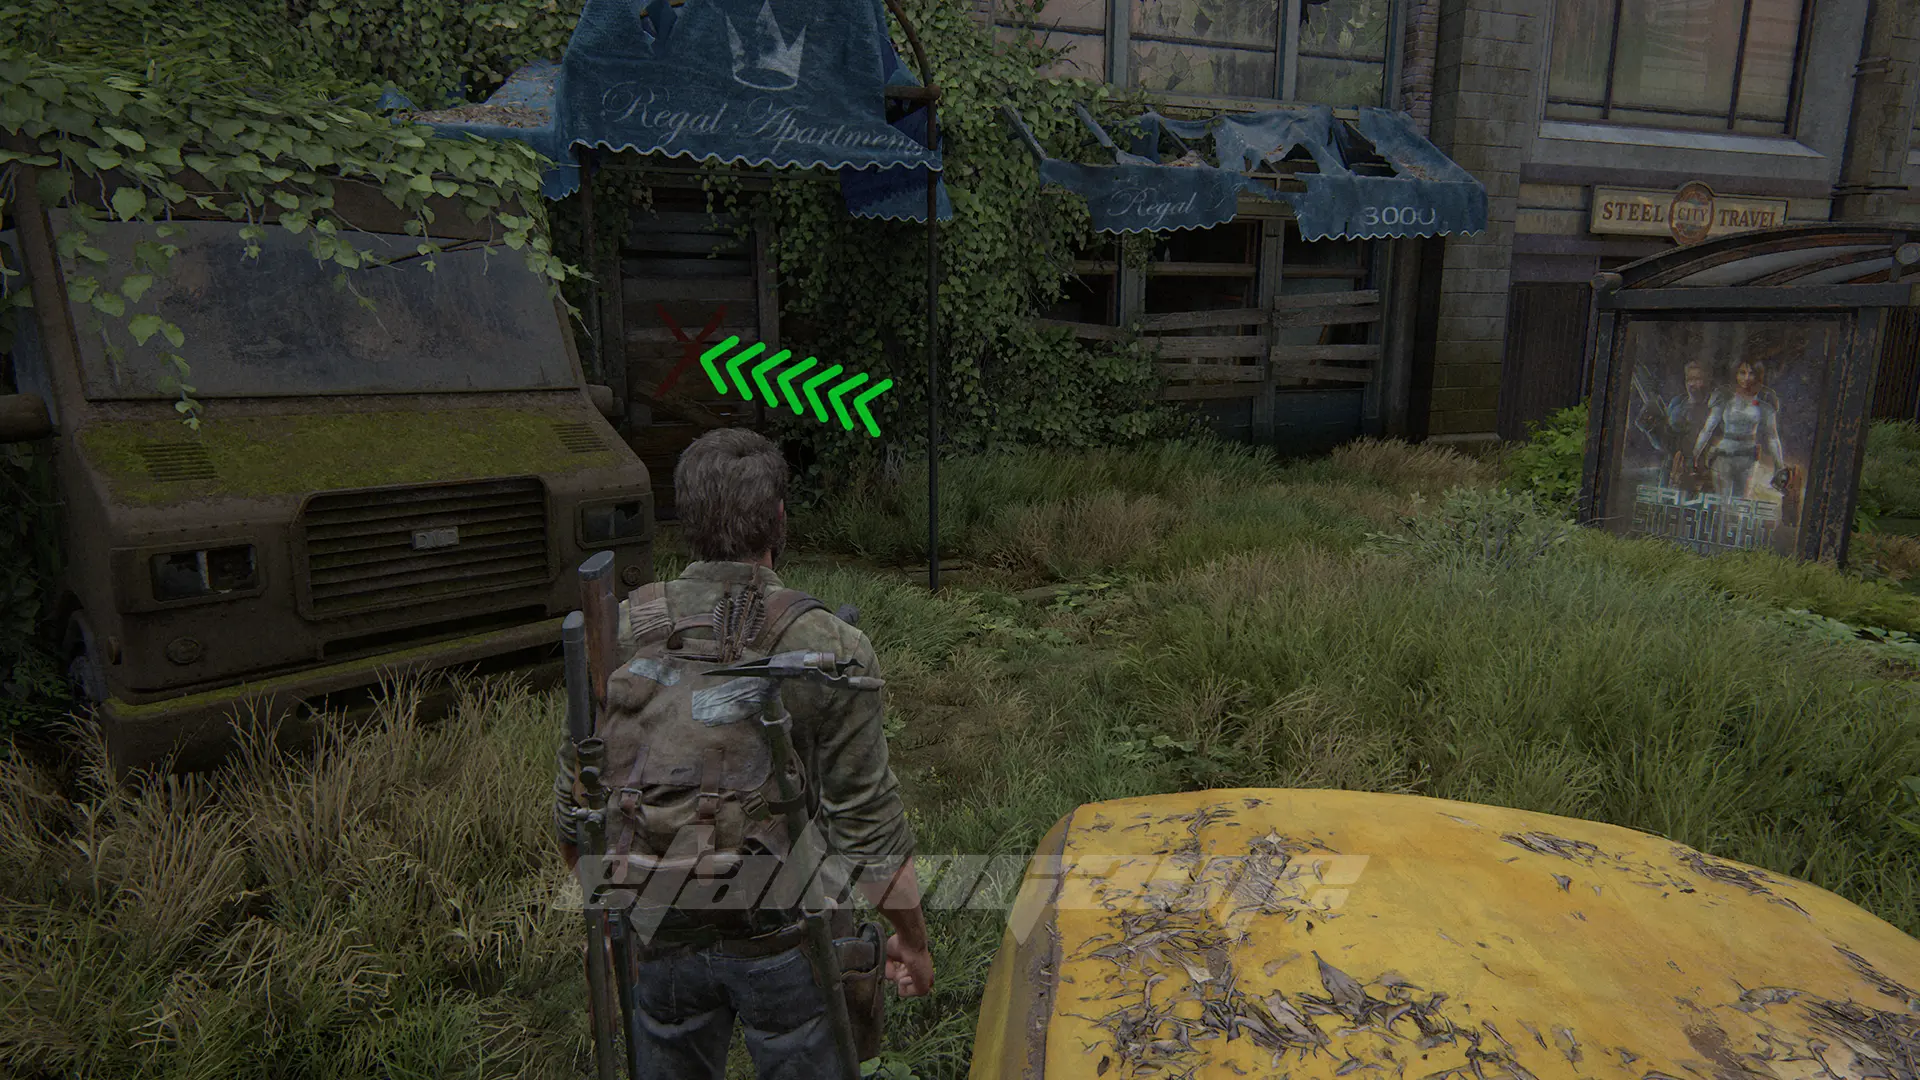
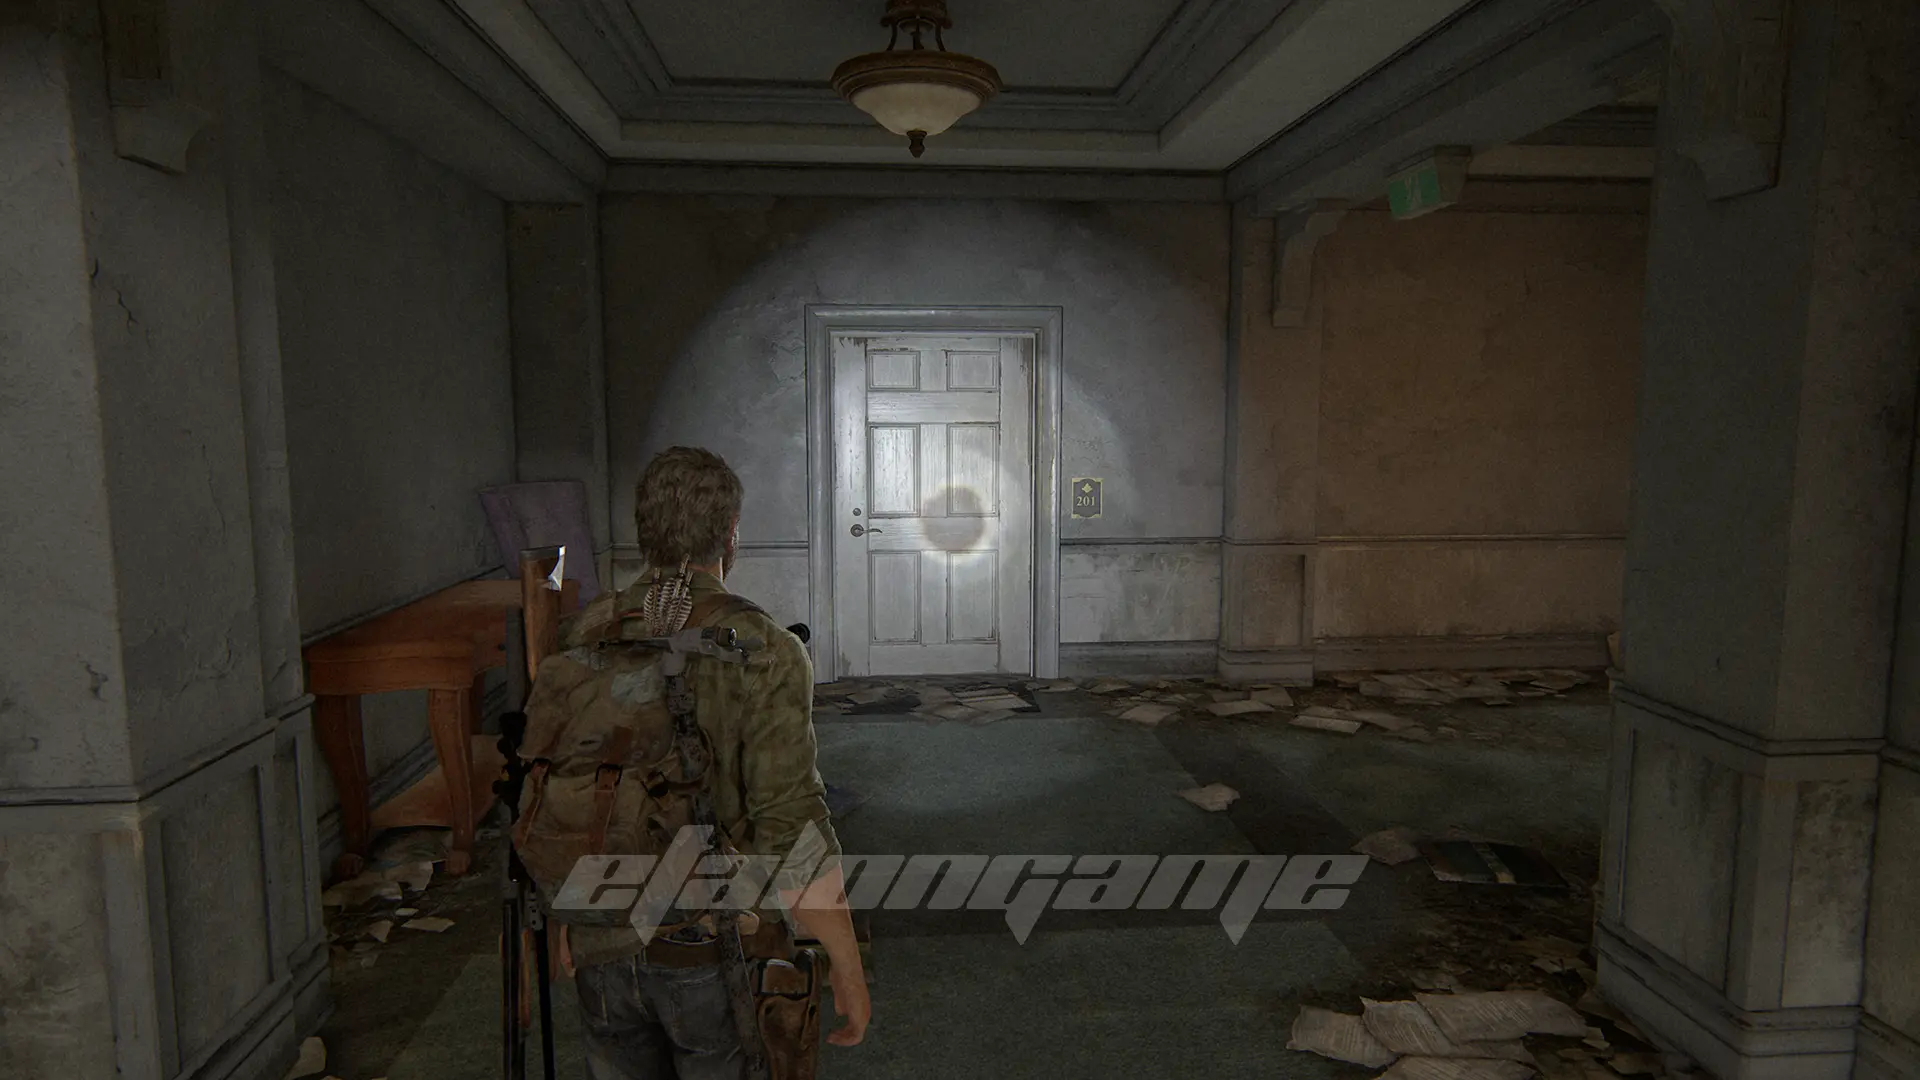
Shiv Door #4
Go down to the floor below and crack the door in apartment 201 with a shiv. Inside you will find additives and parts for the workbench.
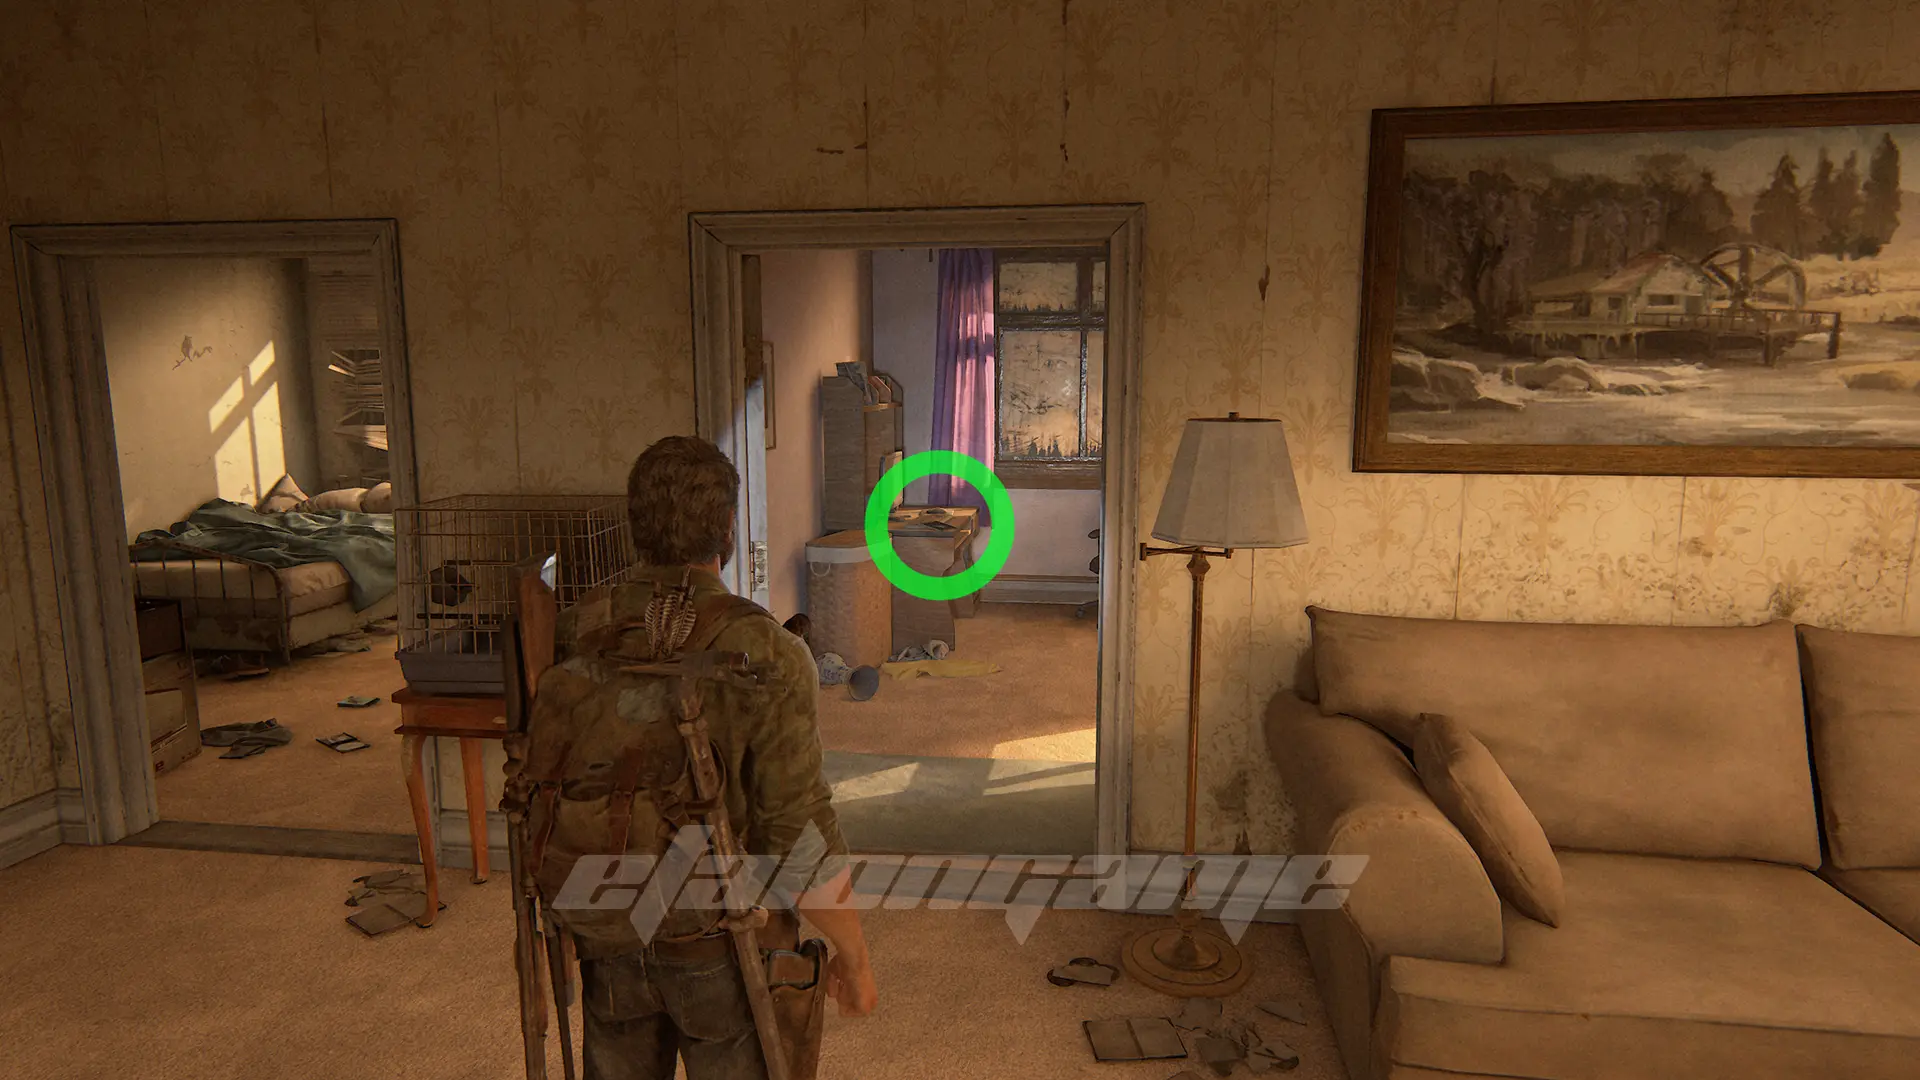
Comics #3: Deep Phase
In the same apartment, there is the comics book on the table in the bedroom.
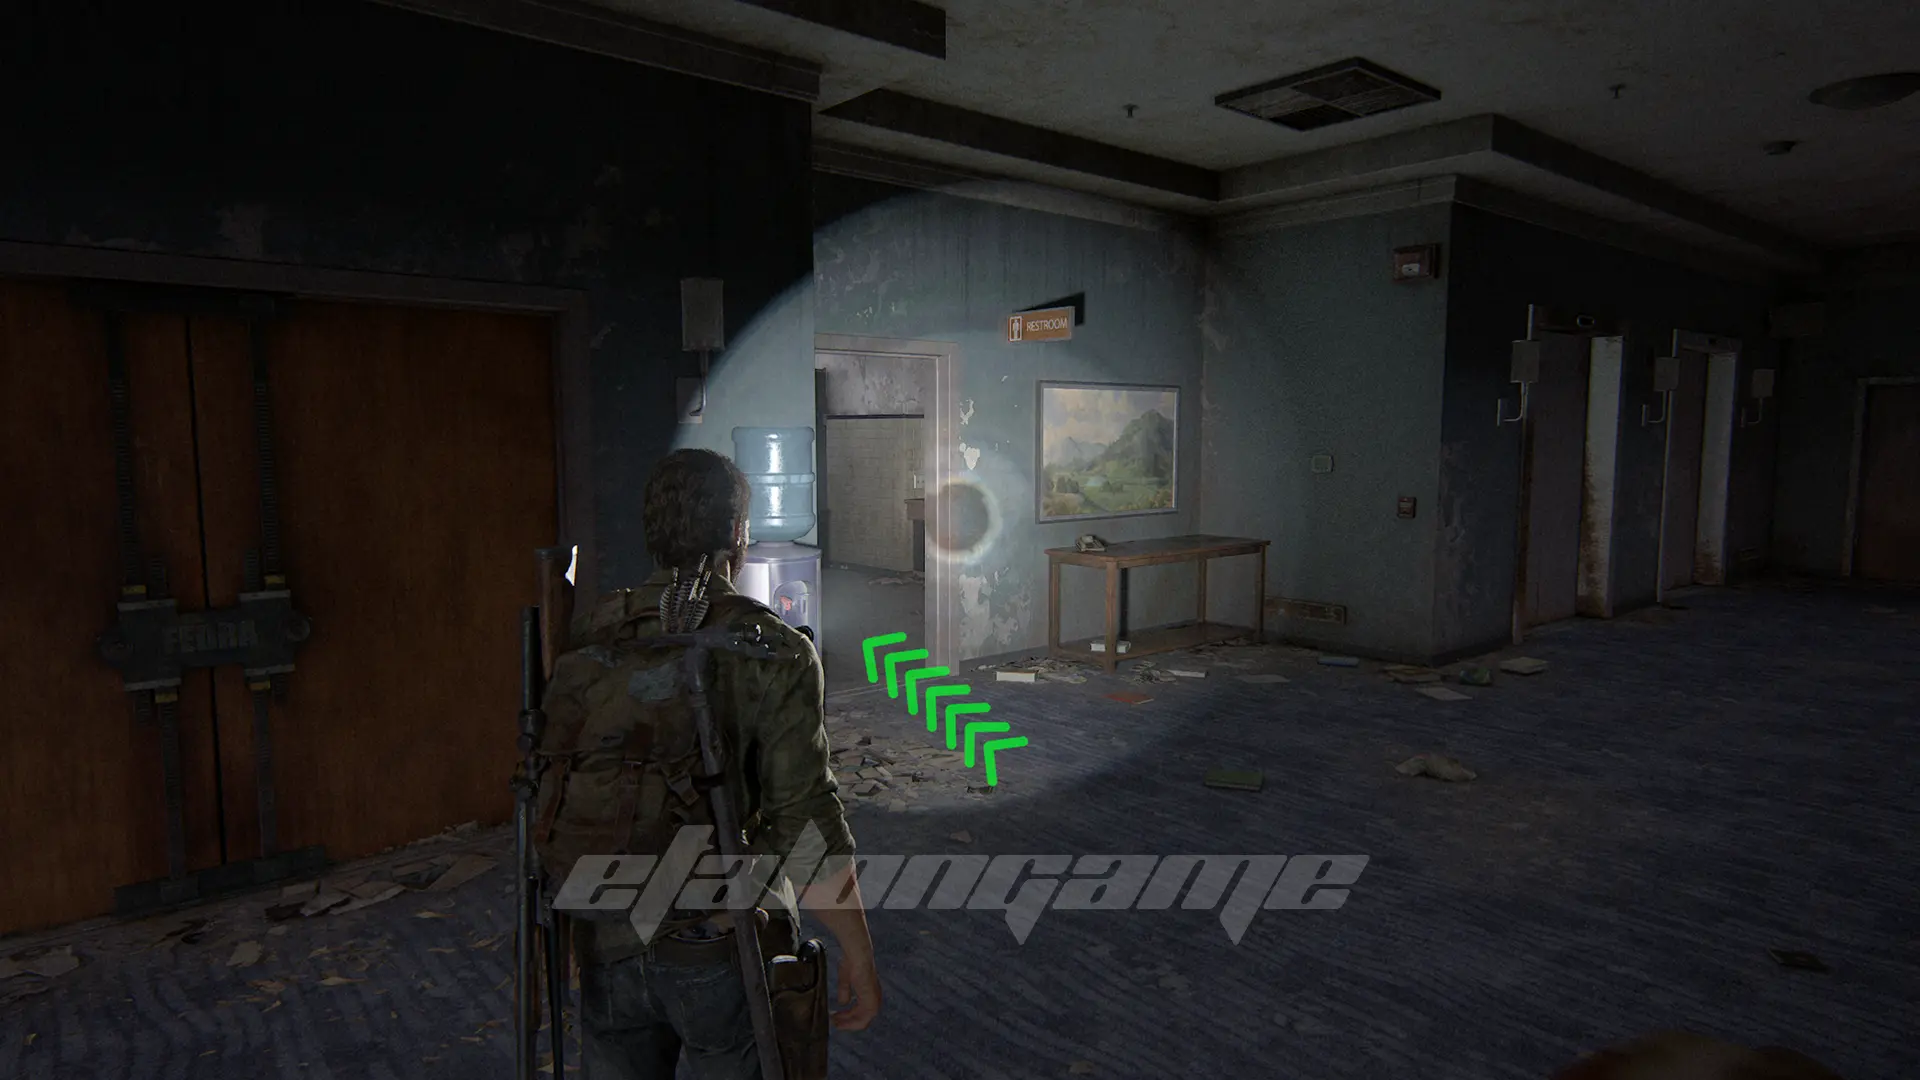
Firefly Pendant #3: Rios
After dealing with the group of hunters and going up to the next building, go into the Restroom on the left to find this pendant.
Artifact #17: Trial Note
In the same building, go into the office following Henry and look into the meeting room to find this note in the corner.
Achievement “Lights Out”
The next night, when you encounter the Hunters, you must get to the generator and turn it off so that you won’t be seen. The first two will help you silently kill Henry.
After that, move clockwise, hiding behind the barricades and staying out of the spotlight. You will have the opportunity to disable the generator without killing the patrolling Hunter.